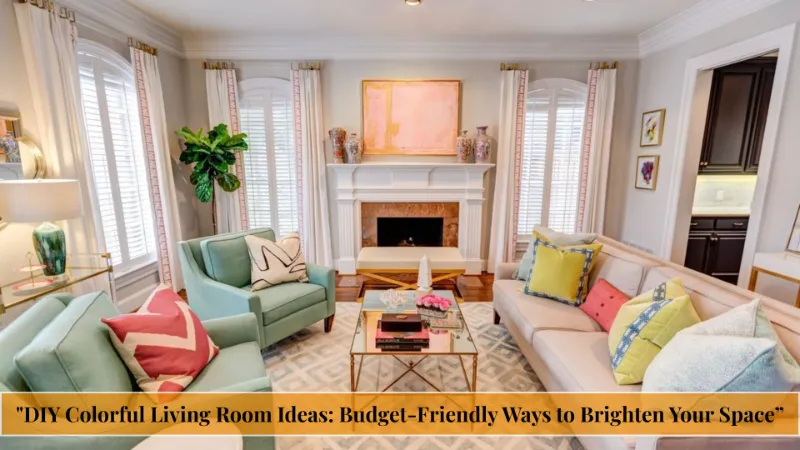
DIY Colorful Living Room Ideas: Budget-Friendly Ways to Brighten Your Space

Staring at the same beige walls every evening gets old fast. If your living room feels flat, forgettable, or just plain boring, you’re not alone it’s one of the most common complaints homeowners and renters share about their main gathering space.
The good news: you don’t need a full renovation or a designer’s budget to fix it. This guide walks you through 10 tested DIY colorful living room ideas, each with real materials, real costs, and step-by-step instructions you can follow this weekend.
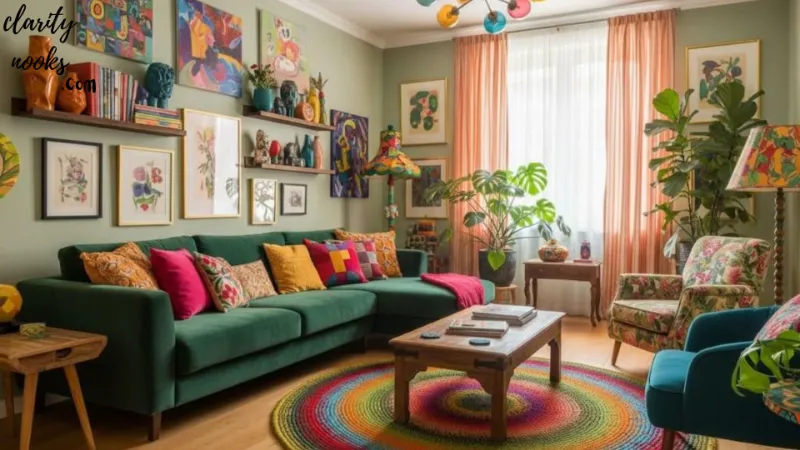
Every idea here has been chosen for its balance of budget-friendly home decor value and visual impact no vague inspiration boards, just practical projects that work in rentals, starter homes, and everything in between.
Paint a Bold Accent Wall
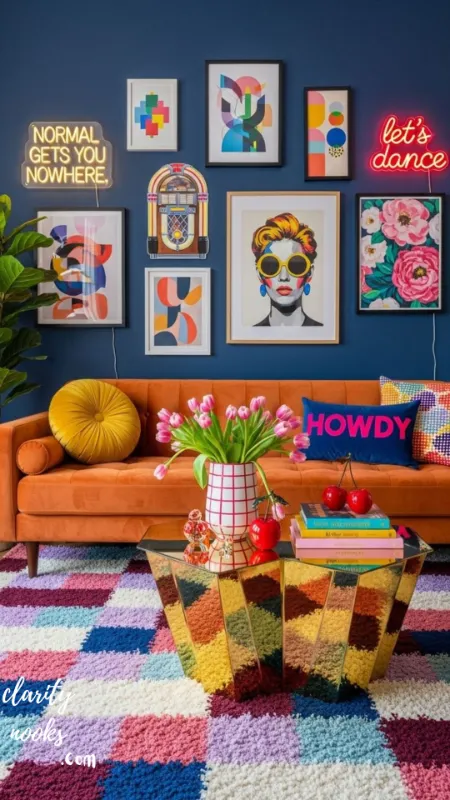
A bold accent wall is the fastest way to bring colorful living room decor into a neutral space without repainting every wall. It’s low-commitment, reversible, and gives your room an instant focal point ideal if you’re testing how much color you can live with before going further.
Materials Needed:
- Sample or quart of interior paint
- Painter’s tape
- Roller and angled brush
- Drop cloth
- Primer (if going from dark to light, or vice versa)
Estimated Cost: $25–$60 for a standard-sized wall
Step-by-Step:
- Choose the wall that naturally draws the eye usually the one behind the sofa or facing the entryway.
- Tape off trim, baseboards, and adjacent walls carefully.
- Apply primer first if there’s a major color or sheen change.
- Roll on two thin coats rather than one thick one for even coverage.
- Pull tape off at a 45-degree angle while the paint is still slightly tacky to avoid peeling.
An accent wall costs a fraction of a full repaint, dries in a weekend, and can be repainted again in a few hours if you change your mind. It’s the single highest-impact, lowest-risk project on this list for adding color fast.
Decorating Tip:
Test your swatch on the actual wall in both daylight and evening lamp light colors shift dramatically under different bulbs, and this step prevents the most common accent-wall regret.
Real-life scenario:
A renter in a Chicago studio apartment painted just the wall behind her sofa in a deep terracotta using leftover sample paint. Total cost: under $20, and it transformed the entire room’s mood without violating her lease’s no-major-changes clause.
Explore this topic: DIY Coffee Table Decor: Budget-Friendly Ideas to Style Your Living Room
Layer a Colorful Gallery Wall
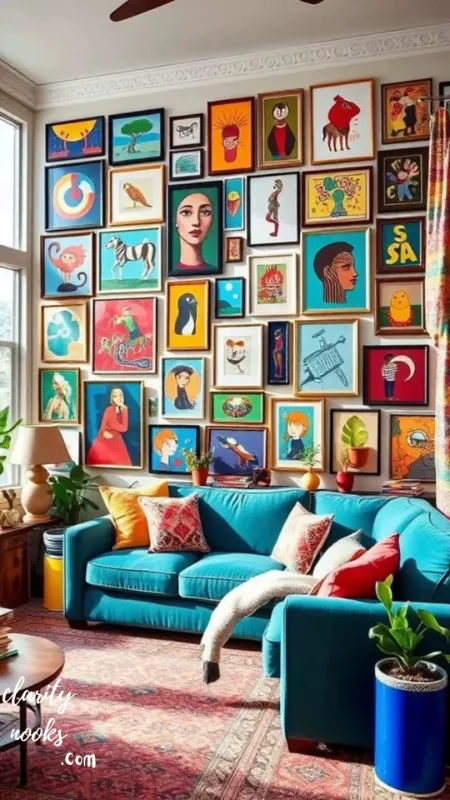
A DIY gallery wall lets you introduce multiple colors through art and frames instead of paint a smart move for renters or anyone hesitant to commit to a single wall color. Done right, it becomes the room’s personality piece.
Materials Needed:
- 5–9 thrifted or leftover frames
- Spray paint (2–3 complementary colors)
- Art prints, photos, or fabric swatches
- Removable adhesive hanging strips
- A level
Estimated Cost: $30–$80 depending on frame count
Step-by-Step:
- Collect mismatched frames from thrift stores or storage.
- Unify them by spray-painting all frames in 2–3 colors from your palette.
- Lay the arrangement out on the floor first and photograph it for reference.
- Space frames 2–3 inches apart, starting from the center piece outward.
- Mount using removable strips so the wall stays damage-free.
This project turns wall space that’s usually wasted into a colorful, personal focal point, and because nothing is painted directly onto the wall, it’s fully reversible a major advantage for rented spaces.
Decorating Tip:
Limit yourself to 2–3 hues total across the frames and art. More than that reads as clutter instead of an intentional colorful accent wall alternative.
See the full breakdown: DIY Sitting Room Ideas That Make Any Living Space Look Expensive
Recover Throw Pillows in Mixed Prints
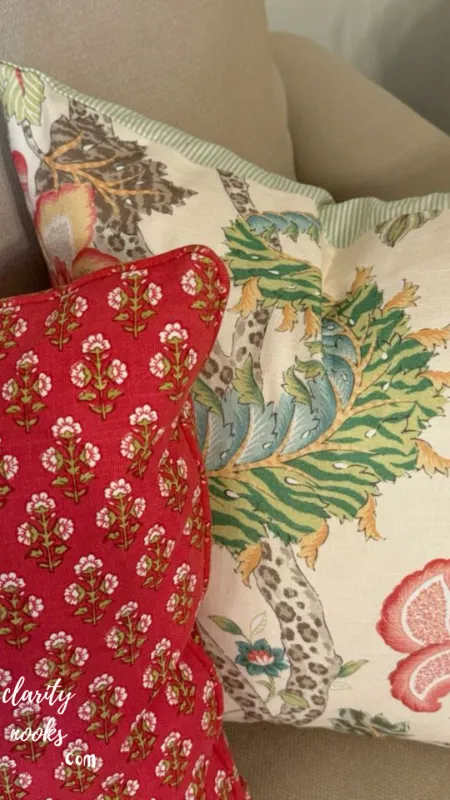
Colorful throw pillows are the cheapest, fastest way to test new colors in your living room without any long-term commitment. A no-sew recover method means you don’t even need a sewing machine to get a designer-store look.
Materials Needed:
- Fabric remnants (1/2 yard per pillow)
- No-sew hem tape or fabric glue
- Pillow inserts
- Fabric scissors
- Iron
Estimated Cost: $15–$40 for a set of three pillows
Step-by-Step:
- Measure your existing pillow insert and cut fabric with a 1-inch seam allowance.
- Use the envelope method: fold fabric edges under and press with an iron.
- Apply hem tape along the folded edges and press to bond.
- Assemble into a pillowcase shape, leaving one overlapping seam open.
- Insert the pillow form and press the final seam closed.
Pillows are the easiest colorful living room accessories to swap seasonally, and this no-sew method keeps the project accessible even if you’ve never touched a needle.
Decorating Tip:
Mix a maximum of three patterns, and anchor them with one solid color pulled directly from your wall paint or rug so the mix feels curated, not random.
Read our expert tips: DIY Living Room Carpet Ideas: Transform Your Space Without Breaking the Bank
DIY Ombre or Dip-Dyed Curtains
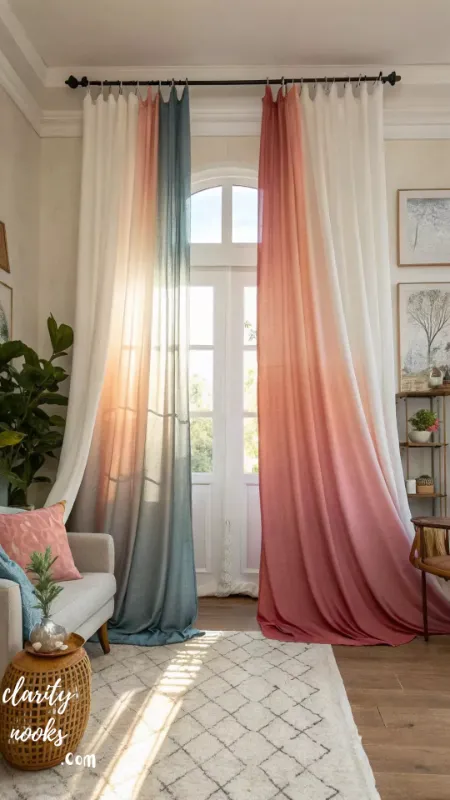
Ombre curtains bring a soft, gradient wash of color into the room that feels intentional rather than overwhelming. Because the color fades rather than blocks, this project works even in smaller rooms where a full bold curtain might feel heavy.
Materials Needed:
- Plain cotton or linen curtain panels
- Fabric dye
- Large bucket
- Rubber gloves
- Clothesline or drying rack
Estimated Cost: $20–$45 per pair of panels
Step-by-Step:
- Pre-wash curtains to remove any factory finish that blocks dye absorption.
- Mix your dye bath according to package instructions.
- Dip the bottom third of the panel first, holding for 10 minutes.
- Gradually lower the panel deeper into the dye every few minutes to build the gradient.
- Rinse in cold water until it runs clear, then hang to dry fully before rehanging.
The gradient effect diffuses natural light with a subtle colored glow throughout the day, giving you color without the visual weight of a solid-colored panel.
Decorating Tip:
Choose a dye shade one or two tones deeper than your accent wall or main color for a cohesive palette rather than a competing one.
Start learning now: Trendy DIY Living Room Curtain Ideas for a Fresh and Elegant Look
Paint a Thrifted Furniture Makeover
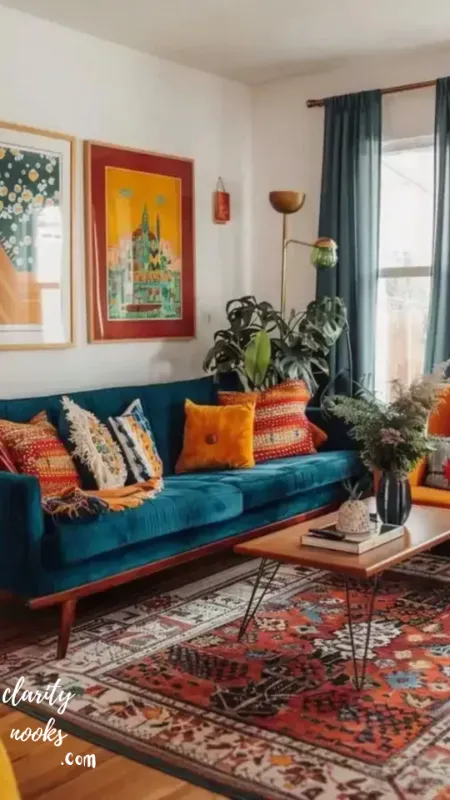
A painted furniture makeover turns a tired thrifted chair, side table, or coffee table into a statement piece and it’s one of the more sustainable projects on this list, since it keeps usable furniture out of landfills.
Materials Needed:
- Thrifted furniture piece
- Sandpaper (120–220 grit)
- Primer
- Chalk or enamel paint
- Polyurethane sealant
- Foam risers
Estimated Cost: $20–$70 depending on the piece and paint type
Step-by-Step:
- Clean the piece thoroughly and sand lightly to help paint adhere.
- Apply a coat of primer, especially over dark or glossy original finishes.
- Paint two thin coats, letting each dry fully between applications.
- Seal with polyurethane for pieces that will see daily use, like tabletops.
- Swap in new hardware if the piece has drawers or doors, for a finished look.
Beyond the cost savings versus buying new, this project gives you a completely unique piece no one else will have, and it supports a lower-waste approach to decorating.
Decorating Tip:
Prop furniture legs on foam risers or a painter’s pyramid stand while painting so nothing sticks to your drop cloth mid-project.
Real-life scenario:
A couple furnishing their first apartment found a $15 side table at a thrift store and painted it in a saturated cobalt blue. It became the most-complimented item in their living room, at a fraction of retail cost.
Read the next article: DIY Living Room Decor Ideas That Actually Transform Your Space
Color-Block Your Bookshelf Styling
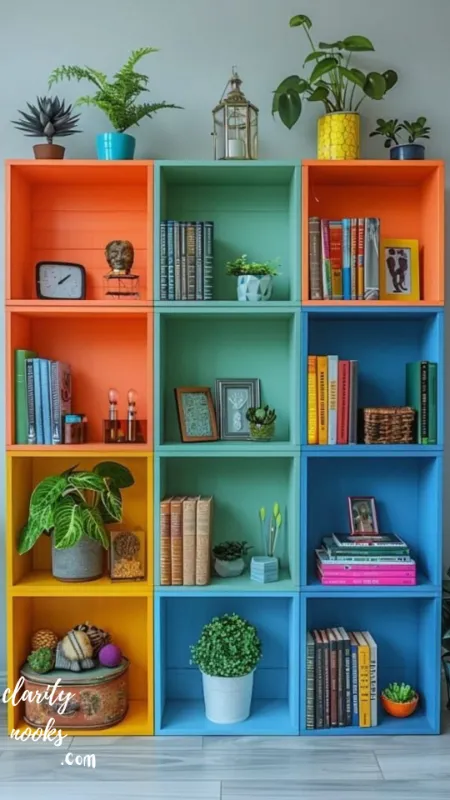
Color-blocked bookshelves turn ordinary storage into a deliberate design feature. Since most living rooms already have a bookshelf or media unit, this is a zero-cost-to-low-cost project that uses items you already own.
Materials Needed:
- Existing bookshelf
- Craft paper or spare book jackets
- Woven or painted baskets
- Small potted plants
- Spray-painted bookends
Estimated Cost: $10–$30
Step-by-Step:
- Remove everything from the shelves and sort books by spine color.
- Arrange books in a gradient or rainbow order across the shelves.
- Wrap any distractingly bright or mismatched jackets in plain craft paper.
- Add color-blocked baskets for loose items and a few small plants for texture.
- Group decorative objects in odd numbers (3s work best visually).
This project makes functional storage double as a colorful focal point, and because it uses existing books and objects, it’s one of the most budget-friendly options here.
Decorating Tip:
Leave 10–20% of shelf space empty. Fully packed shelves read as cluttered no matter how well the colors are arranged.
You May Also Like: DIY Colorful Kids Room: Budget-Friendly Ideas That Actually Work
Make a Hand-Dyed Macrame Wall Hanging
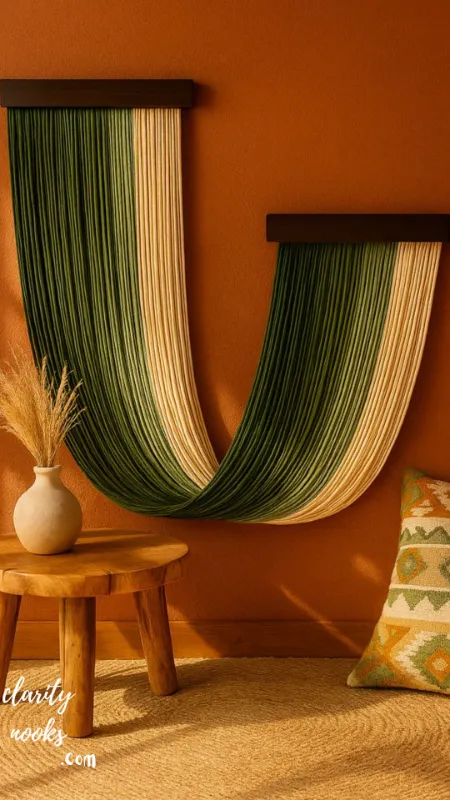
A hand-dyed macrame wall hanging adds texture and color above a sofa or media console, filling awkward empty wall space that paint or frames don’t always solve well.
Materials Needed:
- Cotton macrame rope or cord
- Wooden dowel
- Fiber-reactive fabric dye
- Scissors
Estimated Cost: $15–$35
Step-by-Step:
- Cut rope into equal lengths, roughly triple your desired finished length.
- Dye the bottom portion of the rope in an ombre bucket before knotting.
- Let the dyed rope dry completely.
- Fold each length over the dowel and secure with a simple larks-head knot.
- Add rows of square knots for texture, then trim the fringe evenly.
Dyeing the rope before knotting gives a much cleaner color transition than dyeing the finished piece, and the handmade texture adds warmth that flat colored decor can’t match.
Decorating Tip:
Practice your knots on scrap rope first macrame patterns are forgiving, but consistent tension takes a few tries to get right.
Paint a Stenciled Canvas Drop-Cloth Rug
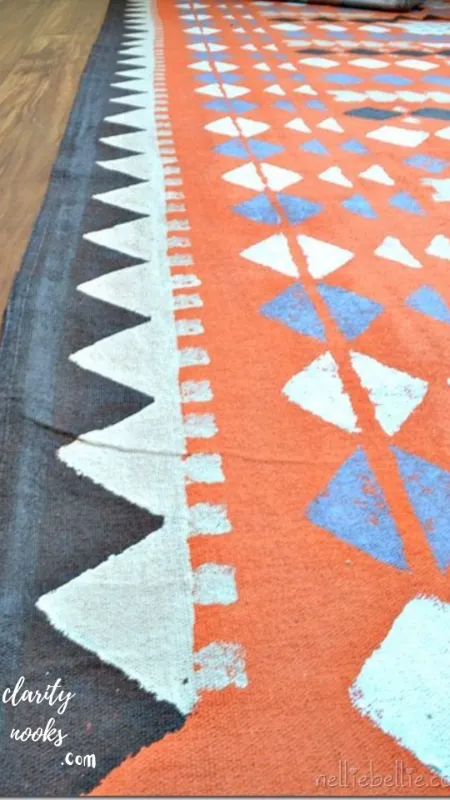
A DIY painted rug made from a canvas drop cloth is one of the most underrated budget-friendly home decor projects, giving you a custom-size, custom-color rug for a fraction of a patterned designer rug’s price.
Materials Needed:
- Canvas drop cloth
- Stencils
- Acrylic or fabric paint
- Fabric medium
- Painter’s tape
Estimated Cost: $25–$50
Step-by-Step:
- Wash and iron the drop cloth to remove sizing and wrinkles.
- Tape your stencil pattern in place, working in manageable sections.
- Mix paint with fabric medium so the finish stays flexible underfoot.
- Apply paint in thin layers, lifting the stencil carefully between sections.
- Seal edges with hem tape once fully dry to prevent fraying.
Because you’re painting the canvas yourself, you control the exact size, colors, and pattern scale something you can’t get from a pre-made rug at any price point.
Decorating Tip:
Finish with a fabric spray sealant to protect the painted surface from everyday foot traffic and spills.
Upcycle a Plain Lampshade in Color
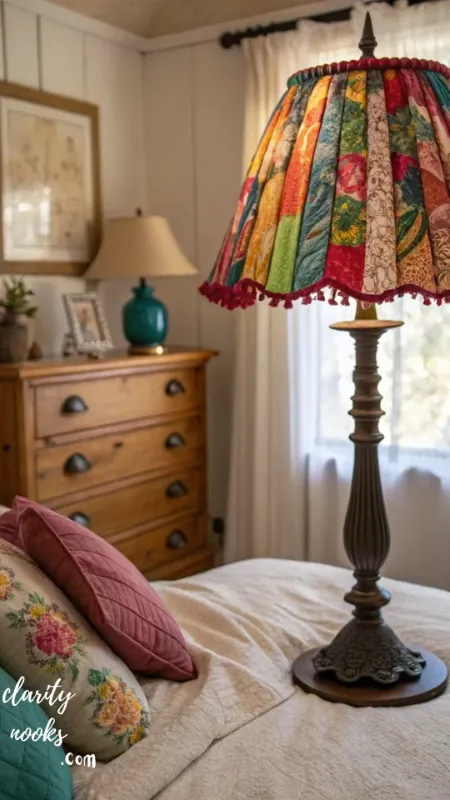
A colorful lampshade upcycle is a small project with an outsized effect light passing through a colored shade tints the whole room’s ambiance, tying your palette together after the sun goes down.
Materials Needed:
- Plain lampshade
- Fabric or lamp-safe paint
- Spray adhesive
- Trim or ribbon
Estimated Cost: $10–$25
Step-by-Step:
- Choose a lightweight, semi-translucent fabric that won’t block too much light.
- Apply spray adhesive to the shade in sections and smooth fabric over it.
- Trim excess fabric neatly at the top and bottom edges.
- Glue decorative ribbon or trim over the seams to finish the edges.
- Let cure for 24 hours before turning the lamp back on.
This is one of the cheapest projects on the list, and it does double duty adding color during the day and a warm colored glow at night.
Decorating Tip:
Avoid thick or dark fabrics; they block too much light and can even pose a heat risk near the bulb. Lighter, thinner fabrics glow beautifully instead.
Paint a Statement Ceiling Accent
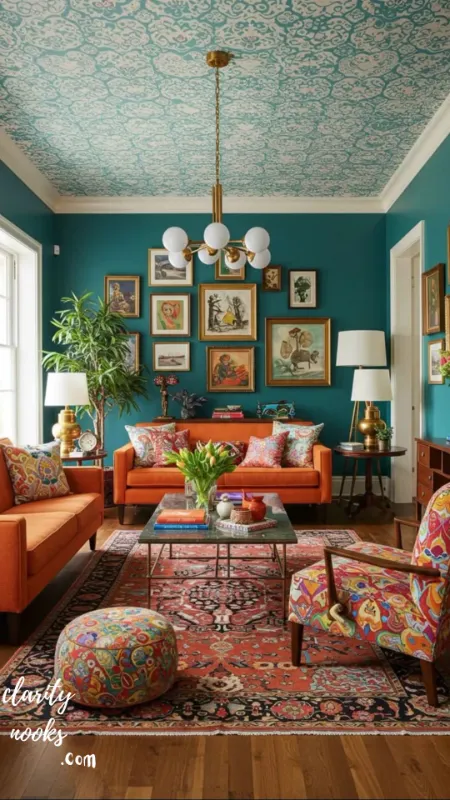
Painting the ceiling often called the fifth wall in a bold or soft color is one of the more advanced but high-impact colorful living room ideas, making the whole room feel more dynamic without touching the walls or furniture at all.
Materials Needed:
- Ceiling paint
- Roller with extension pole
- Painter’s tape
- Drop cloths
Estimated Cost: $30–$65
Step-by-Step:
- Tape off crown molding, light fixtures, and wall edges carefully.
- Cut in the edges by hand with an angled brush first.
- Roll paint across the ceiling in overlapping sections to avoid streaks.
- Apply a second coat once the first is fully dry.
- Remove tape while the paint is still slightly tacky for clean lines.
A painted ceiling adds a sense of coziness or drama depending on the shade chosen, and it’s currently one of the fastest-growing trends in colorful living room decor because it uses space most homes ignore entirely.
Decorating Tip:
Pick a hue that complements rather than competes with your walls pastels create a soft cocoon effect, while deep jewel tones create drama in rooms with high ceilings.
Final Thoughts
Bringing color into your living room doesn’t require a big budget or a professional’s help it just takes the right projects done in the right order. These DIY colorful living room ideas range from a $10 lampshade upcycle to a full accent wall, so you can start small and build confidence as you go. Pick one or two projects this weekend, test how the color feels in your space, and layer in more from there. Your living room doesn’t have to stay beige any longer than you want it to.
Trend Analysis: Colorful Living Rooms Now Through the Next 3 Years
Color drenching painting walls, trim, and ceiling in one unified saturated hue has moved from a niche design term to a mainstream search term over the past year, and that momentum is expected to continue through the next two to three years as more homeowners look for cohesive rather than accent-only color.
Search behavior is shifting too. Queries are becoming more specific and cost-conscious think “cheap ways to add color to a living room” or “DIY colorful decor on a budget” reflecting a broader move toward budget-friendly home decor over big-box, big-spend renovations.
Expect warm maximalism to keep gaining ground against the “quiet luxury” neutral trend, with saturated jewel tones, terracotta, and olive paired against soft neutrals rather than replacing them entirely. Sustainability-driven upcycling repainting thrifted furniture instead of buying new is also becoming a stronger purchase and content driver.
Practical Tips & Expert Insights
Apply the 60-30-10 rule even in a DIY context: 60% of the room in a base neutral, 30% in your chosen secondary color (walls, rug, or curtains), and 10% in bold accent pops (pillows, art, lampshades). This ratio keeps color-rich rooms feeling balanced instead of chaotic.
Always test paint swatches in the room itself, not under store lighting, and view them at both midday and evening. Color temperature from your bulbs can shift a shade dramatically a mistake that causes more repaint regret than any other single factor.
Start with low-commitment layers pillows, art, a lampshade before committing to a painted wall or ceiling. This lets you live with a palette for a few weeks and confirm it still feels right before investing in a bigger project.
Long-Term Strategy & Sustainability
Choose low-VOC or zero-VOC paint for any wall or ceiling project it costs slightly more upfront but pays off in air quality and resale-friendly finish quality, especially in smaller rooms with less airflow.
Favor secondhand furniture you repaint over buying new colorful pieces outright. Not only is it cheaper, it’s also more sustainable, and thrifted pieces are usually solid wood construction that holds paint and repainting far better than modern veneer furniture.
Build your color scheme around swappable, renter-friendly elements pillow covers, slipcovers, removable wallpaper, and art so your colorful living room decor can evolve with trends or your own taste without requiring a full redo every few years.
Future Predictions & Innovations
AI-assisted visualization tools are becoming standard in paint shopping apps, letting users photograph their actual room and preview a color in real lighting before buying a single can a shift that should meaningfully reduce repaint regret over the next few years.
Smart, color-changing LED lighting is increasingly being layered with static painted or upholstered color choices, letting one room shift mood from a calm daytime palette to a saturated evening one at the tap of an app.
Peel-and-stick, renter-friendly colorful wallpaper is improving fast in both durability and print quality, which is likely to make DIY colorful accent walls even more accessible for renters who currently rely on paint or gallery walls alone.
Common Mistakes & Hidden Gaps
- Using too many bold colors without a neutral anchor. A room with five saturated hues and no breathing room reads as cluttered rather than curated always give color-rich rooms a calm base to rest against.
- Skipping primer on furniture makeovers. This is the single most common reason painted furniture chips or peels within months primer isn’t optional on glossy or dark original finishes.
- Forgetting that rugs and curtains anchor a room’s palette. Many DIYers focus entirely on walls and pillows while ignoring the floor and window treatments, which are actually what ties a color scheme together visually.
- Chasing trends over personal preference. A color palette pulled straight from social media without testing it in your own lighting and furniture context often feels wrong within months always sample before committing.
Frequently Asked Questions
What is the cheapest way to add color to a living room?
The cheapest way to add color to a living room is through throw pillows and small accessories like a lampshade or a few pieces of art most of these projects cost under $30 and require no painting at all.
How do I add color to a living room without painting walls?
You can add color without painting by layering a gallery wall, swapping in colorful pillows and throws, painting furniture pieces, adding a stenciled rug, or hanging a hand-dyed textile all covered in this guide.
What colors make a small living room feel bigger?
Soft, warm pastels and mid-tone hues tend to make small living rooms feel larger than very dark or very bright saturated colors, especially when the ceiling and walls share a similar tone to avoid visual breaks.
Can a colorful living room look cluttered instead of stylish?
If too many unrelated colors compete for attention. Following the 60-30-10 color ratio and anchoring bold hues with a neutral base keeps a colorful room looking intentional rather than chaotic.
How much does a DIY colorful living room makeover cost?
Most of the projects in this guide cost between $10 and $70 each, meaning a full room refresh combining three or four projects typically lands between $75 and $250 total far below furniture or renovation costs.
Rameen Zara is the founder of Clarity Nooks, bringing over five years of experience in home décor and interior styling. She shares simple yet practical design ideas that suit real homes and everyday living. Her approach focuses on cozy aesthetics, soft color palettes, and natural textures that create warm, inviting spaces.