

DIY Wall Painting Ideas for Stylish and Cozy Home Walls
Your walls are the largest canvas in your home and most people leave them completely blank. A single coat of builder-grade white paint might have felt safe when you moved in, but six months later, the room still feels unfinished, cold, and forgettable.
The good news? You don’t need a professional painter or a designer’s budget to fix it. DIY wall painting ideas have evolved far beyond roller-and-brush basics. Today’s techniques from geometric tape designs to textured limewash finishes can turn an ordinary room into something you’ll actually want to show off. This guide covers nine of the most impactful ideas, complete with realistic tips, real-world examples, and everything competitors won’t tell you.
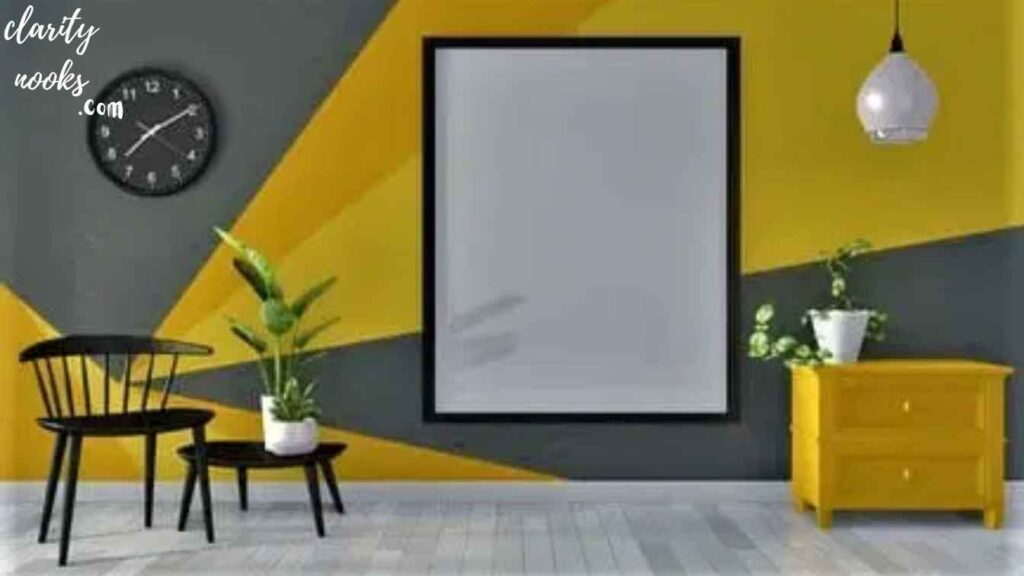
Geometric Tape Wall Designs
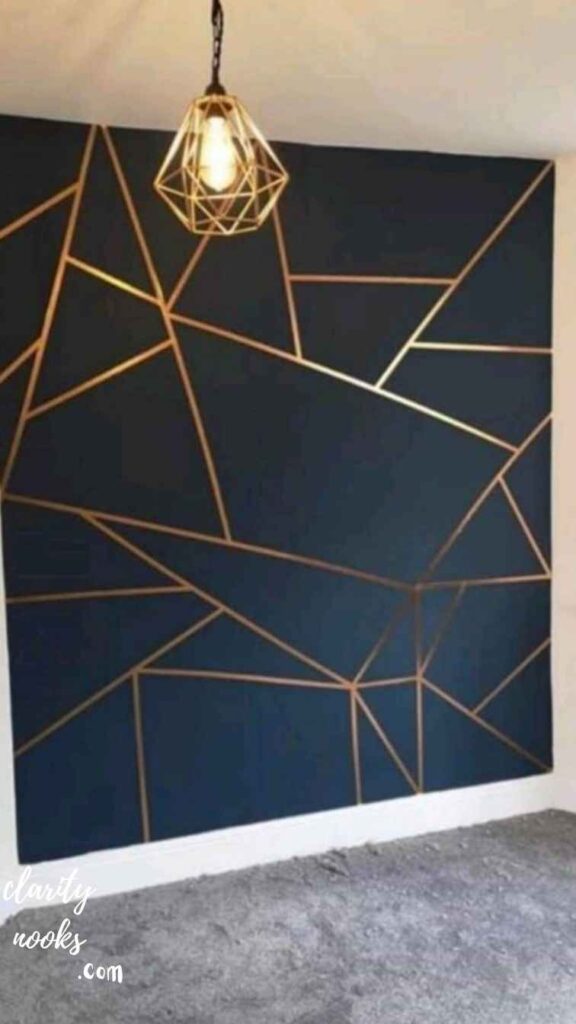
Painter’s tape is possibly the most underrated decorating tool you own. By layering strips in diamonds, triangles, or irregular polygons across a wall, then painting inside the masked shapes, you create a sharp, graphic pattern that looks custom and intentional. The key is to press the tape edges firmly any gap and paint bleeds, ruining clean lines.
A popular approach in 2026–2027 is the “half-diamond” feature wall: tape a large-scale diamond grid across the entire surface, paint alternating sections in a warm terracotta against a soft cream background. It costs under $40 in materials and turns a flat wall into the focal point of a living room. One DIYer in Austin shared that this single wall change made buyers add $8,000 to their offer on her home without any furniture upgrades.
Pro Tip:
Remove the tape while the paint is still slightly wet not fully dry to get the crispest edges without peeling.
Must Read: DIY Garden Decor Ideas for a Cozy Backyard Vibe
Ombré & Color Wash Technique
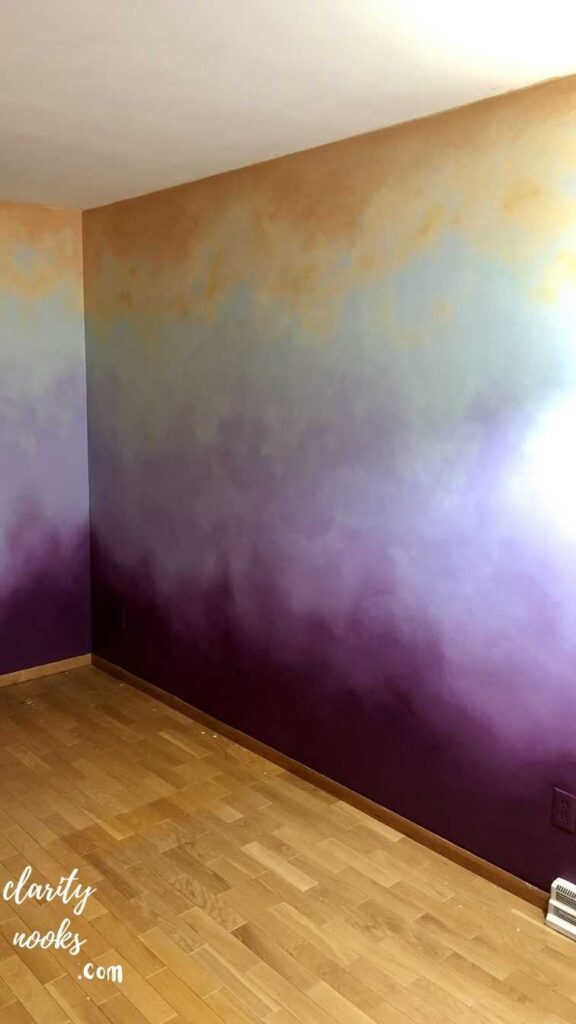
An ombré wall transitions seamlessly from one color to another typically from a dark, saturated hue at the bottom to a lighter tint near the ceiling. This gradient effect adds visual depth to flat rooms, especially in spaces with low natural light. The blending is done while both colors are still wet, using a dry roller worked in a crosshatch pattern at the transition zone.
Color wash goes one step further: a diluted glaze in a contrasting hue is brushed and blended over a dry base coat in loose, circular motions. The result is a soft, organic texture that mimics aged European plasterwork. It’s particularly striking in bedrooms and dining rooms where you want warmth without heaviness. Use a ratio of 4 parts glaze to 1 part paint for a subtle effect, or 2:1 for something more dramatic.
Featured Snippet Answer:
An ombré wall is a painting technique where two colors blend seamlessly from dark to light across a single surface, typically using a dry roller at the transition point while paint is still wet.
Don’t Skip: DIY Bedroom Decor Ideas That Actually Transform Your Space
Limewash Paint Finish
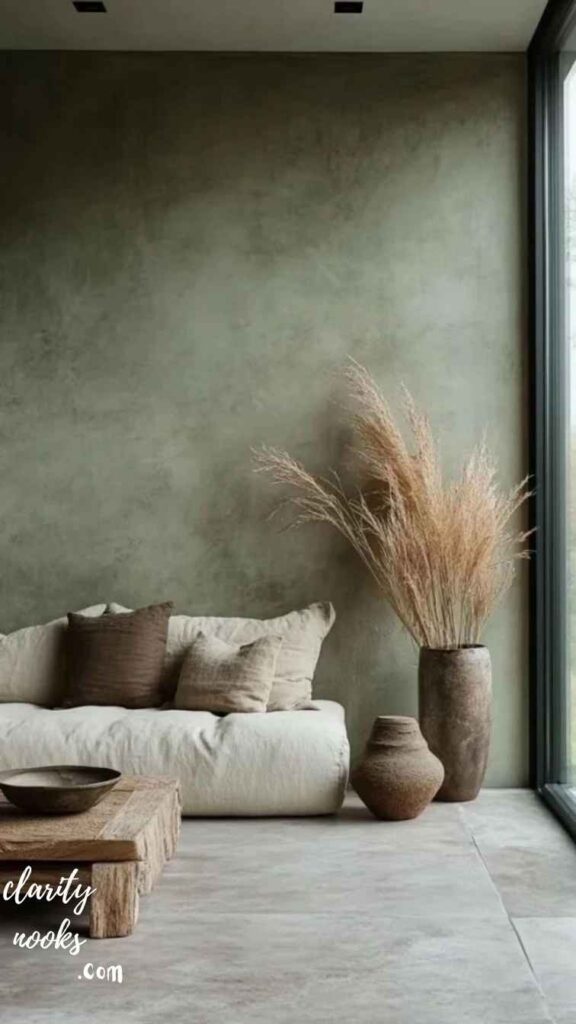
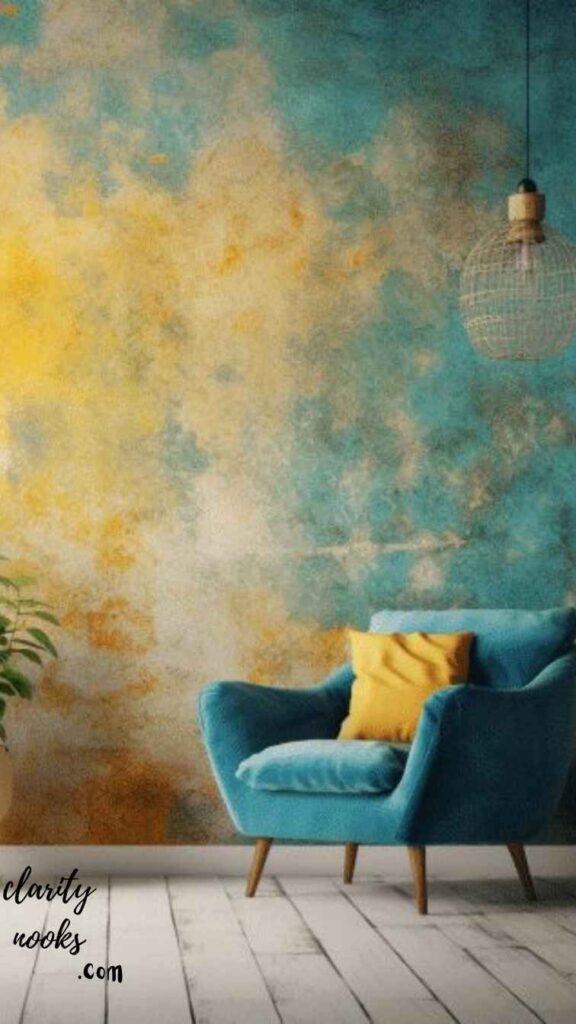
Limewash is having a serious moment in interior design, and for good reason. Applied with a brush in overlapping, irregular strokes, this technique creates a mottled, chalky finish with visible depth and variation the kind of texture that looks centuries old. Unlike conventional paint, limewash is semi-translucent, meaning the wall color you see is actually built from multiple layered passes of diluted pigment.
Brands like Portola Paints have made limewash accessible for DIYers, with pre-mixed formulas that skip the traditional slaking process. For a bedroom makeover on a $150 budget, one homeowner in Chicago applied two coats of warm sage limewash over existing white walls and described the transformation as “the most impactful single afternoon I’ve ever spent on my apartment.” Limewash also has practical benefits: it’s breathable, antimicrobial, and genuinely sustainable.
Real-World Scenario:
Ideal for plaster walls, exposed brick-look finishes, and anywhere you want an organic, artisan feel without expensive wallpaper or tile.
Don’t Miss: DIY Living Room Decor Ideas That Actually Transform Your Space
Stencil Accent Walls
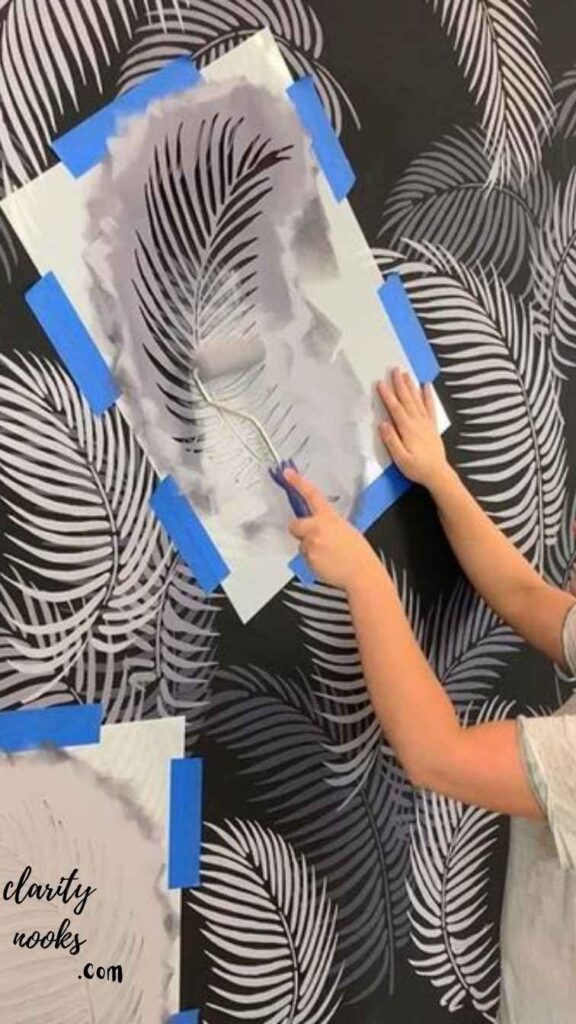
Stenciling is the shortcut to a pattern wall without wallpaper costs or professional installation. You simply tape a repeating stencil to the wall, roll or sponge paint through the openings, reposition, and repeat. Modern stencil designs range from Moroccan lattice and Art Deco fans to oversized botanical leaves and abstract brushstroke patterns. The technique works on virtually any surface and can be done in a single afternoon.
The most common beginner mistake is overloading the brush. Less paint on the applicator means sharper edges and less bleeding under the stencil. A dry-brush approach where you remove most paint from the brush on a paper towel first gives the cleanest results. For an entry hallway, a vertical stripe of a botanical stencil in matte forest green over a pale linen base creates a high-end botanical mural effect for under $35 total.
Read More: DIY Kitchen Decor Ideas That Actually Transform Your Space
Two-Tone Split Walls

Rather than painting all four walls the same color, a two-tone split divides the wall horizontally typically one-third of the way up with a contrasting color or finish below. The lower section is often a deeper, richer shade, grounding the room and creating the visual effect of a dado rail even without molding. This technique works especially well in hallways, home offices, and children’s rooms.
A specific variation gaining traction is the “color block with gap” look: instead of meeting at a single tape line, the two colors are separated by a thin white or neutral strip of 1–2 inches. This gives the design a graphic, deliberate quality. A small Brooklyn apartment used this approach navy below with a two-inch white gap before pale blush above and the result photographs so well it was featured in an interior design blog with thousands of repins.
Voice Search Answer:
To create a two-tone split wall, paint the lower third a darker shade, the upper two-thirds a lighter tone, and use painter’s tape to create a clean horizontal dividing line at the transition.
Sponge Texture Technique
Sea sponge painting creates a soft, mottled texture that reads as dimensional from across the room. You dip a natural sea sponge (not synthetic the irregular shape matters) into a paint color, dab off excess on a paper towel, then press it lightly and randomly across the wall. Rotate the sponge between presses to avoid a repeating pattern. The base coat shows through, creating the illusion of depth.
For a bathroom or laundry room update, try layering two sponge colors say, a warm sand base with a light dusty blue sponge layer on top. The effect suggests natural stone without any heavy faux finishes. This whole-wall technique takes about two hours per medium-sized room and costs almost nothing beyond the paint itself. It’s also forgiving: uneven coverage just adds to the organic charm.
Mural via Projector Method
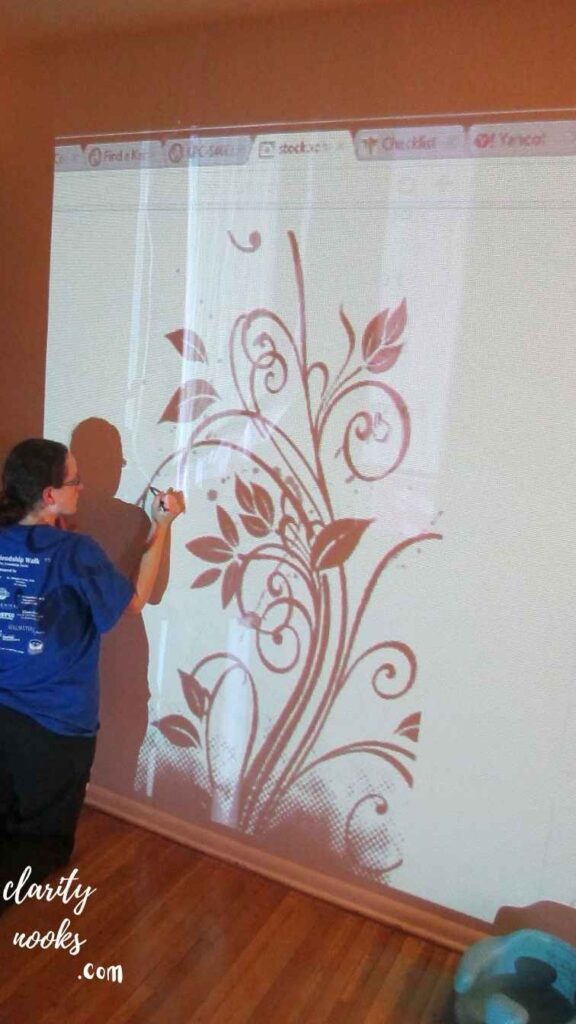
Here’s the technique that separates confident DIYers from beginners who believe murals require artistic talent. You don’t need to freehand anything. Simply project any image onto the wall using a cheap plug-in projector or even your phone projector app, trace the outlines lightly with pencil, then paint within the lines. The traced sketch serves as your guide, and from five feet away, the result looks entirely hand-painted.
This approach has democratized mural painting completely. A parent in Melbourne used this method to paint a floor-to-ceiling mountain landscape in their child’s room over a single weekend. Total materials cost was $45 some acrylic craft paints, two brushes, and a free stock image. The scale and visual impact of a mural wall is genuinely unmatched for any other DIY painting technique, and with a projector, it’s accessible to everyone.
Mini Case Study:
A rental apartment in Manchester with strict no-wallpaper rules used this method to create a subtle line-art botanical mural in pale gray on white. The mural was subtle enough to pass end-of-tenancy inspection but striking enough to photograph for a sold-out Airbnb listing.
Dragged Paint (Strié) Finish
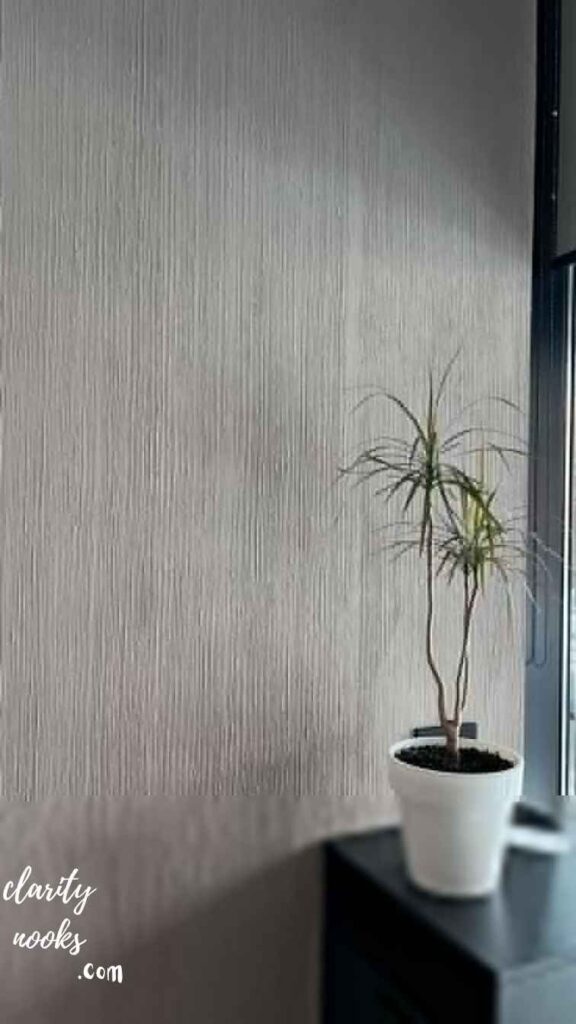
The strié finish French for “striped” is created by dragging a stiff-bristled brush through wet glaze in long, controlled vertical strokes. The result is a refined, silk-like texture that resembles woven fabric when viewed from an angle. It’s a traditional decorative painting technique that has quietly returned to popularity as maximalist interiors trend upward again in 2026–2027.
The technique requires a bit more coordination than sponging: one person applies a glaze coat, while a second immediately follows with the dragging brush. Working section by section, you need to complete each pass before the glaze dries typically within 4–6 minutes. Dining rooms and formal sitting rooms are ideal candidates. In a warm ochre or deep emerald, a strié accent wall communicates sophistication without spending anything close to what bespoke wallpaper would cost.
The Ceiling as a Fifth Wall
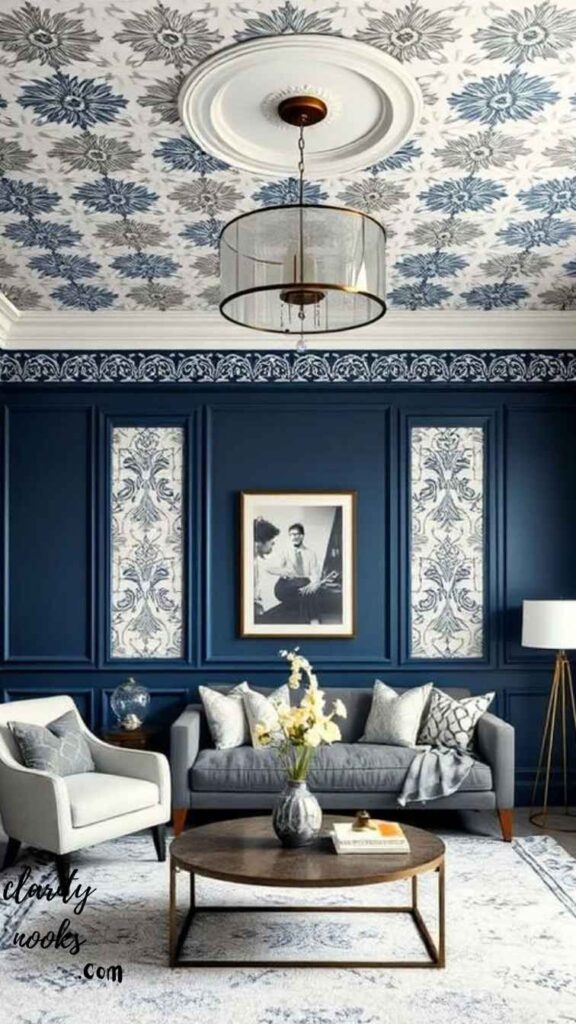
This is the most overlooked surface in any room and the highest-impact change you can make without moving a single piece of furniture. Painting the ceiling a deep, dramatic color (navy, forest green, burgundy, charcoal) draws the eye upward, makes the room feel cozy and intentional, and immediately signals a confident design sensibility. The walls can remain white or neutral; the ceiling does all the work.
The logistics feel intimidating but are straightforward: use a roller with an extension pole, cut in along the edges with an angled brush, and apply two coats. Cover furniture with drop cloths and tape the top edge of the walls carefully. An 12×14 bedroom ceiling takes about 90 minutes to paint. A homeowner in Toronto painted her small home office ceiling in Benjamin Moore’s “Newburyport Blue” and the room went from cramped to atmospheric. She reported spending more time working there specifically because of the change.
Expert Insight:
Sheen matters: use flat or matte for ceilings to minimize visible texture imperfections, which eggshell and satin finishes tend to highlight under overhead lighting.
Conclusion
DIY wall painting ideas are among the highest-return home improvement projects available low cost, high visual impact, and entirely within reach for a motivated weekend. Whether you start with a simple two-tone split or go bold with a limewash feature wall, the principles are the same: prepare thoroughly, test your color first, and commit fully to the technique.
The nine ideas in this guide cover the full spectrum from beginner to ambitious, and each one has been chosen because it delivers genuine transformation not just a color change. Pick the idea that matches your room, your skills, and your style. Then pick up a brush and start. Your walls have been waiting long enough.
Trend Analysis: 2026 and Beyond
The wall painting landscape has shifted significantly in the past 18 months. Here’s where it stands today and where it’s heading through 2028.
| Trend | Status | Direction |
| Limewash & mineral finishes | Peak | Mainstream now; artisan variations will differentiate |
| Dark, moody ceilings | Rising | Spreading from design media to everyday homes |
| Warm neutrals (clay, terracotta) | Peak | Replacing cold grays as the new default neutral |
| AI color matching tools | Emerging | Apps now let you test virtual paint before buying |
| Soft geometric murals | Rising | Replacing stark geometric patterns with organic curves |
| Eco-formulated paints | Rising | Low/zero VOC becoming an expectation, not a premium |
| Color drenching (tone-on-tone) | Emerging | Painting walls, trim, and ceiling the same deep hue |
Looking further ahead, expect augmented reality (AR) paint tools to become a standard feature in major paint brand apps by late 2026. Rather than guessing how a color will look, you’ll point your phone at a wall and see any finish applied in real time. Sherwin-Williams and Benjamin Moore are already in early deployment and this will fundamentally change how people choose colors and commit to wall painting projects.
Practical Tips & Expert Insights
Prep is 70% of the job
Sand, clean, and prime before any decorative technique. Even the best technique fails on a dusty or glossy surface.
Buy a quality brush once
A $4 brush leaves bristle marks in limewash and strié work. A $20 Purdy brush pays for itself on the first use.
Test on board first
Paint a 24″×24″ sample board and live with it for two days in different lighting before committing to the whole wall.
Lighting changes everything
North-facing rooms read colors cooler. Deep navy that looks moody at noon looks near-black by evening plan accordingly.
Finish selection matters
Flat hides imperfections; eggshell is wipeable; satin is washable. Match sheen to room use, not just aesthetics.
Start with one wall
Accent wall = one bold choice without overwhelming the room. Master one technique before going all four walls.
Long-Term Strategy & Sustainability
The smartest approach to DIY wall painting isn’t a one-time project it’s building a system. Think of your home’s color story across rooms: do your hallway, living room, and bedroom share a cohesive palette thread? Designers call this “color flow,” and it’s what separates homes that feel intentional from those that feel assembled room by room.
From a sustainability perspective, the paint industry has meaningfully improved. Low-VOC and zero-VOC formulas from brands like Clare, Benjamin Moore Natura, and Farrow & Ball are now as durable as conventional options. If you’re updating a child’s room, nursery, or heavily occupied space, choosing a zero-VOC formula isn’t just environmentally preferable it’s a genuine health consideration. The off-gassing from conventional paints can linger for weeks in sealed rooms.
Finally, invest in documentation: photograph your finished walls in good natural light, note the exact paint color code, sheen level, and number of coats. When you repaint in five years, or want to match for touch-ups, this record saves you hours of guesswork and potentially hundreds of dollars in do-overs.
Future Predictions & Innovations
The near-future of DIY wall painting will be defined by technology and material science working together. AR visualization tools will eliminate color-regret entirely you’ll see the finished result before opening a single can. AI-powered color consultants, like the emerging tools built into apps like Houzz and the Color Snap AI from Sherwin-Williams, will analyze your room’s lighting, furniture, and flooring to suggest specific color combinations with scientific precision.
On the material side, watch for smart paints with embedded functions: paints that purify indoor air by neutralizing volatile compounds, paints with antimicrobial properties for bathrooms and kitchens, and even thermochromic finishes that subtly shift in tone with room temperature. These are not distant concepts they’re in limited commercial release now and are expected to enter mainstream home improvement retail by 2027–2028. For DIY enthusiasts, this means technique and material choice will become equally important.
Common Mistakes & Hidden Gaps
- Skipping primer on dark-to-light changes. Going from a bold color to a light one without a gray-tinted primer requires 4–6 coats of white. One coat of quality primer replaces three coats of paint.
- Choosing paint color from a chip in the store. Paint chips look different under fluorescent retail lighting than at home. Always take a chip home and view it at multiple times of day before buying a full gallon.
- Painting in the wrong order. Ceiling first, then walls, then trim always. Reversing this order guarantees visible overlaps you’ll have to fix later.
- Underestimating dry time between coats. Most latex paints feel dry in one hour but need 4 hours minimum before a second coat. Rushing causes peeling, streaking, and lift.
- Using a roller that’s too short-nap on textured walls. A 3/8″ nap roller on rough plaster or orange-peel texture won’t fill the valleys. Use 1/2″ or 3/4″ for textured surfaces.
- Ignoring the sheen mismatch on touch-ups. Touching up with a brush when the original coat was rolled creates visible dull spots. Roll touch-ups to match the original texture.
FAQ’s About DIY Wall Painting Ideas
What is the easiest DIY wall painting technique for beginners?
The two-tone split wall is the most beginner-friendly. It requires only basic tape, a roller, and two paint colors no special tools, no timing coordination, and very little room for error.
How do I make a small room look bigger with wall paint?
Paint the ceiling a lighter color than the walls and keep the floor dark. This vertical contrast draws the eye upward. Alternatively, paint all four walls the same medium tone (color drenching) it removes visual boundaries and makes the room read as a cohesive whole rather than a cramped box.
Can I paint over limewash with regular paint?
Yes, but it requires prep. Sand lightly to remove any chalky residue, apply a bonding primer, then paint normally. Skipping the primer risks peeling within months.
How long does a DIY geometric tape wall take?
For a single accent wall, allow 2 hours for taping, 1–2 hours for painting, and 2 hours of drying before tape removal. The full project comfortably fits in a single afternoon or evening.
What wall painting ideas work in a rental apartment?
Techniques using standard latex paint over white walls like ombré, stenciling, color wash, and even murals using the projector method can be painted back to white when you move. Choose removable painter’s tape and avoid oil-based paints that may require heavy sanding to cover.

Rameen Zara is the founder of Clarity Nooks, bringing over five years of experience in home décor and interior styling. She shares simple yet practical design ideas that suit real homes and everyday living. Her approach focuses on cozy aesthetics, soft color palettes, and natural textures that create warm, inviting spaces.
