

DIY BBQ Patio Ideas That Turn Your Backyard Into a Party Spot
Most people inherit a backyard setup that’s an afterthought a portable grill shoved into a corner, nowhere to prep food, and guests awkwardly balancing plates on their laps. Sound familiar, You’re not alone. Millions of homeowners want an outdoor cooking space that actually works, but assume it requires hiring expensive contractors or spending a fortune on materials.
Here’s the truth: with the right DIY BBQ patio ideas, you can build a fully functional, beautiful outdoor cooking and entertaining area on almost any budget. Whether you want a rustic brick smoker station or a sleek modern grilling island, this guide gives you the real-world plan to make it happen without regret.
This isn’t a listicle of vague suggestions. Every idea below includes practical details, material guidance, and examples drawn from real backyard builds.
What Is a DIY BBQ Patio?
(Quick Definition)
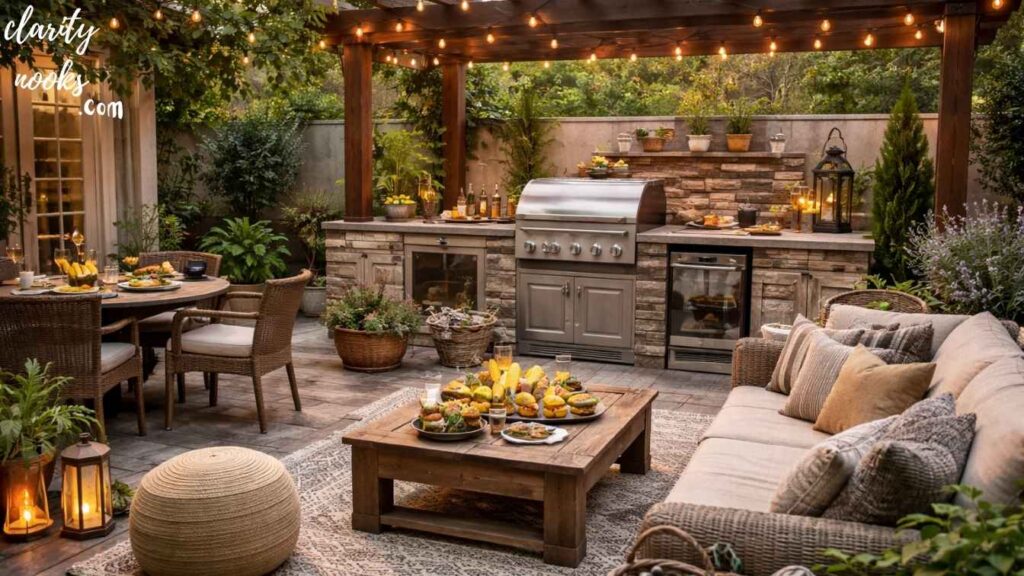
A DIY BBQ patio is a self-built outdoor space designed around grilling and entertaining. It typically includes a cooking station, weather-resistant surfaces, seating, storage, and sometimes utilities like lighting or running water all constructed by the homeowner rather than a professional contractor.
Build a Cinder Block Grilling Island
(The Weekend Warrior’s Best Friend)
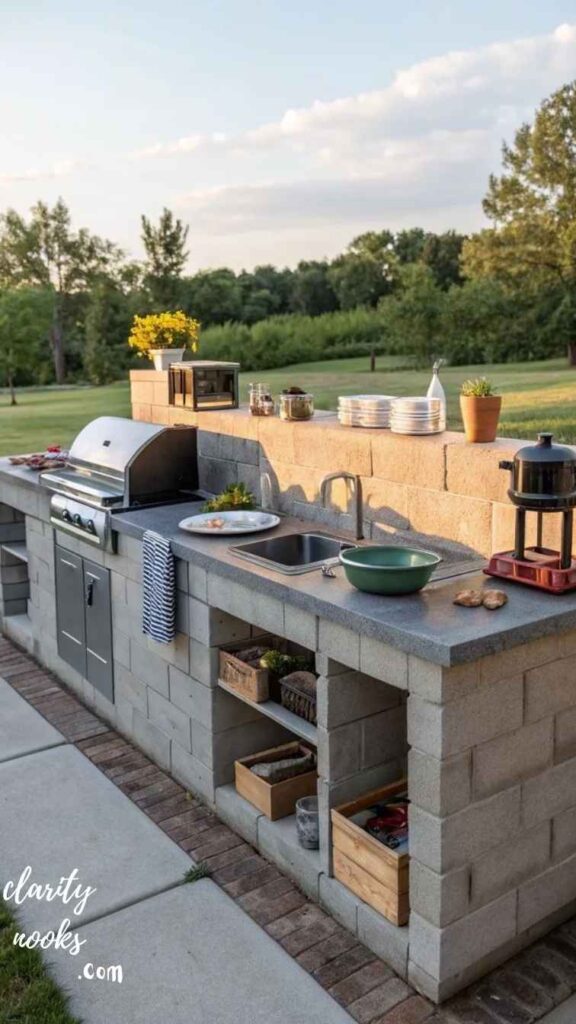
Cinder block grilling islands are the most popular entry point into DIY outdoor kitchens and for good reason. A standard build takes a single weekend, costs between $400–$900 in materials, and can hold a full-size grill, side burner, and storage.
The structure is straightforward: stack standard 8x8x16 concrete masonry units (CMUs) in an L-shape or U-shape around your grill’s footprint. Leave gaps for a drop-in grill or built-in grill insert. Finish the exterior with stucco, stone veneer, or tile for a polished look. Because CMUs are fire-resistant and structurally sound, this setup is both safe and durable.
One real-world example: a homeowner in Texas built a U-shaped cinder block island with a 36-inch built-in grill, a 12-inch side burner, and a refrigerator cabinet for under $850 in materials. He used gray granite tile for the countertop and cultured stone for the exterior the result looked like a $5,000 professional build.
Pro tip: Always check local building codes before starting. Some municipalities require permits for permanent outdoor structures, even low-profile ones.
Must Read: Budget-Friendly DIY Media Wall Ideas to Upgrade Your Space
Lay a Paver Patio as Your Foundation
(Don’t Skip This Step)
Before you build anything vertical, your foundation needs to be right. A paver patio solves the most common BBQ area problem: uneven, muddy, or cracking ground that makes furniture wobbly and grills unstable.
Concrete pavers, natural flagstone, or porcelain outdoor tiles all work well. Concrete pavers are the most forgiving for a DIYer they’re easier to cut, widely available, and highly durable. A 12×16-foot paver patio can be completed in a weekend with proper prep: excavate 6 inches, add a gravel base layer, compact it, add coarse sand, then lay and level your pavers.
The key detail most beginners miss is the gravel sub-base depth. Skimping here causes pavers to shift and sink over time. Use at least 4 inches of crushed gravel (not pea gravel) compacted with a plate compactor you can rent from any hardware store. This one step separates a patio that lasts 20 years from one that looks terrible after two winters.
LSI keywords in play: outdoor cooking area, backyard grill station, paver installation, outdoor flooring ideas.
Don’t Skip: Simple DIY Bedroom Interior Ideas for a Stylish and Relaxing Bedroom Makeover
Create a DIY Pergola Over Your Grill Zone
(Shade + Style)
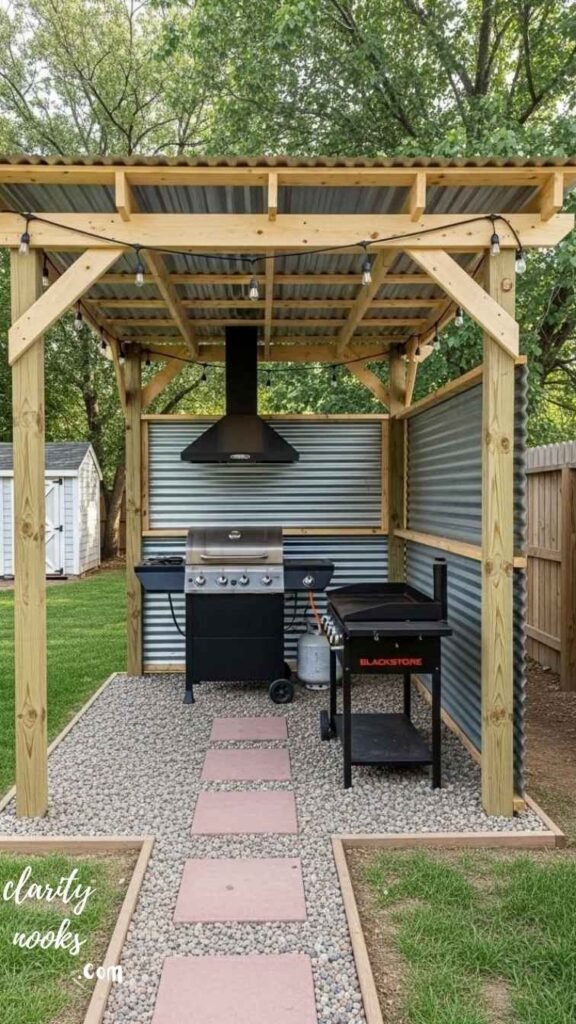
A pergola over your BBQ patio does three things: it defines the cooking zone visually, provides shade on hot days, and gives you a structure to hang lighting, fans, or even a mounted outdoor TV. It’s one of the highest-impact additions you can make for the cost.
A basic 10×12 cedar pergola kit costs $600–$1,200 and requires only basic carpentry skills to assemble. If you’re building from scratch with lumber, budget around $400–$700 for materials. The critical rule: never build a fully enclosed pergola roof directly over a gas or charcoal grill. Ventilation is non-negotiable for both smoke management and safety. Open-slat or louvered pergola designs are ideal.
A family in Georgia installed a 12×14 pressure-treated pine pergola over their L-shaped grilling island. They added café lights overhead, a ceiling fan rated for outdoor use, and climbing jasmine on one side. Total DIY cost: $780. Neighbors assumed they hired a landscape architect.
Featured snippet opportunity:
How do I add shade to my BBQ patio?
Answer: Build a slatted pergola directly above the grill zone using pressure-treated pine or cedar. Open slats allow smoke to escape while blocking direct sun. Add a ceiling fan rated for outdoor use to improve comfort.
Don’t Miss: DIY Home Office Ideas That Actually Work Smart Setups for Every Space and Budget
Add a DIY Outdoor Bar and Prep Station
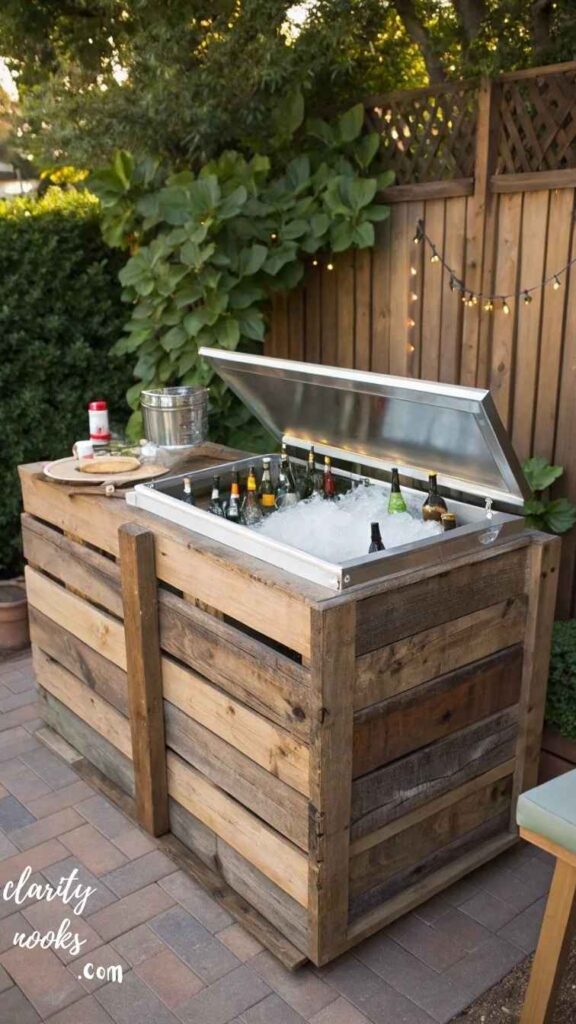
One of the biggest pain points for backyard cooks is the “chef isolation” problem you’re stuck at the grill while everyone else is socializing. An outdoor bar with counter seating solves this entirely. Guests sit at the bar, you grill directly in front of them, and the experience becomes communal rather than separated.
Build the bar counter using pressure-treated lumber for the frame and finish it with concrete board topped by outdoor-rated tile or natural stone. A bar counter should be 42 inches tall standard bar height with overhanging seating on the guest side and prep space on yours. Add a mounted bottle opener, hooks for utensils, and a small sink if you can run a waterline (even a garden hose quick-connect works for outdoor use).
For a budget-friendly version, repurpose a heavy-duty outdoor workbench or kitchen island cart with weatherproof finish. One DIYer in Florida used two 36-inch unfinished wood cabinets from a kitchen remodel, wrapped them in fiber cement board, tiled the top with slate tile, and created a fully functional outdoor bar counter for $220 total.
Read More: DIY Patio Decor Ideas to Transform Your Backyard on a Budget
Install a DIY Fire Pit Seating Area Adjacent to the Grill
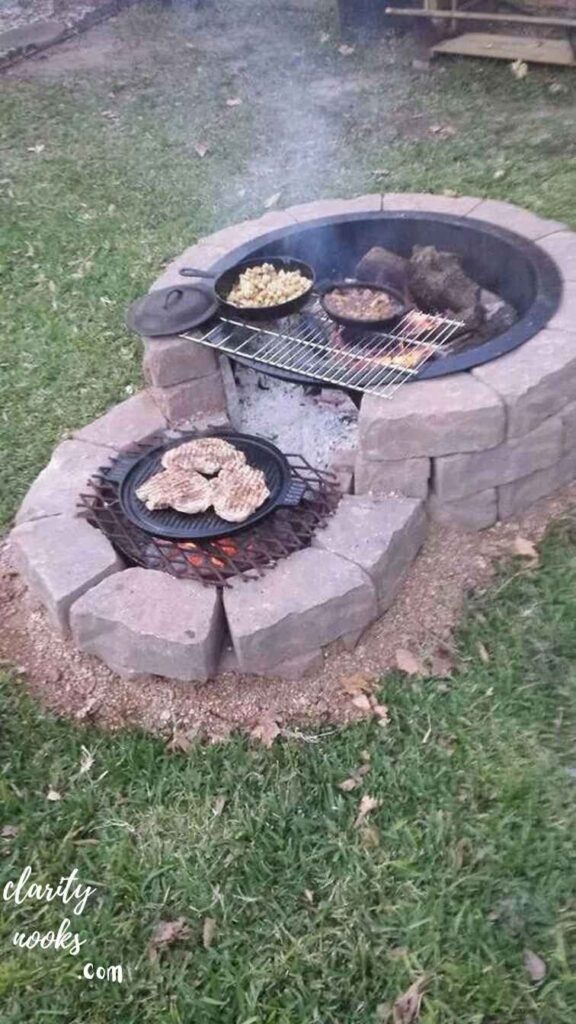
Your BBQ patio shouldn’t shut down when dinner is done. A fire pit seating area adjacent to but clearly separated from the grill zone extends your outdoor living hours into the evening and through cooler months.
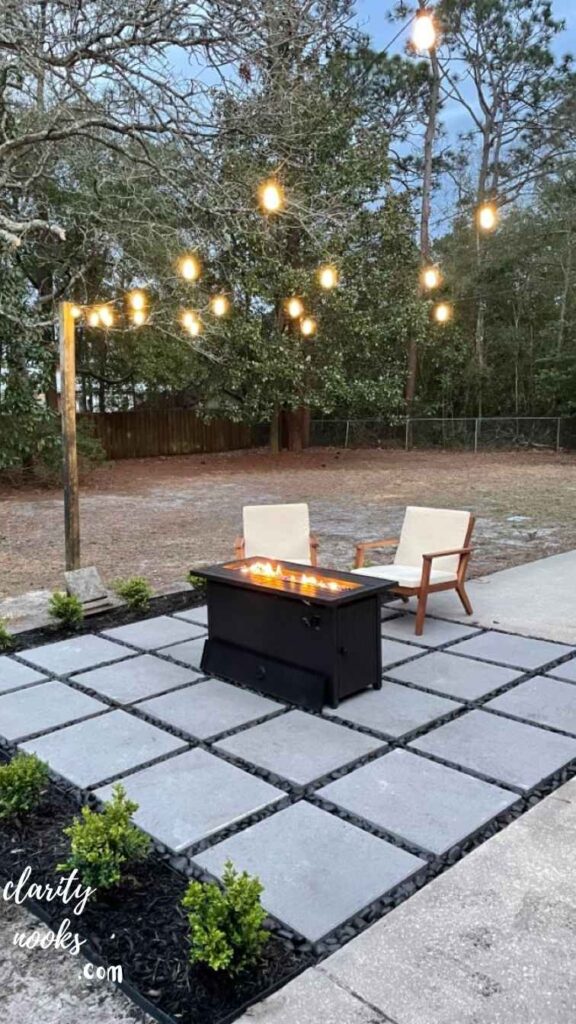
A dry-stacked natural stone fire pit is one of the easiest masonry projects a beginner can attempt. Use fieldstone, retaining wall blocks, or fire-rated bricks stacked in a circle 3–4 feet in diameter and 12–18 inches tall. No mortar is required for a basic build the weight of the stones holds everything in place. Surround it with a gravel or paver apron at least 3 feet wide for safety and aesthetics.
Place the fire pit at least 10 feet from the grill station and any structures. Arrange seating in a semicircle using weather-resistant Adirondack chairs, concrete benches, or built-in wood benches with storage underneath. The fire pit zone becomes a natural gathering magnet people linger longer, conversations go deeper, and your outdoor space gets real nightly use
Build Raised Planter Beds That Double as Windbreaks
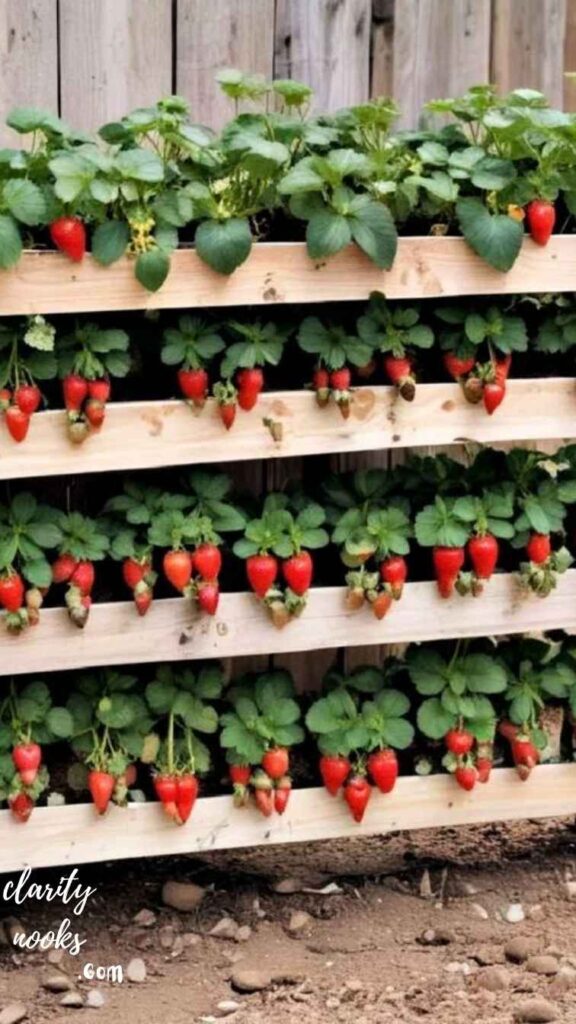
This is a subtopic that almost no competitor covers: strategic planting around your BBQ patio. Raised planter beds positioned on the windward side of your grill area serve double duty they look great AND block prevailing winds that make flame control difficult and smoke unpredictable.
Build simple cedar raised beds (naturally rot-resistant) 24–30 inches tall and position them in an L or U shape around the back and side of your grilling station. Plant dense, fragrant herbs and shrubs: rosemary, lavender, ornamental grasses, and boxwood all work well. Rosemary especially becomes a living BBQ ingredient garden snip sprigs directly onto the grill.
The side benefit is sensory: fragrant herbs near a grill enhance the entire cooking experience. One landscape blogger documented how a $180 cedar planter build on the north side of her patio reduced her grill’s wind interference by roughly 60% allowing much more consistent cooking temperatures.
Use String Lights and Solar Path Lighting to Define the Space
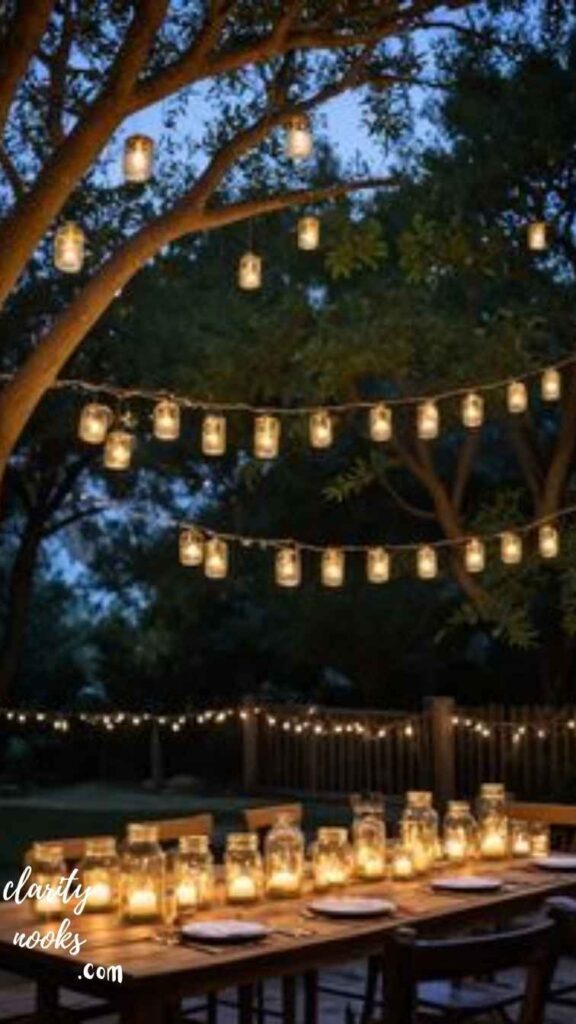
Lighting is the most underrated element in any DIY BBQ patio design and the easiest to implement. Properly placed lighting extends your patio’s usable hours, improves safety around the grill area, and dramatically changes the perceived quality of the entire space.
String café lights (also called Edison lights) mounted between the pergola posts or strung between tall shepherd’s hooks instantly elevate any outdoor space. Use warm white (2700K) bulbs for the most flattering, atmospheric effect. Solar-powered path lights along the edge of your patio define the space perimeter and guide guests safely after dark.
For the grill station itself, add a dedicated grill light with a flexible neck that clamps onto the grill handle critical for safe nighttime cooking. A motion-sensor floodlight pointed at the cooking zone is a smart safety addition that also discourages unwanted nighttime visitors. Total lighting upgrade cost for an average patio: $80–$200.
Conclusion:
DIY BBQ Patio Ideas can turn your backyard into a fun cooking space. You can create a simple and stylish area without spending too much money. It helps you enjoy outdoor meals with family and friends. A good setup also makes grilling easier and more comfortable for everyone.
With DIY BBQ Patio Ideas, you can design a space that fits your style and needs. Add seating, lights, and small decorations for a cozy feel. Keep it clean and well maintained for long use. Most of all, enjoy cooking outside and spending quality time with loved ones every day together always.
Trend Analysis:
Where DIY BBQ Patios Are Headed (2026–2029)
Current trends shaping the outdoor kitchen space:
- Modular outdoor kitchens are overtaking custom-built units. Prefab modular systems from brands like Moduluxe and Coyote allow homeowners to snap together pre-finished grill cabinets, side burners, and refrigerator units without any masonry. Sales in this category grew approximately 34% from 2023–2025, and growth is accelerating.
- Outdoor kitchen integration with smart home systems is moving mainstream. Wi-Fi-enabled grills (Traeger, Weber Connect) that sync with smartphones are no longer niche. Expect this to become a baseline expectation within 2–3 years.
- Biophilic design incorporating natural materials, living plants, and water features is driving a shift away from pure concrete-and-steel outdoor kitchens toward warmer, more organic spaces. The “restaurant-style outdoor kitchen” look is being replaced by a “garden kitchen” aesthetic.
- Climate-conscious builds: Composite decking made from recycled materials, reclaimed wood countertops, and solar-integrated pergola roofs reflect a growing demand for sustainability in outdoor living design.
Looking ahead to 2028: AI-assisted design tools will allow homeowners to input their backyard dimensions, budget, and style preferences and receive a fully rendered, materials-listed outdoor kitchen plan in minutes. This will democratize high-quality patio design for first-time builders.
Practical Tips & Expert Insights
These aren’t generic suggestions they’re the lessons that separate successful DIY outdoor kitchen builds from expensive failures:
- Design for workflow, not just appearance. The “work triangle” concept from indoor kitchen design applies outdoors: grill, prep surface, and storage should form a triangle requiring minimal steps to navigate. Most beginners build things that look good in photos but are frustrating to cook in.
- Overestimate your electrical needs. Run outdoor-rated conduit with 20-amp circuits to your patio even if you don’t need it now. Adding electrical after concrete is poured or stone is laid costs 3–5x more than doing it during the initial build.
- Use outdoor-rated materials exclusively. Standard wood glue, interior-grade plywood, and regular grout will fail outdoors within 1–2 seasons. Every material touching an outdoor kitchen needs to be rated for weather exposure this includes your adhesives, grouts, sealers, and fasteners (use stainless steel or hot-dipped galvanized).
- Build for your worst weather, not your best. If you get hard freezes, use frost-resistant tile. If you’re in a hurricane zone, anchor your pergola with concrete footings rather than surface-mount post bases. A patio that survives extreme weather without damage pays dividends for decades.
- Leave utility rough-ins even if you skip the appliance. If you’re not ready for a refrigerator, plumb the space anyway. If you’re not sure about a sink, run the supply and drain lines and cap them. Future-proofing costs almost nothing when you’re already building.
Long-Term Strategy & Sustainability
A DIY BBQ patio is a long-term investment in your home’s value and your family’s quality of life. Studies from the National Association of Realtors consistently show that outdoor kitchens return 60–80% of their cost in home value and the enjoyment value compounds every season you use the space.
Build in phases. The biggest mistake is trying to do everything at once. Phase 1: foundation and cooking station. Phase 2: pergola and lighting. Phase 3: bar, refrigeration, and secondary features. Each phase adds value and usability without the financial or physical strain of doing it all at once.
Choose materials with 20-year horizons. Porcelain tile lasts longer than natural stone in freeze-thaw climates. Powder-coated steel outlasts painted aluminum. 6×6 cedar pergola posts outlast 4×4 pine by decades. Spending 15–20% more on material quality at the start eliminates costly replacements later.
Sustainability matters more every year. Reclaimed brick, FSC-certified lumber, and LED lighting don’t just reduce environmental impact they often produce more characterful, visually interesting results than standard materials. A patio built with reclaimed Chicago brick looks irreplaceable. One built with standard concrete block looks replaceable.
Future Predictions & Innovations
AI-powered outdoor kitchen design: is 2–3 years from being mainstream. Apps will scan your backyard via smartphone camera and generate a full 3D outdoor kitchen layout with a clickable materials list and real-time cost estimates. This will dramatically reduce planning errors for DIYers.
Integrated solar pergola roofs: pergola panels that incorporate flexible solar cells are already available at $3,000–$8,000 installed. As solar cell costs continue dropping (projected 40% decline by 2030), expect solar-integrated pergolas to become a standard option for premium DIY patio builds.
Outdoor refrigeration and cooking appliance efficiency: is improving rapidly. The next generation of outdoor-rated undercounter refrigerators will use roughly 30% less energy than current models, making full outdoor kitchen electrification more practical.
Voice-controlled outdoor grills: are coming. Expect Alexa and Google-integrated grill controllers to become standard on mid-range grills by 2027–2028, allowing temperature adjustments, timers, and monitoring without touching the grill.
Common Mistakes & Hidden Gaps
Beginner mistakes:
- Skipping the permit process. Permanent outdoor structures often require permits. Getting caught means fines and potentially demolishing completed work.
- Ignoring drainage. A flat patio with no slope channels water toward your house foundation. All patios should slope away from structures at a minimum 1/8 inch per foot.
- Buying the wrong grill for a built-in application. Freestanding grills are not the same as drop-in grill inserts. Using a freestanding grill in a cinder block island without proper ventilation is a fire hazard.
Intermediate mistakes:
- Under-speccing the countertop material. Granite tile is great. Standard ceramic tile is not it can crack under thermal stress from grills and will absorb grease over time. Use porcelain, granite, or concrete countertops.
- Forgetting about nighttime use. Many homeowners build beautiful patios that are unusable after dark because they added no lighting. Always plan your lighting at the design stage.
- Building too small. The most common regret among DIY outdoor kitchen builders is that they wish they’d built it bigger. Add at least 25% to your initial counter and seating estimates.
Hidden gaps competitors miss:
- Most BBQ patio articles never address acoustic design how sound travels in outdoor spaces and how to use fencing, planting, and pergola placement to create a more intimate, conversation-friendly atmosphere.
- Almost no guides discuss pest management integration: designing your patio with overhead fans, citronella planting zones, and mosquito misting system rough-ins built in from the start.
- Grease management in DIY outdoor kitchens is almost never covered. A built-in grill needs a grease trap, drainage channel, or at minimum a removable drip tray system failure to plan for this leads to messy, stained patios and fire risk.
FAQ’s About DIY BBQ Patio Ideas
How much does a DIY BBQ patio cost to build?
A basic DIY BBQ patio with a cinder block grill island, paver foundation, and basic lighting typically costs $800–$2,500 depending on materials and grill quality. A full outdoor kitchen with pergola, bar, and refrigeration can run $3,000–$8,000 as a DIY build roughly 40–60% less than hiring a contractor.
Do I need a permit to build an outdoor kitchen?
In most U.S. municipalities, any permanent structure including outdoor kitchens and pergolas requires a building permit. Gas line connections always require a licensed plumber and permit. Check with your local building department before starting any permanent outdoor structure.
What is the best material for an outdoor kitchen countertop?
Porcelain tile and granite tile are the best options for DIY outdoor kitchen countertops. Both are heat-resistant, frost-resistant (when rated), non-porous, and durable. Avoid standard ceramic tile, which can crack under thermal stress, and natural limestone, which stains easily and requires frequent sealing.
How far should a grill be from a house?
The National Fire Protection Association recommends keeping any grill at least 10 feet from any structure, including the house, garage, deck railings, or pergola roof. This applies to both gas and charcoal grills.
Can I build a BBQ patio on a budget under $1,000?
Yes. A paver foundation (approximately $300–$450 for a 10×10 area), a cinder block grill surround ($150–$250), and basic string lighting ($50–$100) can produce a functional, attractive BBQ patio for under $900 in materials if you already own basic tools.

Rameen Zara is the founder of Clarity Nooks, bringing over five years of experience in home décor and interior styling. She shares simple yet practical design ideas that suit real homes and everyday living. Her approach focuses on cozy aesthetics, soft color palettes, and natural textures that create warm, inviting spaces.


