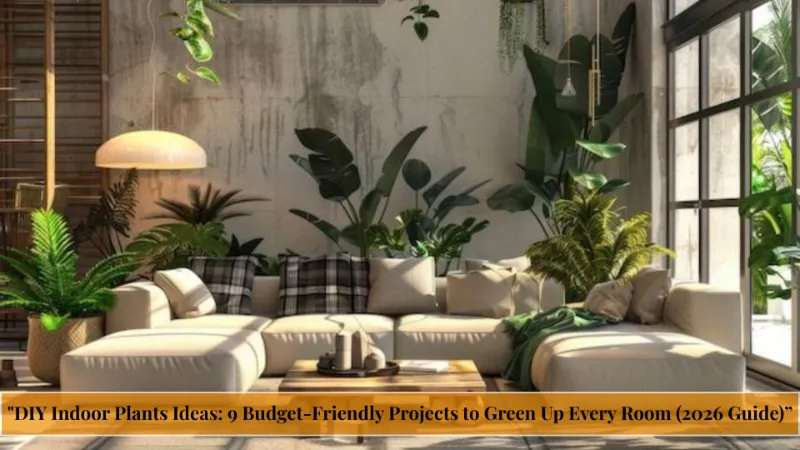
DIY Indoor Plants Ideas: 9 Budget-Friendly Projects to Green Up Every Room (2026 Guide)

Your living room feels flat. The walls are bare, the shelves look empty, and store-bought plant stands cost more than they should. If you’ve been searching for DIY indoor plants ideas that don’t drain your wallet, you’re in the right place.
Here’s the good news: turning your home into a lush, plant-filled sanctuary doesn’t require a big budget or a green thumb. With basic materials like mason jars, rope, and reclaimed wood, you can create indoor plant decor that rivals anything from a boutique nursery.
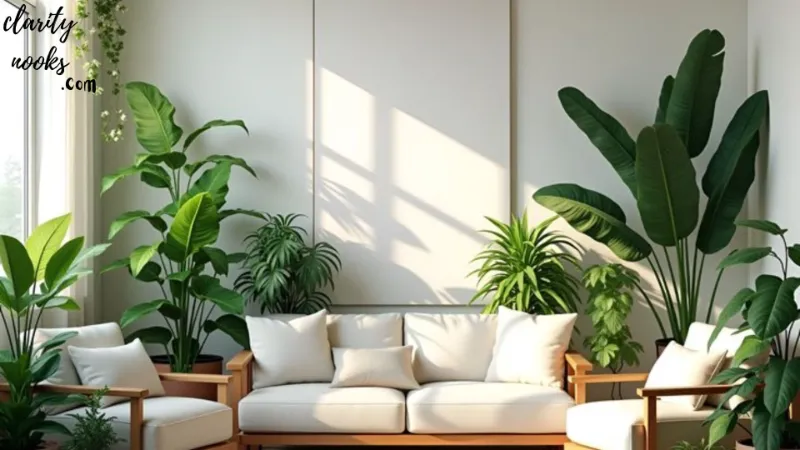
This guide walks you through 9 tested budget-friendly indoor plant projects, complete with materials, costs, step-by-step instructions, and styling tips. Whether you’re a renter with one sunny windowsill or a homeowner with an entire wall to fill, there’s a project here built for your space and skill level.
What Are DIY Indoor Plants Ideas? (Quick Answer)
Definition:
DIY indoor plants ideas are self-made displays, planters, hangers, or stands that let you grow and showcase houseplants using affordable, often repurposed materials, instead of buying pre-made plant furniture.
The appeal goes far beyond saving money. A handmade plant display can be customized to your exact space, your plants’ light needs, and your personal style something mass-produced planters rarely offer. You control the size, color, and placement down to the inch.
Most of these projects take under an hour, use tools you likely already own, and cost a fraction of retail plant furniture. That combination of speed, savings, and personalization is why DIY houseplant decor has become one of the most searched home trends of the year.
Mason Jar Propagation Station
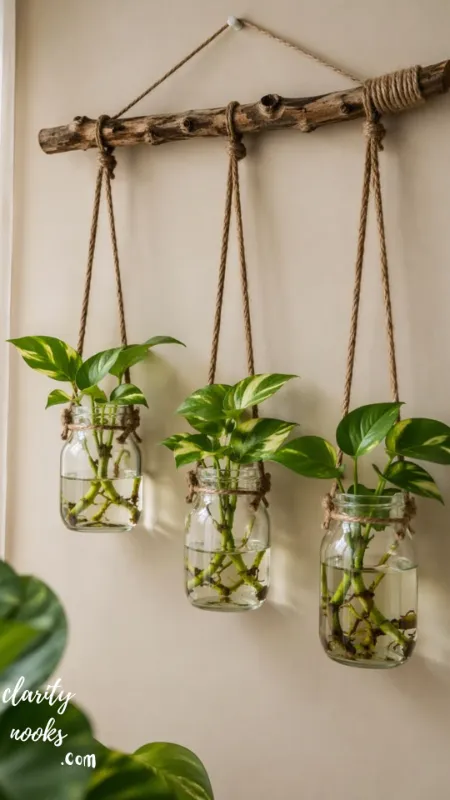
A propagation station turns ordinary plant cuttings into a living display while they grow roots. Line a windowsill with mason jars holding pothos, philodendron, or spider plant cuttings, and you get a science-experiment-meets-decor piece that costs almost nothing to start.
Materials Needed
- 3–5 mason jars (assorted heights)
- Plant cuttings (pothos, philodendron, spider plant, or coleus)
- Wooden or wire jar rack (optional)
- Room-temperature water
💰 Estimated Cost: $8–$15 for jars and a small wire rack; cuttings from an existing plant are free.
Step-by-Step Instructions
- Snip 4–6 inch cuttings just below a leaf node using clean scissors.
- Remove any lower leaves so no foliage sits below the waterline.
- Fill each jar with room-temperature, chlorine-free water.
- Arrange cuttings on a windowsill or wire rack that gets bright, indirect light.
- Refresh the water every 5–7 days; transplant to soil once roots reach 2 inches.
Benefits
This is one of the cheapest ways to multiply your houseplant collection without buying new plants, and it doubles as an educational, low-maintenance centerpiece for kids or beginners learning plant care.
🎨 Decorating Tip:
Cluster jars of different heights on a floating shelf near a north- or east-facing window for a botanical-lab aesthetic that also filters soft natural light.
Explore this topic: DIY Under Stairs Storage Ideas: Smart Ways to Reclaim Hidden Space
Macrame Plant Hangers
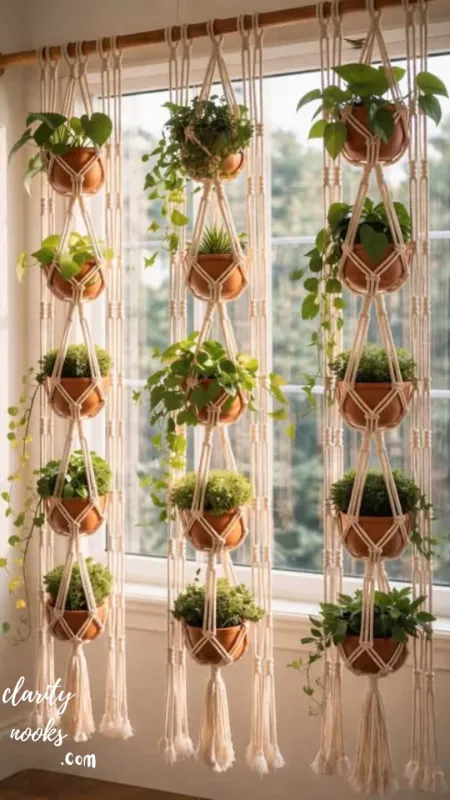
Macrame plant hangers are the fastest way to add vertical greenery without using any floor or shelf space. A single hanger can transform a blank corner into a focal point, and the knotting technique takes less than 20 minutes to learn.
Materials Needed
- 6mm cotton cord, cut into 8 pieces (roughly 6 feet each)
- A wooden or metal ring (2–3 inches)
- A lightweight ceramic or plastic pot
- Scissors and measuring tape
- Ceiling hook rated for at least 15 lbs
💰 Estimated Cost $10–$20 for cord, ring, and a basic ceiling hook.
Step-by-Step Instructions
- Fold the cords in half through the ring, creating 16 working strands.
- Divide strands into 4 groups of 4 and tie an overhand knot 6 inches below the ring.
- Create a square knot pattern for 4–6 inches down each group.
- Combine adjacent strands from neighboring groups and repeat the square knot to form a diamond lattice.
- Gather all strands at the bottom, tie a finishing knot, and trim the tassel evenly.
- Install the ceiling hook into a stud or use a rated drywall anchor before hanging.
Benefits
Vertical storage is the single biggest space-saver for small apartments, and macrame plant hangers add texture and warmth that plastic pots can’t match.
🎨 Decorating Tip:
Mix cord thicknesses across 2–3 hangers at staggered heights to create depth instead of a single flat row.
Find out more: DIY Yoga Room Ideas: Transform Any Space Into Your Perfect Home Sanctuary
Vertical Pallet Garden Wall
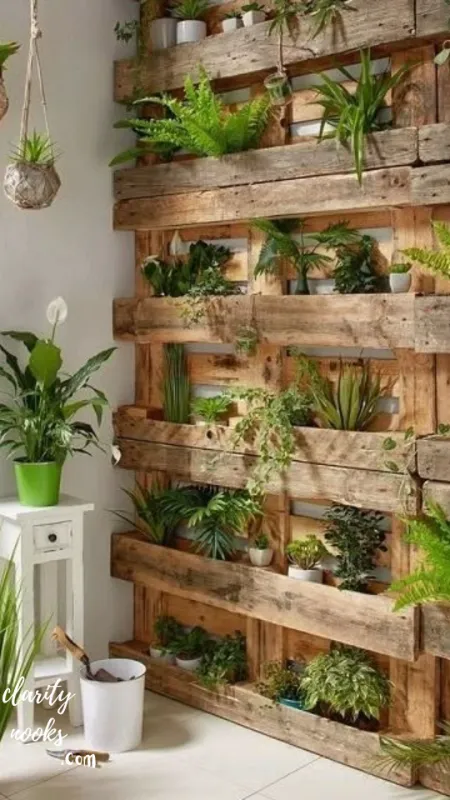
A vertical pallet garden converts an unused wall into a living green feature, ideal for small apartments or renters who want maximum plant impact without sacrificing square footage. One reclaimed pallet can hold 6–8 small plants.
Materials Needed
- 1 wooden shipping pallet (sanded, untreated)
- Landscape fabric or burlap
- Staple gun and staples
- Wood stain or paint (optional)
- Small pots or planting pockets
- Heavy-duty wall anchors
💰 Estimated Cost $0–$25 (pallets are often free; fabric and stain add minor cost).
Step-by-Step Instructions
- Sand the pallet to remove splinters, then stain or paint if desired.
- Staple landscape fabric across the back and bottom of each slat gap to create planting pockets.
- Let the pallet lay flat for 2–3 weeks while plants establish roots, so soil doesn’t spill.
- Fill pockets with potting mix suited to low-water plants like succulents or ferns.
- Once roots take hold, mount the pallet vertically using wall anchors rated for its full loaded weight.
Benefits
This project delivers the biggest visual impact per dollar on this list and works as a natural privacy screen on balconies or patios, in addition to indoor use.
🎨 Decorating Tip:
Stain the wood a warm walnut tone to contrast with green foliage, and stagger plant varieties by height for a layered, garden-wall effect.
Learn more here: DIY Workshop Design Ideas: Smart, Budget-Friendly Setups That Actually Work
Repurposed Ladder Plant Stand
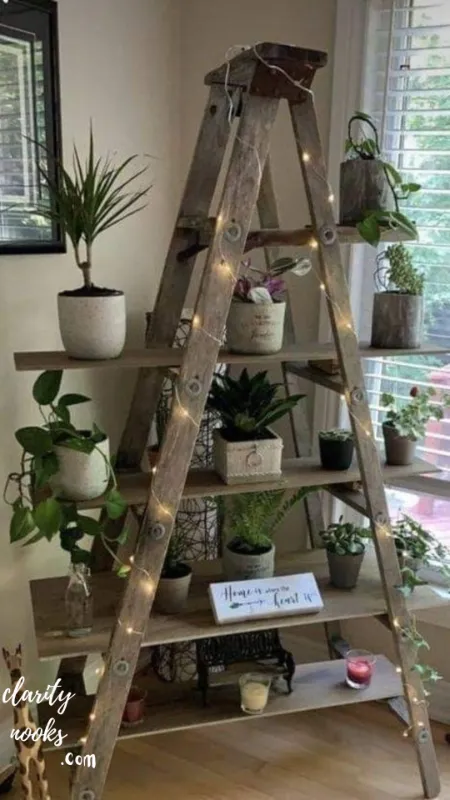
An old wooden ladder, ignored in the garage, makes one of the most versatile DIY plant stands you can build. Each rung becomes a shelf, letting you display 4–6 plants in a single vertical footprint.
Materials Needed
- 1 wooden step ladder or A-frame ladder
- Sandpaper (120 and 220 grit)
- Wood stain, paint, or clear sealant
- 4–6 small to medium plant pots
💰 Estimated Cost $0–$30 (free if repurposed; paint and sealant are the only real cost).
Step-by-Step Instructions
- Sand the ladder to smooth rough edges and remove old paint or splinters.
- Wipe down with a damp cloth, then apply stain, paint, or sealant in thin, even coats.
- Let dry fully for 24 hours before placing any weight on the rungs.
- Position the ladder near a light source that suits your tallest, most light-hungry plant.
- Arrange pots from largest (bottom) to smallest (top) for visual balance and stability.
Benefits
Ladder stands solve the common problem of plants competing for the same windowsill by spreading them across multiple heights, which also improves light exposure for each one.
🎨 Decorating Tip:
Alternate trailing plants like pothos with upright plants like snake plants to create movement and contrast down the ladder’s height.
See the full breakdown: DIY Front Door Entryway Ideas That Instantly Boost Curb Appeal and Welcome Guests
DIY Closed Terrarium in Glass Containers
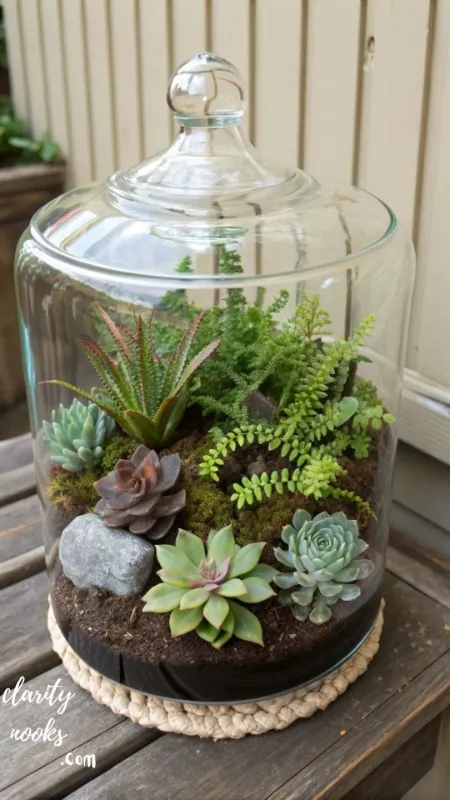
A closed terrarium is a self-sustaining mini ecosystem: it recycles its own moisture, needs watering only every few weeks, and works beautifully for low-light rooms like hallways or bathrooms.
Materials Needed
- A large glass jar, cloche, or fish bowl with a lid
- Small pebbles or gravel
- Activated charcoal
- Potting soil suited to humidity-loving plants
- Moss, ferns, or fittonia (nerve plant)
- Small decorative stones (optional)
💰 Estimated Cost $15–$25 for a container, soil, charcoal, and 1–2 small plants.
Step-by-Step Instructions
- Layer 1–2 inches of pebbles at the bottom of the container for drainage.
- Add a thin layer of activated charcoal to keep the environment fresh and odor-free.
- Add 2–3 inches of potting soil suited to moisture-loving plants.
- Plant moss, ferns, or fittonia, leaving space between plants for growth.
- Mist lightly, seal the lid, and place in bright, indirect light never direct sun.
Benefits
Because the ecosystem largely waters itself through condensation, this is the lowest-maintenance option on the list, ideal for frequent travelers or forgetful waterers.
🎨 Decorating Tip:
Add a tiny figurine or a single piece of driftwood for scale, turning the terrarium into a miniature landscape rather than just a potted plant.
Don’t miss this guide: DIY Front Door Decor Ideas: 9 Creative Ways to Transform Your Entryway on a Budget
Hanging Test-Tube Wall Herb Garden
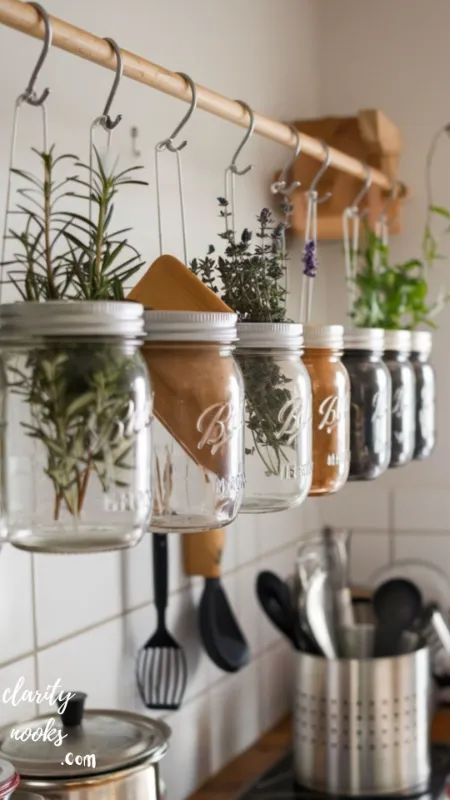
A test-tube herb garden is a compact, hydroponic-style display that suits kitchens with limited counter space. Herbs root and grow directly in water, so there’s no soil mess near your cooking area.
Materials Needed
- 5–6 glass test tubes with rubber stoppers
- A reclaimed wood board (12–18 inches)
- Screws or wire loops to hold each tube
- Herb cuttings (basil, mint, or rosemary root easily in water)
💰 Estimated Cost $18–$30 for test tubes and a wood mounting board.
Step-by-Step Instructions
- Drill holes or attach wire loops to the wood board at even intervals.
- Insert test tubes through the stoppers or loops so they sit at a slight upward angle.
- Fill each tube two-thirds with water.
- Add herb cuttings, submerging at least one leaf node.
- Mount the board near a kitchen window and refresh water weekly.
Benefits
Beyond decor, this project puts fresh herbs within arm’s reach of your cooking space, cutting grocery trips while keeping the kitchen visually interesting.
🎨 Decorating Tip:
Label each tube with a small chalkboard tag so the display doubles as a functional, farmhouse-style herb station.
You May Also Like: DIY Coffee Table Decor: Budget-Friendly Ideas to Style Your Living Room
Hand-Painted Terracotta Pot Collection
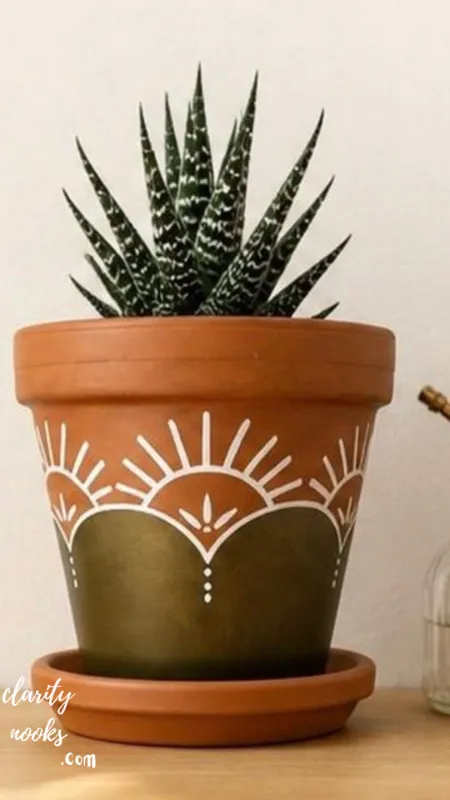
Plain terracotta pots cost very little but look generic on their own. A weekend of painting turns a $2 pot into a design piece that matches your exact color scheme, no matter how specific your taste.
Materials Needed
- Unglazed terracotta pots (assorted sizes)
- Acrylic paint (outdoor-rated for humidity resistance)
- Painter’s tape for patterns
- Clear matte or satin sealant spray
- Paintbrushes (fine and medium tip)
💰 Estimated Cost $12–$20 for 4–5 pots, paint, and sealant.
Step-by-Step Instructions
- Wipe pots clean and let dry completely; terracotta is porous and absorbs paint quickly.
- Apply painter’s tape for geometric patterns, stripes, or color-blocking.
- Paint in thin layers, letting each coat dry for at least 30 minutes before the next.
- Remove tape carefully while the final coat is still slightly tacky for clean lines.
- Seal with 2 light coats of matte or satin spray to protect against moisture and chipping.
Benefits
This is the most budget-friendly way to unify a mismatched plant collection into one cohesive look without buying new planters.
🎨 Decorating Tip:
Pick 2–3 accent colors from your existing decor and repeat them across the pot collection so plants read as a set, not a random assortment.
Floating Window Shelf Display
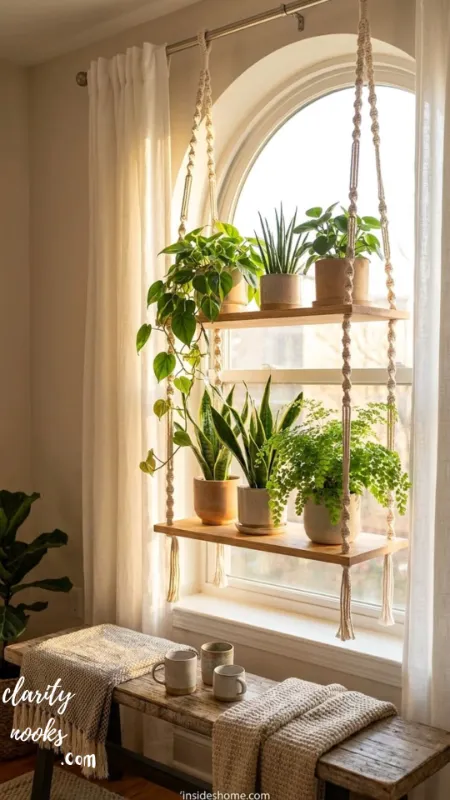
A floating window shelf places plants directly in the path of natural light without blocking the view or taking up floor space, solving one of the most common complaints among renters with small rooms.
Materials Needed
- 2–3 floating wood shelf brackets and boards
- Level and stud finder
- Screws and wall anchors
- Small to medium potted plants
💰 Estimated Cost $20–$40 depending on shelf material and length.
Step-by-Step Instructions
- Use a stud finder to locate solid mounting points around the window frame.
- Mark shelf height using a level, staggering 2–3 shelves at different heights if space allows.
- Install brackets first, securing into studs or rated anchors.
- Attach the shelf board and check it holds level under light pressure.
- Arrange plants by light needs, placing sun-lovers closest to the glass.
Benefits
Shelves positioned directly in a window frame maximize light exposure per plant, often improving growth compared to plants set back on a floor stand.
🎨 Decorating Tip:
Use varying pot heights on the same shelf, and let one trailing plant spill slightly over the edge to soften the hard shelf line.
Self-Watering Planter from Plastic Bottles
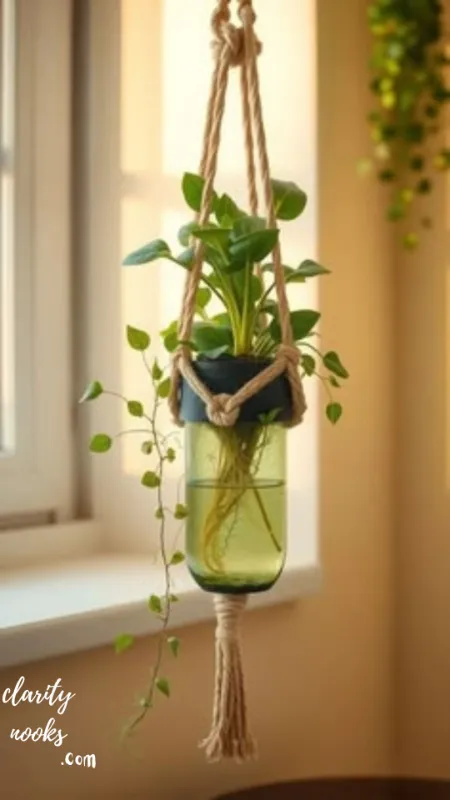
A self-watering planter built from a repurposed plastic bottle is the most practical project on this list for anyone who travels often or regularly forgets to water. It also keeps a bottle out of the recycling bin.
Materials Needed
- 1 large plastic bottle (2-liter or gallon size)
- Utility knife or scissors
- Cotton rope or strip of felt (wicking material)
- Potting soil
- Small plant (pothos or peace lily work well)
💰 Estimated Cost $0–$5 (mostly free using materials on hand).
Step-by-Step Instructions
- Cut the bottle in half; the top becomes the planter, the bottom becomes the water reservoir.
- Poke a small hole in the bottle cap and thread cotton rope or felt through it.
- Invert the top half into the bottom half, cap-down, so the wick hangs into the reservoir.
- Fill the top with potting soil and plant your cutting or small plant.
- Fill the bottom reservoir with water; the wick draws moisture up as the soil dries.
Benefits
This project can keep soil evenly moist for 1–2 weeks unattended, making it ideal for vacations, offices, or anyone building low-maintenance plant care habits.
🎨 Decorating Tip:
Wrap the clear plastic reservoir in twine or fabric to hide the bottle shape, turning a recycled object into a display-ready planter.
Final Thoughts
You don’t need a big budget to fill your home with greenery. These 9 DIY indoor plants ideas from mason jar propagation stations to self-watering bottle planters prove that thoughtful, handmade decor can outperform anything store-bought.
Start with one project this weekend, whether it’s a $5 macrame hanger or a terrarium built from a jar you already own. Once you see how easily a single plant display transforms a room, it’s hard to stop at just one.
Frequently Asked Questions About DIY Indoor Plant Decor
What is the cheapest way to display indoor plants?
The cheapest option on this list is the self-watering bottle planter, which costs close to nothing since it reuses a plastic bottle you already have. A close second is the mason jar propagation station, which only requires jars and a cutting from an existing plant.
Can I make a terrarium without special tools?
A basic closed terrarium needs only a glass container with a lid, pebbles, activated charcoal, soil, and a small plant. No drilling, cutting, or specialized tools are required, which makes it one of the most beginner-friendly projects here.
How do I keep DIY plant hangers from falling?
Always anchor macrame plant hangers into a ceiling stud, or use a drywall anchor rated for at least twice the loaded weight of the pot, soil, and plant combined. Check the hook periodically, since cord can stretch slightly over the first few weeks.
Which indoor plants are best for beginner DIY projects?
Pothos, philodendron, spider plant, and snake plant are the most forgiving choices for DIY indoor plants ideas because they tolerate inconsistent watering, adapt to low and bright light, and propagate easily in water.
Trend Analysis: Indoor Plant Decor in 2026 and Beyond
Biophilic design decorating with living elements to reduce stress and improve air quality remains one of the strongest home trends heading into 2026, with search interest in indoor plant decor continuing to climb as more people work from home and prioritize wellness-focused spaces.
User behavior is shifting from buying pre-styled plant sets toward DIY and upcycled displays, driven largely by short-form video platforms where propagation stations, macrame tutorials, and pallet gardens consistently outperform polished, store-bought plant photography in engagement.
Over the next 2–3 years, expect continued growth in small-space vertical gardening as apartment living rises in cost per square foot, alongside a parallel rise in smart plant care tools moisture sensors and app-based light meters that pair naturally with handmade, budget planters.
Expert Insights & Practical Tips
Water needs shift seasonally: most houseplants need roughly 30–40% less water in winter as growth slows. A common mistake is keeping a summer watering schedule year-round, which leads to root rot far more often than underwatering does.
Group plants by humidity preference rather than by decor style. Ferns, fittonia, and moss terrariums thrive together in a bathroom’s higher humidity, while snake plants and succulents prefer the drier air of a living room or bedroom.
Rotate every pot a quarter turn each week. Plants grow toward their light source, and without rotation, DIY plant displays develop a lopsided, one-sided shape within a few months.
Long-Term Strategy: Building a Sustainable Indoor Garden
Treat your first few plants as a starting investment, not a finished collection. Propagation stations let you multiply pothos, spider plants, and philodendron indefinitely, meaning a single $10 plant can fill an entire pallet garden within a year at zero additional plant cost.
Favor repurposed materials pallets, ladders, bottles, jars over new purchases wherever possible. Beyond the cost savings, upcycled DIY plant stands age with more character than mass-produced furniture and rarely go out of style the way trend-driven decor does.
Budget for one higher-quality item per year, such as a proper grow light, rather than many disposable extras. A single $40–$60 grow light extends healthy growth through winter for an entire room of plants, paying for itself compared to replacing light-starved plants annually.
Future Predictions & Innovations
Expect wider adoption of AI plant identification and care apps that diagnose issues from a photo and recommend watering schedules, making it easier for DIY plant owners to catch problems before they become fatal.
Smart, sensor-equipped self-watering planters an upgraded version of the bottle-wick project in this guide are likely to become mainstream and affordable, blending the DIY aesthetic with app-based moisture monitoring.
Sustainable materials will play a larger role, with biodegradable planting pockets and recycled-plastic wicking systems replacing some of today’s improvised materials, while still keeping the same low-cost, build-it-yourself spirit.
Common Mistakes & Hidden Gaps
Beginner Mistakes
Overwatering is the single most common cause of failure, especially in closed terrariums and self-watering planters where excess moisture has nowhere to evaporate. Skipping drainage holes in DIY containers is a close second.
Intermediate Mistakes
More experienced DIYers often underestimate weight when mounting hanging planters or pallet gardens, using standard picture hooks instead of stud-anchored hardware rated for wet soil weight, which can double once watered.
Hidden Gaps Competitors Miss
Most articles on this topic skip acclimation moving a cutting or new plant gradually into brighter light over 1–2 weeks instead of placing it directly in full sun, which prevents leaf scorch that otherwise gets blamed on ‘bad luck’ rather than sudden light exposure.
Rameen Zara is the founder of Clarity Nooks, bringing over five years of experience in home décor and interior styling. She shares simple yet practical design ideas that suit real homes and everyday living. Her approach focuses on cozy aesthetics, soft color palettes, and natural textures that create warm, inviting spaces.