
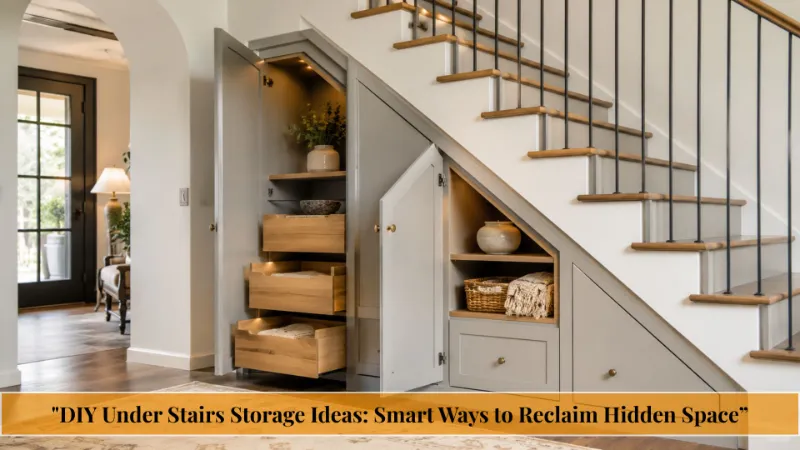
DIY Under Stairs Storage Ideas: Smart Ways to Reclaim Hidden Space

That awkward triangular space under your staircase is one of the most underutilized areas in any home. Most homeowners fill it with a random pile of shoes, forgotten boxes, or a vacuum cleaner that barely fits. Yet this same space properly converted can hold hundreds of pounds of organized storage, a stylish reading nook, a functional home office, or even a discreet pet haven. The potential is enormous, and the transformation doesn’t have to cost a fortune.
Whether you live in a compact apartment or a spacious family home, under stairs storage solutions can dramatically reduce clutter and add measurable value to your property. Interior designers often cite this space as one of the highest ROI improvements per square foot. And with the right DIY under stairs storage ideas, you can tackle the project yourself over a weekend no contractor required.
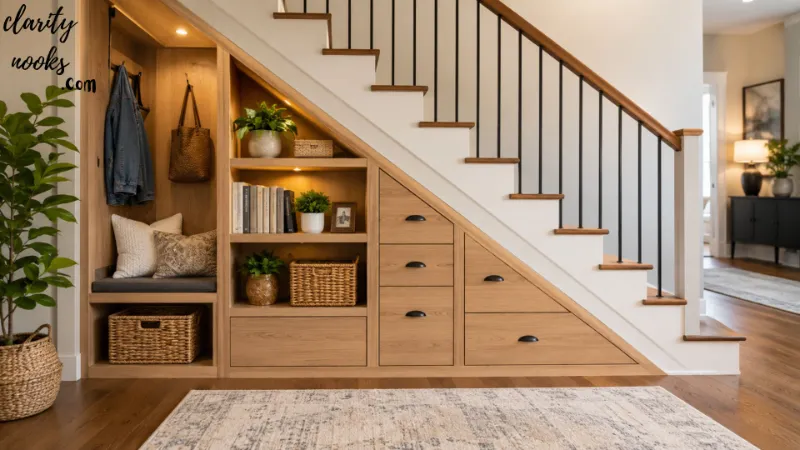
In this guide, you’ll discover practical, budget-friendly, and genuinely creative ways to transform your stair space. Each idea includes a step-by-step guide, materials list, estimated cost, and real-world examples. Whether you’re a beginner with basic tools or a seasoned DIYer ready for a more ambitious build, there’s something here for every skill level and budget.
📌 Featured Snippet Answer:
What is the best DIY under stairs storage idea?
The best DIY under stairs storage idea depends on your space and needs. Pull-out drawers maximize depth, built-in shelving suits books and display items, and a custom closet works best for coats and cleaning supplies. For small spaces, a combination of open shelves and hidden drawers offers the most flexibility.
Built-In Pull-Out Drawers Maximum Storage in Minimum Space
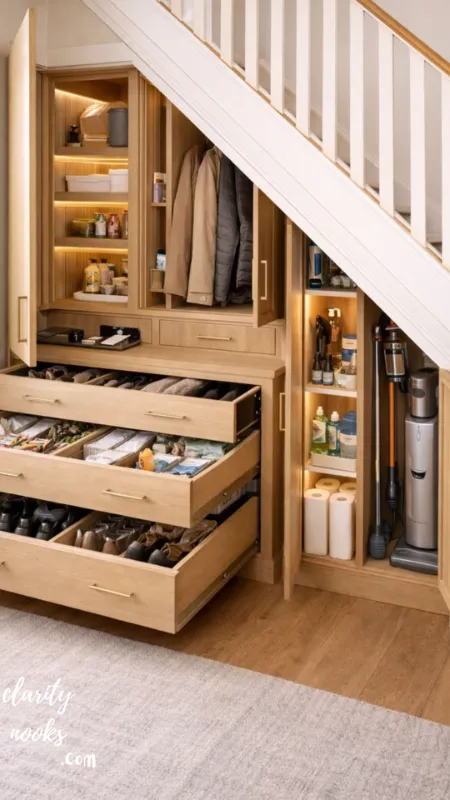
Pull-out drawers under stairs are the gold standard of stair storage. Unlike open shelves that collect dust, drawers keep everything concealed, organized, and easily accessible. They work especially well in the lower, shallower sections of the staircase where the ceiling height is too low for standing shelves.
The key to a successful build is mapping your stair risers and using each riser as the front face of a drawer. This creates a seamless, flush look that appears built into the architecture of your home. Face-frame construction using plywood carcasses gives you a sturdy, affordable result that looks custom-made.
Real-life example: A London homeowner with a 2-bedroom terraced house replaced a cluttered coat cupboard under the stairs with eight custom pull-out drawers. The result? Over 40 cubic feet of organized storage for seasonal clothing, shoes, and household supplies all within the existing footprint.
Materials Needed
- 3/4-inch plywood for drawer boxes and carcasses
- Full-extension drawer slides (soft-close recommended)
- MDF or solid timber for drawer fronts
- Pocket hole jig and screws
- Wood glue, sandpaper, primer, and paint or veneer
- Handle hardware or push-to-open mechanisms
Step-by-Step Guide
- Measure each stair riser height, width, and depth carefully.
- Cut plywood carcasses to fit each drawer cavity.
- Install carcasses flush against the risers and secure to the floor.
- Build drawer boxes from 1/2-inch plywood using dado joints or pocket screws.
- Attach full-extension slides to carcass sides and drawer boxes.
- Cut and attach drawer fronts aligned with the stair risers.
- Sand, prime, and paint to match your interior decor.
Estimated Cost & Benefits
Estimated cost: $300–$700 (DIY). Professional installation can cost $1,500 $3,000+
Benefits: Completely hidden storage, no wasted depth, adds significant resale value, and looks architecturally integrated.
💡 Pro Decorating Tip:
Paint drawer fronts the same color as your skirting boards for a seamless, designer finish. Push-to-open mechanisms eliminate the need for handles and create an ultra-clean, modern look.
Learn More Here: Inspiring DIY Staircase Decor Ideas for Every Style & Budget (2026)
Open Shelving System Display and Access in One
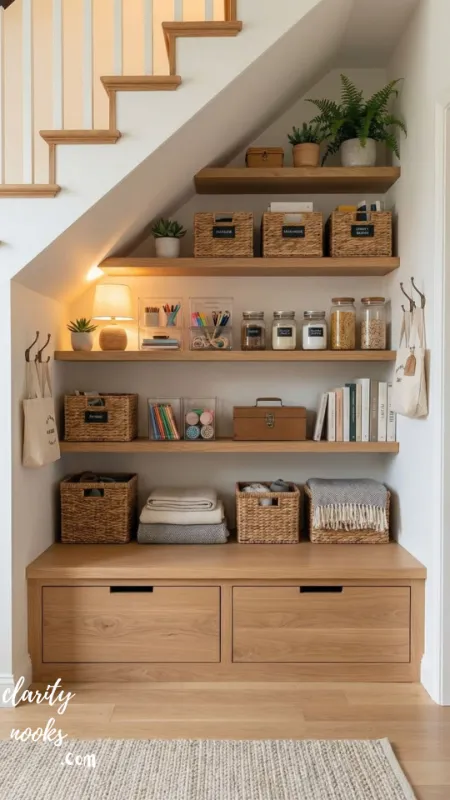
Open shelving under the stairs is the quickest, most affordable transformation you can make. It turns an underutilized void into a functional display space for books, plants, baskets, or decorative items. It’s particularly popular in living rooms where the staircase is a focal feature.
The trick is to use the varying heights across the staircase creatively. Taller shelves near the center of the staircase work well for large storage baskets and books, while the shallower end suits framed photos, small plants, and decorative objects. Installing a simple LED strip light transforms the whole unit into a statement wall feature.
Materials Needed
- Adjustable shelf brackets or fixed shelf supports
- Melamine-coated or solid wood shelving boards
- Spirit level, drill, and wall anchors
- Paint or wood stain
- Optional: LED strip lighting, wicker baskets
Step-by-Step Guide
- Remove any existing cladding or door from the stair void.
- Map out shelf positions to fit the sloping ceiling line.
- Install brackets at stud points or using appropriate wall anchors.
- Cut shelves to the correct width at the angled ends.
- Sand all edges smooth and apply your chosen finish.
- Add lighting and style with baskets and books.
Estimated cost:
$80–$250 depending on materials. One of the most beginner-friendly projects on this list.
Explore this topic: DIY Home Decor Ideas That Actually Transform Your Space
Integrated Coat Cupboard Hallway Clutter Solved
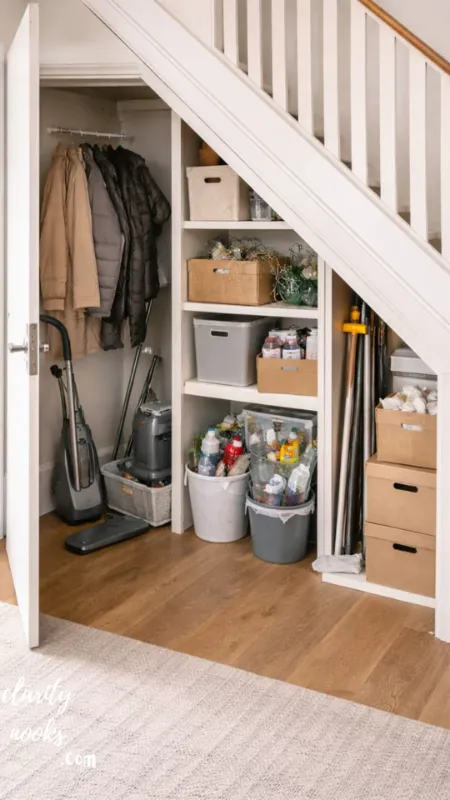
If your staircase is in or near the hallway, converting the space into a built-in coat cupboard is a practical game-changer. A well-designed closet here handles coats, bags, umbrellas, shoes, and sports equipment removing the chronic clutter that plagues most hallways.
The secret to a functional coat cupboard is planning the interior layout before building the enclosure. A combination of hanging rail, shelf, and shoe rack makes the most of every inch. Adding a door with a full-length mirror on the back side is a clever space-saving trick that adds a premium feel.
Materials Needed
- MDF or plywood for walls and door frame
- Solid door or frameless door with hinges
- Hanging rail, shelf boards, and shoe storage rack
- Mirror (optional, for door back)
- Paint, handles, and coat hooks
Estimated cost:
$200–$500. Mini case study: A family in Manchester installed this over one weekend and freed up their hallway entirely, which also helped their home sell 12% faster than comparable properties on the same street.
Find out more: DIY Home Office Ideas That Actually Work Smart Setups for Every Space and Budget
Under-Stairs Home Office A Productive Nook in Dead Space
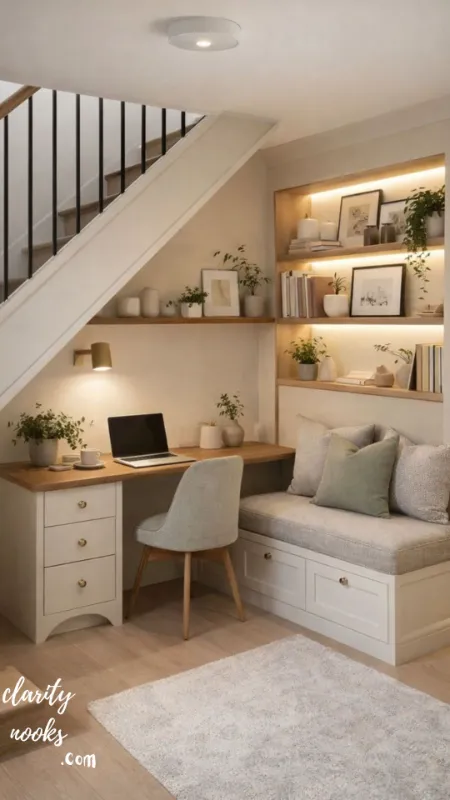
The rise of remote work has made under stairs home office ideas incredibly popular. A compact desk, floating shelves, and a task light turn this small space into a surprisingly productive work nook. It creates a psychological boundary between work and relaxation in smaller homes.
The ideal setup uses a floating L-shaped or straight desk that fits the widest part of the staircase cavity. Cable management is critical here route cables through a grommet in the desk surface and keep them off the floor. Installing a sliding or bi-fold door lets you completely close off the office when the workday ends.
Materials Needed
- Wall-mounted floating desk (custom cut to fit)
- Monitor arm to save desk surface space
- Floating shelves above the desk
- Cable tray and desk grommet
- Task lighting or LED strip under the stairs ceiling
- Optional: barn door or bi-fold door for closing off the space
Estimated cost:
$150–$400. The monitor arm alone saves 18 inches of desk space essential in a compact nook.
🔍 Voice Search Optimization Common question:
“How do I turn the space under my stairs into a home office?”
This section directly answers that query, making it suitable for featured snippet capture and AI-generated answers.
See the full breakdown: DIY Entryway Decor Ideas That Make a Stunning First Impression
Wine Rack and Drinks Storage A Designer Touch for Entertainers
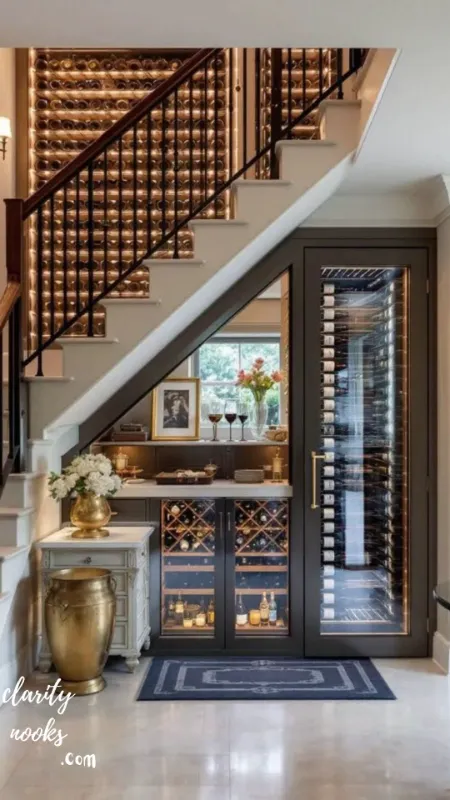
For homeowners who love to entertain, converting the under-stair space into a wine rack or drinks cabinet creates a sophisticated focal point. The naturally cool, dark environment under stairs is actually ideal for short-term wine storage temperature fluctuations are minimal compared to open kitchen areas.
A combination of horizontal wine bottle slots, glass hangers, and a small drinks trolley shelf creates a complete home bar setup. Use reclaimed wood or dark-stained timber for an upscale aesthetic. Add spotlighting pointed at the bottles and the whole feature becomes a conversation piece.
Materials Needed
- Reclaimed timber or dark-stained MDF for the frame
- Pre-made modular wine rack inserts
- Stemware rail for hanging wine glasses
- Spotlight or LED puck lights
- Optional: small bar fridge (requires electrical point)
Estimated cost:
$120–$400 for a wine rack setup. Adding a bar fridge increases this to $350–$800 depending on appliance cost.
Read our expert tips: DIY Home Decoration Ideas to Add a Personal Touch to Your Space
Children’s Reading Nook The Most Loved Transformation
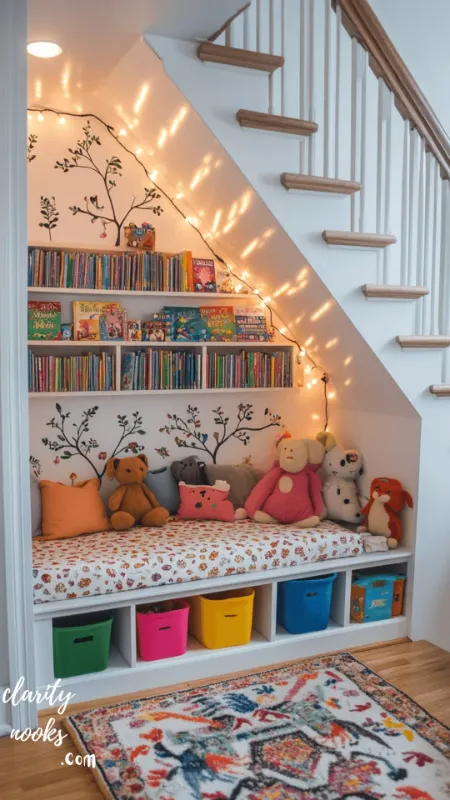
One of the most charming and popular under stairs storage ideas is a dedicated children’s reading nook. The enclosed, cave-like quality of the space naturally appeals to children’s sense of adventure. A cushioned bench with under-seat storage, surrounded by built-in bookshelves, creates a magical corner that kids genuinely love and use.
The under-seat storage is the practical bonus use it for toys, art supplies, or books that aren’t currently in rotation. Line the walls with colorful low shelving at child height, and add a curtain rather than a door to maintain the den feel while being safe and accessible.
Materials Needed
- Plywood platform with lid-up storage beneath
- Foam cushion (cut to size) and fabric cover
- Low bookshelves (child-height)
- String lights or fairy lights
- Blackboard paint for one wall panel (optional but loved by kids)
Estimated cost:
$100–$300. One of the highest-impact, lowest-cost transformations on this list.
Don’t miss this guide: Modern DIY Walk In Closet Ideas for Organized and Elegant Storage
Shoe Storage Station The Hallway Hero
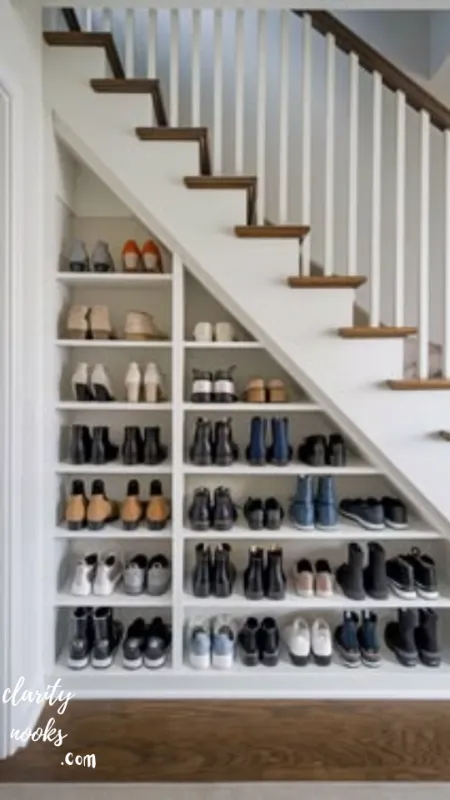
Under stairs shoe storage is one of the most searched DIY projects online, and for good reason. A family of four can easily accumulate 20–30 pairs of shoes with nowhere to put them. The under-stair space, positioned near the front door, is the perfect location for a dedicated shoe storage cabinet or rack system.
The best designs combine angled shoe shelves (which use space 30% more efficiently than flat shelves) with a bench at the top for sitting while putting on shoes. Adding a removable drip tray on the bottom shelf protects the floor from muddy or wet footwear.
Materials Needed
- Angled shelf supports or custom-cut angled MDF shelves
- Seat bench top with upholstered cushion
- Ventilated door fronts to prevent odors
- Waterproof base tray or rubber matting
Estimated cost:
$150–$350. Angled shelves hold up to 50% more shoes than flat shelves of the same footprint.
See our latest insights: DIY Party Decor Ideas That Add Color and Style to Any Celebration
Laundry and Cleaning Supply Closet The Functional Workhorse
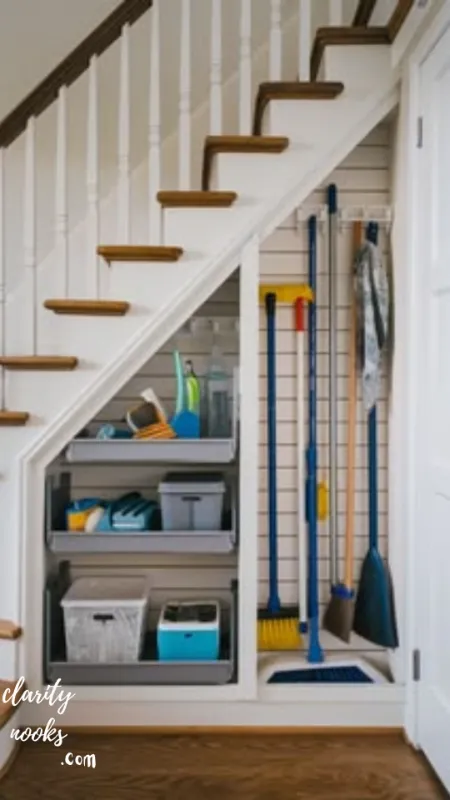
In many homes, cleaning supplies, the vacuum cleaner, and ironing board have no logical home. They get tucked behind sofas, stuffed under beds, or left in plain sight. Converting the under-stairs void into a dedicated cleaning closet solves this immediately and keeps your home looking tidy.
A well-designed cleaning closet includes a tall vertical space for a vacuum and mop, narrow shelves for cleaning products, hooks for dustpans and brushes, and a power outlet for charging cordless appliances. If your plumbing allows, you can even add a small utility sink or washer-dryer connection.
Materials Needed
- Solid door with magnetic catch
- Adjustable shelves for cleaning supplies
- Wall-mounted hooks and pegboard for hanging items
- Electrical outlet (may require an electrician)
- Waterproof flooring inside the closet
Estimated cost:
$100–$350 for a standard cleaning closet.
Read the next article: DIY Sun Room Ideas to Add Style, Comfort, and Natural Light
Built-In Bookcase A Statement Wall That Stores
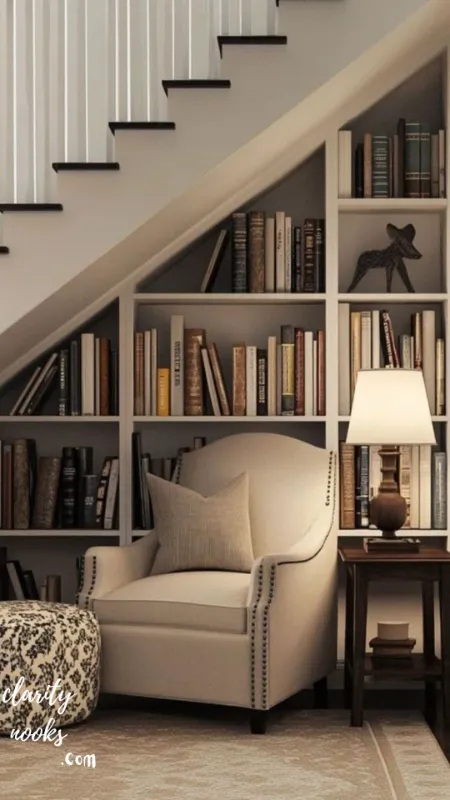
For booklovers, an under-stairs built-in bookcase is a dream come true. The staggered heights across the staircase naturally create visual interest that flat bookshelves can’t replicate. When done well, this transformation becomes the defining feature of an entire room.
Use the tallest section for oversized art books and plants, mid-height sections for novels and reference books, and the lowest shelves near the floor for decorative baskets and children’s books. Painting the back of each shelf bay in a contrasting color adds depth and a high-end custom feel.
Materials Needed
- Plywood or MDF for the frame and shelf boxes
- Adjustable shelf pins and shelves
- Primer, paint, and a contrasting back panel color
- Optional: glass-front doors for the lower sections
Estimated cost:
$200–$600 depending on size and materials. The contrasting back panel paint trick costs almost nothing but creates a premium result.
Must-Read Articles: DIY Yoga Room Ideas: Transform Any Space Into Your Perfect Home Sanctuary
Pet Station A Purpose-Built Corner for Your Furry Family Member
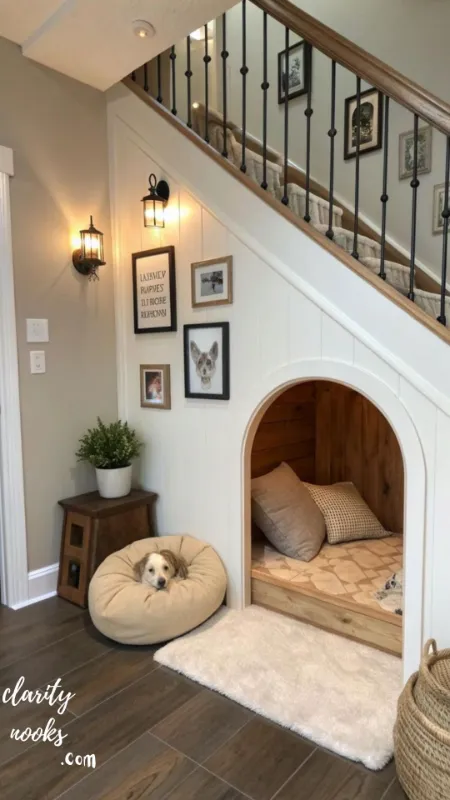
The enclosed, snug environment under the stairs makes an ideal pet area. A built-in pet bed nook with integrated food and water bowl storage gives your dog or cat a private, cozy retreat while keeping pet supplies organized and out of sight.
For dogs, add a removable, washable cushion base and a small gate or bar door rather than a solid door dogs prefer to see their surroundings. Store leashes, poop bags, and grooming supplies in a small drawer unit alongside the pet area. For cats, add a cat flap to the door for self-access.
Materials Needed
- Custom-framed pet nook opening
- Washable cushion or dog bed
- Bar-style gate door or curtain
- Small drawer unit for pet supplies
- Food bowl platform at appropriate height
Estimated cost:
$80–$250. One of the most unique and appreciated under stairs projects for pet owners.
You May Also Like: DIY Workshop Design Ideas: Smart, Budget-Friendly Setups That Actually Work
Hidden Home Filing System Say Goodbye to Paper Chaos
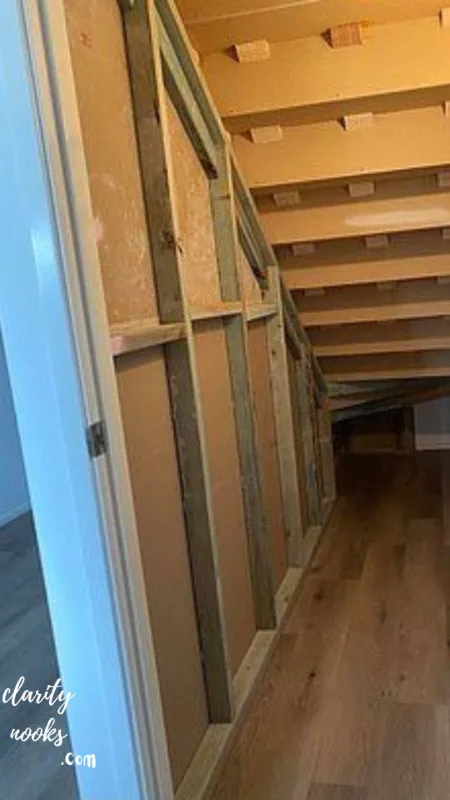
Paper clutter is a silent enemy in most homes. Bills, warranties, school letters, and medical records pile up on kitchen counters or dining tables. A discreet filing cabinet system built under the stairs puts all documents in one logical, lockable location and completely out of sight.
Use a combination of lateral filing drawers for hanging files at the deepest part of the staircase, and floating shelves above for binders, folders, and a small printer. Adding a fold-down shelf creates a quick-access surface for signing documents without needing a full desk.
Materials Needed
- Lateral filing drawer units (pre-made or custom-built)
- Hanging file frames and folders
- Fold-down shelf with lid support brackets
- Lock for the filing drawer
Estimated cost:
$150–$400. A lockable version is essential if you’re storing sensitive documents.
Modular Cube Storage System The Flexible, Budget-First Option
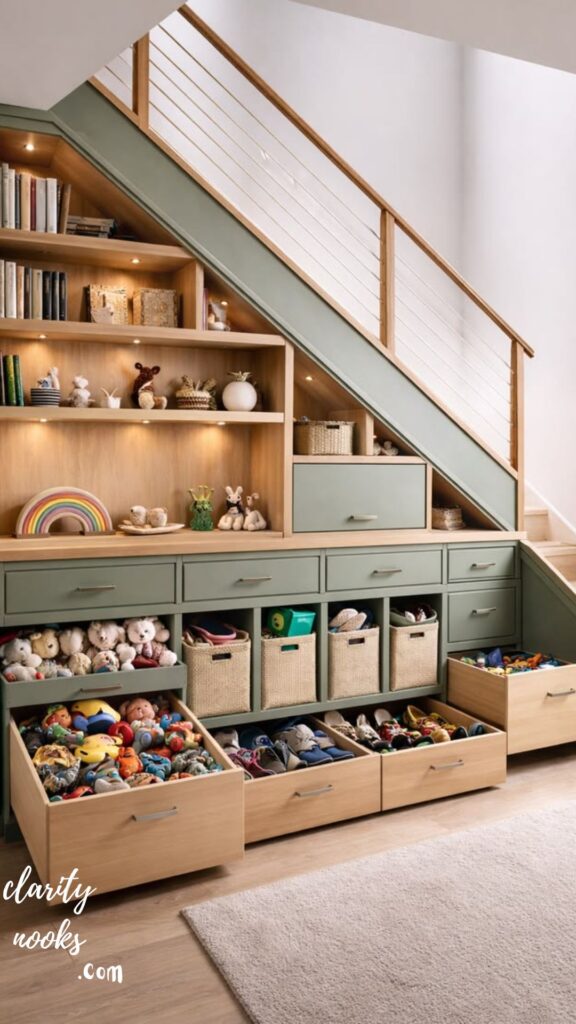
If you’re not ready to commit to a permanent built-in, a modular cube storage system offers maximum flexibility at minimum cost. Pre-made cube units from IKEA, Walmart, or similar retailers can be configured to fit the staircase space perfectly and rearranged or removed when your needs change.
The key is choosing cube units that align well with your stair height and adding door inserts for some cubes and open faces for others. This creates a mix of hidden and accessible storage. Use the same unit across different rooms for a cohesive, intentional look throughout your home.
Materials Needed
- Pre-made cube units (e.g., IKEA KALLAX or similar)
- Door inserts or fabric drawer inserts
- Anti-tip straps for safety
- Cable management clips if adding lighting
Estimated cost:
$50–$200 the most affordable option on this list. Perfect for renters who can’t make permanent changes.
Conclusion
Every staircase hides an opportunity. Whether you choose pull-out drawers, a children’s reading nook, a home office, or a shoe station, transforming your under stairs space is one of the smartest home improvement projects you can tackle. The return on effort is high, the costs are manageable, and the daily impact on your home’s organization and feel is immediate.
DIY under stairs storage ideas range from simple weekend shelf installations to more involved built-in projects but all of them start with the same first step: measuring your space and identifying what you need most. Pick one idea from this guide, gather your materials, and turn that neglected triangle under your stairs into the most functional corner of your home.
Trend Analysis: Under Stairs Storage in 2026–2028
The home storage market has undergone a significant shift since 2022. Driven by the explosion of remote work, smaller urban living spaces, and the ongoing influence of decluttering movements like Marie Kondo’s Kon Mari Method, homeowners are increasingly looking inward literally for storage solutions. The space under the staircase has moved from an afterthought to a central consideration in interior design planning.
Current data from Houzz and the National Kitchen and Bath Association shows that built-in storage customization ranks as one of the top three home improvement priorities for homeowners in 2024–2025. Under stairs conversions are specifically cited as high-value improvements in pre-sale home staging reports. The trend toward multifunctional living spaces means that a single under-stairs zone is now expected to serve two or three purposes simultaneously for example, a pet station that doubles as a cleaning supply closet.
Looking ahead to 2026–2027, expect to see smart storage integration become standard. This includes built-in wireless charging pads, IoT-connected locks on filing systems, and motion-sensor LED lighting that activates automatically when a drawer opens. The aesthetic direction is moving toward seamless, handle-free designs with flush fronts that completely conceal the storage function until opened.
Expert Insights: What Interior Designers Know That Most Homeowners Don’t
Professional interior designers consistently point to one mistake homeowners make above all others in under-stairs projects: they build storage without a zone map. A zone map assigns each category of item to a specific location before any construction begins. This prevents the most common failure scenario where a new storage system looks beautiful but doesn’t actually match how the family uses the space.
The second expert insight is about depth versus height. Most homeowners focus on maximizing height in their under-stairs build, but depth is actually the more valuable dimension. Deep pull-out drawers hold 60% more volume than the equivalent shallow shelving. Always measure the full depth at the widest point of your staircase cavity you may find it’s deeper than you assumed.
Finally, experienced designers always recommend planning for lighting from day one. It’s far cheaper and easier to run cable conduit and add an electrical junction point before building the frame than to retrofit lighting afterward. Even a basic LED strip on a motion sensor transforms the usability of any under-stairs space significantly.
📋 Expert Checklist: Before You Build 1. Draw a zone map before purchasing any materials. 2. Measure depth at multiple points along the staircase (depths vary). 3. Check for plumbing, electrical, or structural elements inside the wall before cutting. 4. Plan your lighting and cable routing before framing. 5. Prime and paint all interior surfaces before assembly it’s nearly impossible afterward.
Long-Term Strategy: Building Under-Stairs Storage That Grows With You
The best under-stairs storage systems are those built with long-term flexibility and scalability in mind. A fixed, non-adjustable shelf unit built for a family with young children will feel completely wrong in ten years when those children are teenagers. The smart long-term strategy is to combine fixed structural elements with modular interiors that can be reconfigured as your needs evolve.
Invest in quality in two areas: the drawer slides and the door hinges. These are the components that take daily wear. Cheap drawer slides fail within 2–3 years under regular use. Specifying full-extension, soft-close, 75kg-rated slides from the start eliminates the frustration of replacing components later. Similarly, heavy-duty European-style hinges on door fronts will outlast the lifetime of the rest of the build.
From a sustainability perspective, choose FSC-certified plywood or solid timber over MDF where possible. While MDF is cheaper, it’s less durable, cannot be easily repaired, and is less eco-friendly than responsibly sourced timber. A solid timber build can be sanded back and refinished multiple times over decades meaning you never need to replace it, just refresh it.
Future Predictions: Where Under Stairs Storage Is Heading
The near-future of under-stairs storage is being shaped by two forces: AI-powered home design tools and advances in prefabricated modular systems. Tools like IKEA’s AI design planner and emerging startups in the digital-to-physical space already allow homeowners to photograph their staircase and receive a fully configured, costed storage design within minutes. By 2027, expect these tools to generate cut-lists and order flat-pack components automatically.
Smart home integration will deepen significantly. Future under-stairs storage units will include biometric locks for secure filing zones, automated inventory scanning (using RFID tags) that tracks what’s stored where, and temperature-controlled zones for wine or medication storage all controllable via smartphone. The staircase storage unit will effectively become a node in your home’s digital infrastructure.
On the design front, invisible storage will become the dominant aesthetic. The goal is surfaces that appear to be blank walls or standard paneling until a gentle push reveals a hidden drawer or door. This direction toward concealment reflects a broader move in interior design toward calm, uncluttered interiors where storage is felt rather than seen.
Common Mistakes and Hidden Gaps: What Most Guides Don’t Tell You
The most costly beginner mistake in DIY under stairs storage is failing to check for existing services. Behind the drywall or plasterboard of your stair void may be electrical cables, gas pipes, water pipes, or even structural timber elements you cannot remove. Always use a stud finder and cable detector before cutting into any wall. This single step prevents potentially dangerous and expensive mistakes.
Intermediate DIYers often underestimate the importance of ventilation in fully enclosed storage builds. A completely sealed cupboard traps moisture, which leads to mildew, warped wood, and damaged stored items within 12–18 months. Even a simple ventilation grille at the top and bottom of a door allows sufficient airflow to prevent moisture buildup.
One gap that almost all competitor guides miss is the issue of acoustic impact. Hollow under-stairs spaces, when converted with hard surfaces only, can amplify footstep sound and create a noticeable echo. Adding a layer of acoustic insulation recycled denim batts or mineral wool to the interior walls before cladding them significantly reduces noise transmission, making the adjoining rooms noticeably quieter.
⚠️ Mistakes to Avoid Summary:
Never skip the cable/pipe check before cutting. Always plan ventilation into fully enclosed builds. Don’t underestimate the acoustic impact of hollow storage cavities. Avoid using cheap drawer slides they’re the component that fails fastest. Never skip priming interior surfaces before assembling the unit.
Frequently Asked Questions About Under Stairs Storage
How much does it cost to convert under stairs space into storage?
DIY conversion costs range from $50 to $700 depending on the complexity of the project. Simple open shelving costs as little as $50–$150 in materials, while a full custom built-in drawer system runs $300–$700. Professional contractors typically charge $1,500–$4,000+ for the same work.
Do I need planning permission to convert under stairs space?
In most cases, no planning permission is required for under-stairs storage conversions as they are considered internal alterations. However, if your home is listed or in a conservation area, check with your local planning authority. If you’re adding electrical work, a certified electrician must sign off the installation in most jurisdictions.
What is the most space-efficient under stairs storage solution?
Pull-out drawers are consistently the most space-efficient option, using the full depth of the staircase cavity while keeping contents organized and accessible. Combined with angled shoe racks and hanging rails, they offer the best cubic foot utilization of any under-stairs storage format.
How long does a DIY under stairs storage project take?
A simple open shelf installation can be completed in a single afternoon 4 to 6 hours. A full built-in drawer and closet system typically takes a weekend of 10–16 hours for an experienced DIYer. Factor in additional time for painting and allowing coats to dry between sessions.
Rameen Zara is the founder of Clarity Nooks, bringing over five years of experience in home décor and interior styling. She shares simple yet practical design ideas that suit real homes and everyday living. Her approach focuses on cozy aesthetics, soft color palettes, and natural textures that create warm, inviting spaces.