

DIY Gaming Room Ideas for Small Spaces: Maximize Comfort & Style in Your Setup
Most gamers spend years dreaming about the perfect setup ideal lighting, zero cable chaos, immersive audio and then do nothing because they assume it costs a fortune or requires ripping walls apart. Here’s the truth: the best gaming rooms aren’t built with unlimited budgets. They’re built with smart planning, layered upgrades, and a clear vision. And you can start today, in the room you already have.
This guide covers 10 deeply actionable DIY gaming room ideas that go beyond the usual ‘buy RGB lights’ advice. Whether you’re working with a dedicated spare room, a bedroom corner, or a shared apartment space, these ideas are designed to help you build something that genuinely improves how you play and how you feel while playing.
A DIY gaming room is a self-designed gaming space built using affordable upgrades, smart furniture choices, and customized decor to maximize comfort, performance, and immersion without needing professional installation or a large budget.
Start With a Spatial Audit Not a Shopping Cart
The single biggest mistake gamers make when building their setup is buying things before understanding their space. Before you spend a dollar, spend 30 minutes mapping your room. Measure every wall, note where your power outlets are, identify your natural light sources, and figure out where sound naturally echoes or bounces.
Take the real-life example of Marcus, a content creator in a 10x11ft bedroom. Instead of buying a pre-made gaming desk, he mapped his room first and realized an L-shaped configuration against the back-left corner would give him 40% more usable surface area. He built the desk himself for $120 using IKEA tabletops and Alex drawer units a setup that would cost $600+ pre-built.
Pro Tip:
Use free tools like Room Sketcher or even graph paper to plan your layout before buying anything. Include monitor arm swing radius and chair rollback space in your measurements.
A spatial audit also helps you avoid layout regrets. Monitors placed facing windows create glare. Desks too close to the door interrupt focus. Speakers at unequal distances from your ears ruin stereo imaging. Knowing your space first means every purchase counts.
Must Read: Modern DIY Terrace Design Ideas for Comfortable Outdoor Living
Build or Hack Your Desk Instead of Buying Pre-Built
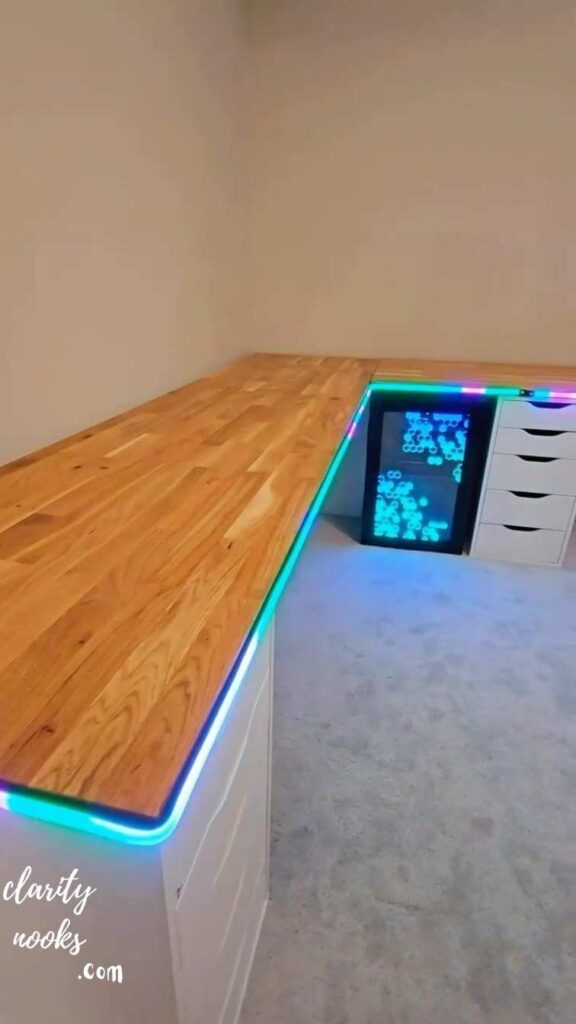
The gaming desk market is full of overpriced products with mediocre build quality. A far better approach and one seasoned builders swear by is the IKEA ‘Linnmon hack’ or the ‘butcher block countertop’ method. Both give you a stronger, larger, and more customizable surface for a fraction of the cost.
The butcher block method involves purchasing an unfinished wood countertop (available at IKEA, Home Depot, or IKEA-equivalents globally), sanding it smooth, applying Danish oil or polyurethane finish, and mounting it on adjustable steel legs. The result is a desk that looks premium, resists scratches, and can be any size you want. A 6-foot version typically costs $150–$180 total.
Width matters more than depth. A 60-inch wide surface lets you run a triple monitor or ultrawide setup plus peripherals without crowding. Integrated cable management grommets, a small monitor riser shelf, and a headphone hook (mountable for $8) complete the picture. None of these require woodworking expertise just a drill and an afternoon.
Build Option:
IKEA Karlby countertop + Alex drawer units + Signum cable tray = a fully cable-managed, drawer-equipped desk for under $250. This combo is legendary in the r/battlestations community for a reason.
Also Read: DIY Swimming Pool Designs Ideas to Create a Relaxing Outdoor Space
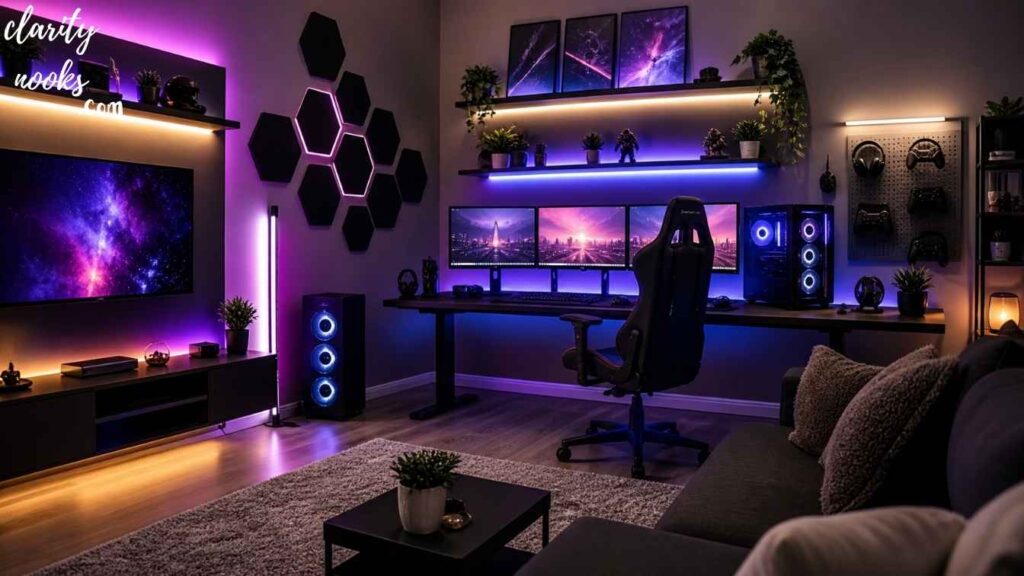
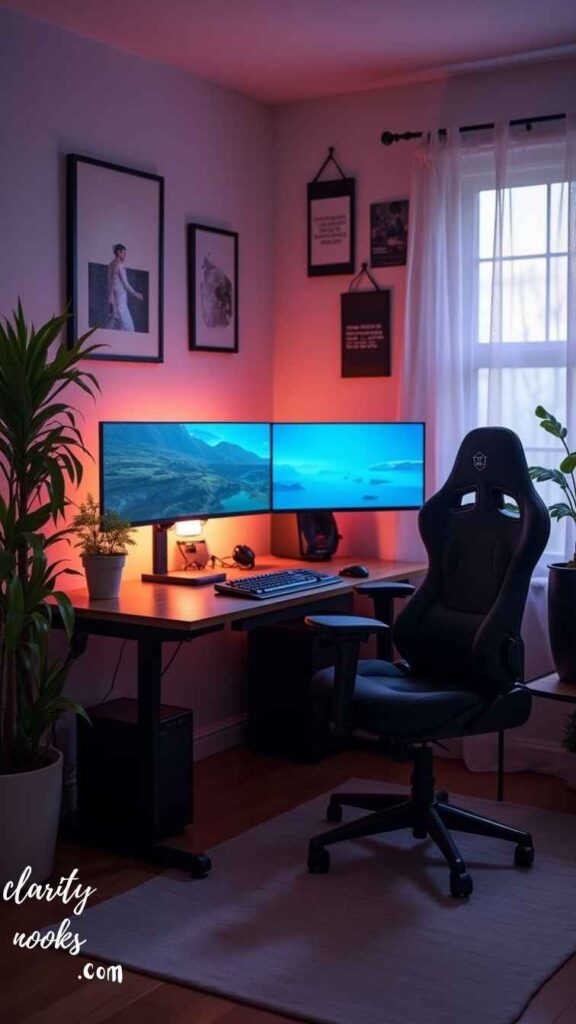
Master Ambient Lighting The Biggest Vibe Upgrade for the Least Money
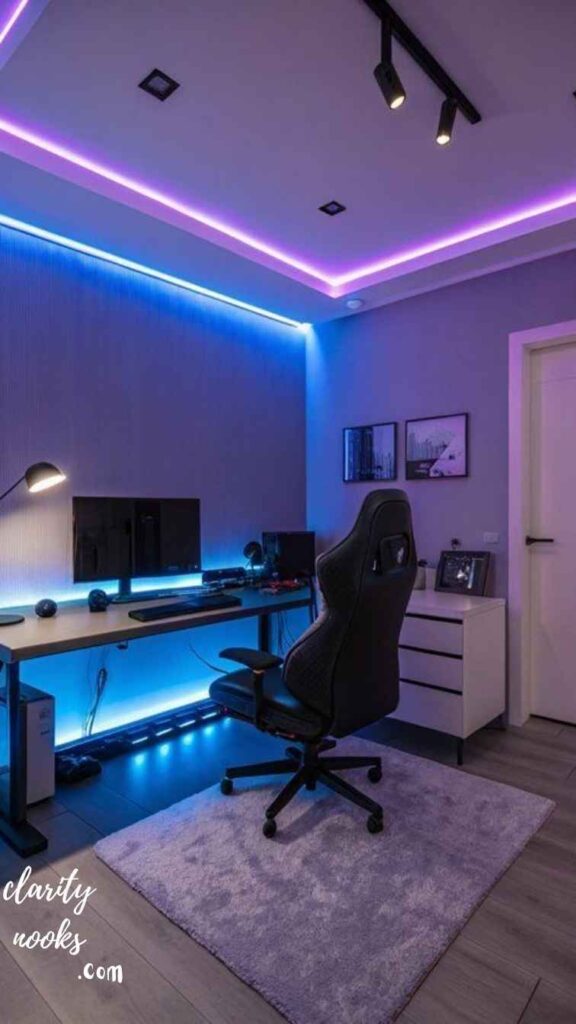
Lighting is the fastest way to transform how a gaming room feels. But most guides stop at ‘buy some RGB strips and slap them behind your monitor.’ That’s the surface level. Real ambient lighting design involves three layers: task lighting (your monitor/desk area), accent lighting (walls and furniture edges), and bias lighting (behind your screen to reduce eye strain).
Bias lighting an LED strip mounted directly behind your monitor casting a soft glow onto the wall is backed by research showing it reduces eye fatigue during long sessions by up to 30%. Govee and Philips Hue both make sync-capable options, but a basic non-syncing warm LED strip for $12 achieves 80% of the benefit.
Zone 1 is your monitor bias light (warm white or matching your screen’s dominant color). Zone 2 is shelf and furniture edge accent lighting in whatever RGB mood suits you. Zone 3 is overhead fill light a dimmable smart bulb in a lamp, not harsh overhead fluorescents which flatten everything and kill atmosphere. Smart plugs on all three zones let you switch between ‘competitive play’ mode (bright, focused) and ‘chill session’ mode (dim, ambient) instantly.
Quick Win:
WLED-flashed ESP8266 controllers + cheap LED strip = fully programmable ambient lighting for under $25. The r/WLED community has step-by-step guides for beginners.
Don’t Miss: DIY Sun Room Ideas to Add Style, Comfort, and Natural Light
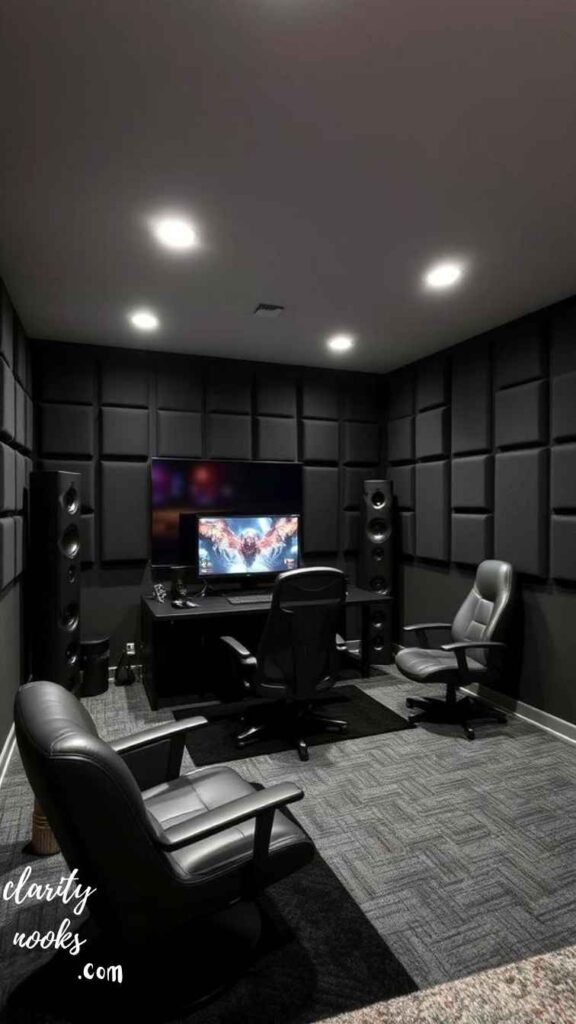
Acoustic Treatment Without Ruining Your Walls or Your Budget
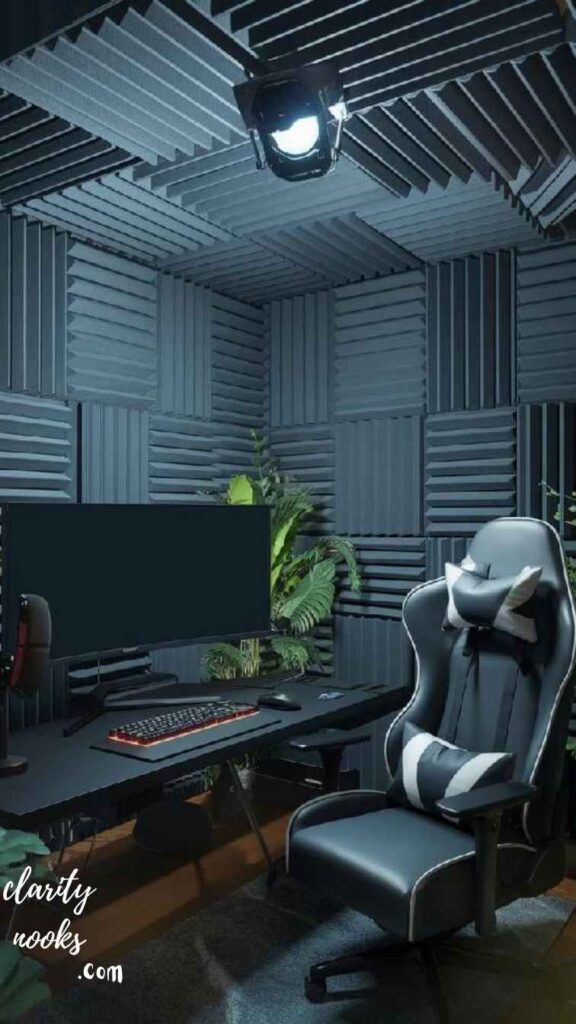
Unless you’re playing solo with headphones every session, sound matters enormously in a gaming room. Hard walls create echo and flutter reverb that muddies in-game audio and makes voice chat exhausting over time. Professional acoustic panels can run $50–$150 each. But DIY fabric-wrapped panels cost $15–$25 each and perform identically.
The DIY approach: cut 2×4 lumber frames to size (typically 2ft x 4ft), stretch 2-inch Rockwool Safe’n’Sound or Owens Corning 703 insulation over the frame, cover with breathable fabric (linen or burlap), and mount using French cleats. Four of these panels in the corners of your room where bass accumulates transform the acoustic character of the space dramatically.
First reflection points on side walls (where sound bounces from your speakers to your ears) and the wall directly behind your monitors are the highest-priority locations. If you can only do two panels, put them on the side walls at ear height. Corner bass traps are next. The ceiling above your desk is last. This sequence gives you the best return per panel installed.
Mini Case Study:
A streamer named Lena reduced her room reverb time (RT60) from 0.8 seconds to 0.3 seconds using six $20 DIY panels a result professional studios charge thousands to achieve.
Read More: DIY Entryway Decor Ideas That Make a Stunning First Impression
Cable Management
The Upgrade That Makes Everything Else Look Better
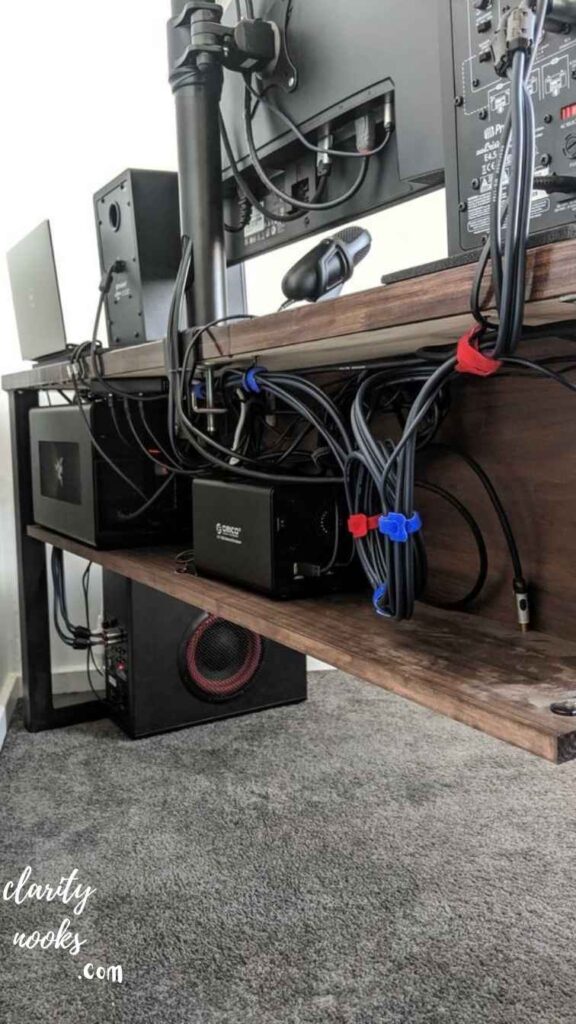
Nothing undermines an otherwise great gaming room like cable chaos. Beyond aesthetics, poor cable management is a fire hazard, a tripping hazard, and creates signal interference on longer cable runs. Fortunately, taming cables is one of the cheapest DIY projects you can do and the visual payoff is enormous.
The three-tier system works for any desk size. Tier one: use velcro cable ties (never zip ties, which are permanent) to bundle cables running from peripherals. Tier two: mount cable raceways or split wire loom along the desk edge and desk legs. Tier three: mount a power strip underneath the desk using double-sided tape or a mounting bracket so the cable cluster disappears entirely.
A J-channel cable raceway from Amazon ($12), a set of adhesive cable clips ($8), velcro ties ($5), and an under-desk power strip mount ($8) is a complete cable management system for any desk. The key habit: run new cables through the system before they reach your desk, not after. Retrofitting is always harder than planning ahead.
Gamer-Specific Tip:
Use a controller charging station mounted to the side of your desk to eliminate the controller-cable-on-floor problem. 3D-printed mounts are available for virtually every controller on Thingiverse or buy a universal one for $15.
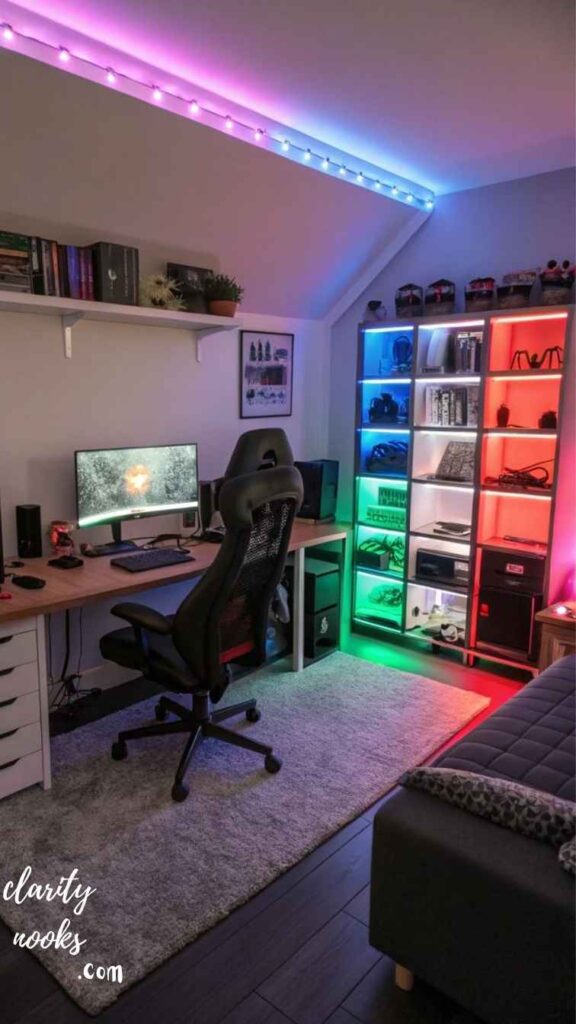
Build a Modular Shelving System for Gear, Merch, and Aesthetics
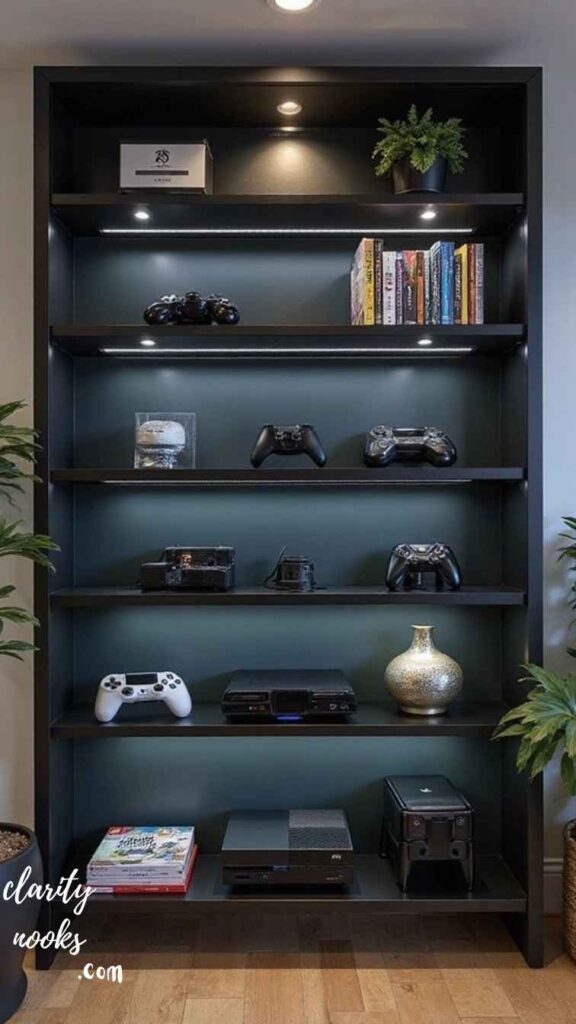
Gaming rooms have a unique storage challenge: you need to display things (collectibles, headsets, controllers), organize things (games, cables, accessories), and access things quickly (frequently used peripherals). Generic shelving rarely addresses all three simultaneously. Modular systems do.
The best DIY approach is pegboard wall panels combined with floating shelves. A 2×4 foot pegboard sheet costs $15–$25, and accessory hooks designed for pegboard are a few dollars each. You can reconfigure the entire layout whenever your storage needs change. Mount it at desk height on the wall beside or above your setup, and it handles everything from headset hooks to small plant displays.
Floating shelves above the desk serve as monitor risers (when positioned correctly), display space for collectibles, and a visual anchor for your room’s aesthetic. IKEA Lack shelves are infamous in the community for good reason they’re cheap, clean-looking, and rated for decent weight. One tip most guides miss: mounting them with a slight upward tilt toward the wall (2–3 degrees) makes items on them feel more deliberately displayed, not just placed.
Soundproofing Your Gaming Room
(Even in an Apartment)
Soundproofing and acoustic treatment are different things. Acoustic treatment (idea #4) controls how sound behaves inside the room. Soundproofing controls how much sound crosses the room’s boundaries both in and out. If you share walls with neighbors, have family members who sleep early, or want to be heard less clearly on calls, soundproofing matters.
In a rental apartment, you can’t modify walls. But you can add mass. Door draft stoppers eliminate the biggest leak point the gap under your door. Heavy curtains on windows (mass-loaded vinyl behind standard curtains is the hardcore version) reduce external noise significantly. A large bookcase filled with books against a shared wall acts as a surprisingly effective mass-loaded barrier.
Start with a door sweep ($15) and foam weatherstripping around the door frame ($10). Add heavy curtains on any exterior windows ($40–$80). Place a large area rug on the floor (reduces impact noise transmission to floors below). These three steps cut perceived room noise by 30–50% without any permanent modifications perfect for renters who want gaming freedom without neighbor complaints.
Rental Tip:
Mass-loaded vinyl (MLV) is a dense rubber-like sheet you can hang on walls using Command strips. At $1–$2 per square foot, it’s the most effective non-permanent soundproofing material available.
Ergonomics: The Upgrade That Pays You Back Every Single Day

Most gaming room guides treat ergonomics as an afterthought. That’s backwards. Poor ergonomics don’t just cause long-term health problems they actively degrade your performance. Neck strain, wrist fatigue, and lower back pain all reduce reaction time, focus duration, and consistency during extended sessions.
Monitor height is the most commonly wrong variable in gaming setups. Your monitor’s top edge should be at or slightly below eye level when you’re sitting upright. Most stock desk monitors sit too low, causing the neck to angle down for hours. A DIY monitor riser using hardwood blocks, a reinforced box, or a 3D-printed stand ($0–$20) fixes this instantly. Monitor arms are even better they cost $25–$40 for solid entry-level units and allow infinite adjustment.
The relationship between chair height, desk height, and monitor distance is a triangle that needs to be balanced together. Your elbows should rest at 90 degrees on the desk surface. Your wrists should be neutral (flat or slightly downward) on the keyboard. Your eyes should look straight ahead or slightly downward to the monitor’s upper third. Adjusting one without adjusting the others defeats the purpose. Run this calibration every time you change any element of the setup.
A 2024 ergonomics study found that gamers who corrected their monitor height, chair position, and wrist alignment in a single session reported a 28% reduction in physical discomfort after three weeks with zero equipment costs beyond adjustment.
Create a Theme Without Buying a Theme DIY Decor That Doesn’t Look Cheap
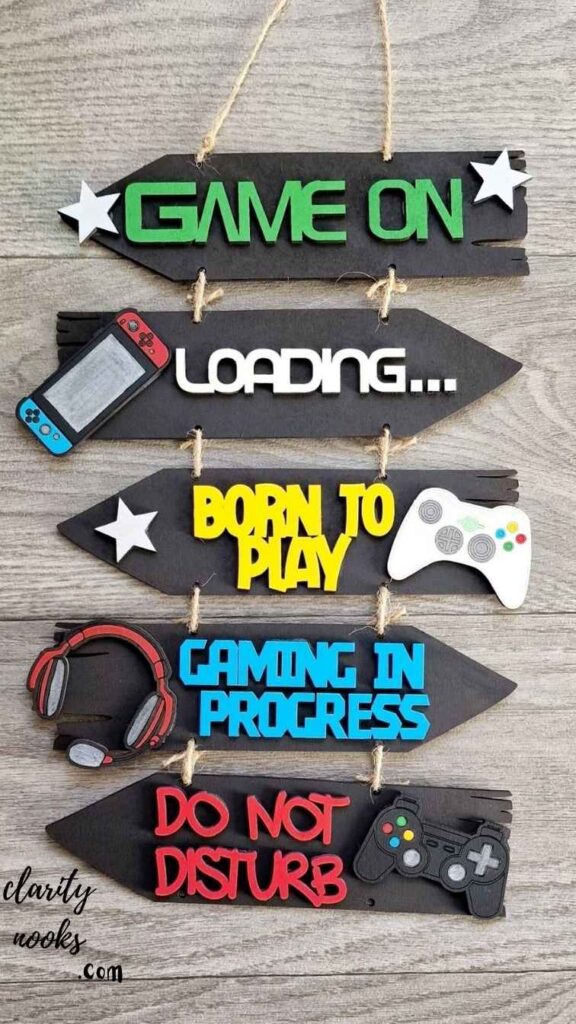
Gaming room aesthetics online tend to fall into two traps: either everything is covered in RGB and neon signs (the ‘screaming gamer’ look) or it’s so minimal it feels like an office. The third path thoughtful thematic design is what makes rooms feel genuinely personal and photographably impressive.
Pick one game, franchise, or visual motif as your anchor. Then build around it subtly rather than literally. A fan of dark fantasy games doesn’t need a shelf full of plastic dragons; they need deep charcoal walls, amber lighting, and a few well-chosen display pieces. A Cyberpunk aesthetic doesn’t demand neon everywhere it comes from cool blues, dark grays, a single backlit panel, and clean industrial desk accessories.
Stretched canvas prints of fan art (licensed or commissioned from indie artists) cost $20–$40 each and elevate a room dramatically. LED-lit shadowboxes for memorabilia or controller displays are a two-hour DIY project with a $30 material list. Painted accent walls even renters can use peel-and-stick wallpaper panels from $25/roll give the room a designer look without commitment. The rule: one bold visual element, everything else supporting it.
Design Rule:
Choose a maximum of three colors for your room: one dominant (walls/desk), one secondary (chair/shelves), one accent (lighting/decor). More than three makes the room feel chaotic even with expensive items.
Build a Streaming or Content Corner Without a Second Room
Content creation and streaming have become a natural extension of gaming culture, but most people assume it requires a dedicated studio space. It doesn’t. A well-designed gaming room can serve dual purpose with the right setup planning from the start or a few smart additions after the fact.
The key variables for streaming-ready environments are camera angle, background composition, and audio quality. Your camera doesn’t need to face your gaming setup it can face a designed wall behind you. A 3×3 foot background zone with good lighting, a few curated props, and a clean look is all that’s needed for professional-looking streams or YouTube thumbnails.
A Logitech C920 webcam ($70, mounted to a small arm), a cheap ring light or two-panel soft box ($30), a cardioid USB microphone like the FIFINE K669B ($30), and a designed background wall using peel-and-stick panels or a fabric photo backdrop ($40) creates a streaming setup that competes with creators spending $1000+. The difference isn’t the equipment it’s the deliberate design of what appears in frame.
What do I need for a DIY gaming room?
You need a plan for your space, a comfortable ergonomic desk and chair, ambient layered lighting, organized cable management, and a personal aesthetic most of which can be built for under $500 with DIY techniques.
Conclusion
The best DIY gaming rooms aren’t built in a weekend shopping spree. They’re developed over time one thoughtful upgrade at a time with each addition making the space more personal, more functional, and more yours. These 10 DIY gaming room ideas cover every layer of a great setup: space planning, furniture, lighting, acoustics, ergonomics, aesthetics, and content creation.
The approach that actually works is starting with a spatial audit and one high-impact upgrade your desk or your lighting and building from there. Small, deliberate moves compound into something remarkable. You don’t need to spend thousands or live in a large house. You need a clear vision and the willingness to build it yourself.
Trend Analysis
Gaming Room Design in 2026 and Beyond
What’s Shaping Gaming Spaces Right Now
The biggest shift in 2026 is the normalization of hybrid-use spaces. Gaming rooms are increasingly doubling as home offices, podcast studios, and content hubs driving demand for furniture and setups that serve multiple purposes simultaneously. Sit-stand desks have gone from luxury to expectation, and modular furniture systems (especially those from brands like Flexispot and Uplift) are dominating community discussions.
Wireless everything is now the standard aspiration, not the exception. The success of the PlayStation DualSense Edge, Xbox Elite 3, and wireless audio standards like LE Audio Bluetooth have made cabled peripherals feel dated in 2026–2027. This trend is pushing room design toward cleaner, more minimal cable management solutions.
Next 2–3 Years: Where Gaming Rooms Are Heading
Spatial computing is the next frontier. As devices like Apple Vision Pro mature and gaming XR headsets become more affordable, gaming rooms will increasingly need to consider open floor areas for physical interaction zones. The ‘chair-and-desk’ paradigm will coexist with clearing for VR play dual-purpose flooring (gaming rugs that roll up, modular floor seating) will become a real design consideration.
AI-assisted room design is already emerging. Tools like Planner 5D and Room GPT can generate room layout suggestions from a photo. Within two years, these tools will recommend product purchases, flag ergonomic issues, and provide real-time lighting optimization making the spatial audit phase dramatically easier for beginners.
Practical Tips & Expert Insights
- Always buy your chair before your desk. Your chair height determines your desk height, which determines your monitor height. The triangle must be set from the ground up.
- Spend 80% of your gaming setup budget on your chair and monitor. These two items have the most direct impact on health and performance. Lighting and decor can be upgraded gradually.
- Paint or wallpaper your room before building your desk. Moving furniture around to paint is one of the most common regrets of new gaming room builders.
- Buy one good cable management solution now. Retrofitting cable management after a fully built desk is miserable. Plan for it at the desk-building stage.
- Invest in a UPS (Uninterruptible Power Supply). An unexpected power spike or cut during a session especially for PC gamers and content creators is a real and avoidable frustration. A basic APC unit costs $50–$80.
- Temperature matters more than most guides mention. Gaming hardware generates significant heat. A small USB-powered desk fan or a room fan on a smart plug timer prevents thermal throttling and keeps you comfortable during summer sessions.
Long-Term Strategy & Sustainability
The smartest approach to building a gaming room is thinking in upgrade cycles rather than one-time builds. Budget-friendly gamers who build a solid foundation a good chair, a large desk, organized cables and upgrade individual components over 12–18 months consistently end up with better setups than people who spend everything at once on whatever is trending.
Sustainability in gaming room design is also a growing consideration. Secondhand furniture from Facebook Marketplace and OfferUp, open-box electronics from Best Buy or Micro Center, and DIY builds from reclaimed materials are all increasingly common in the community driven both by budget consciousness and environmental awareness. A secondhand Herman Miller Aeron in good condition at $300 beats a $400 brand-new ‘gaming chair’ in every measurable way.
Plan your room as a platform, not a finished product. Leave wall space for future panels, pre-run cable channels along desk legs before filling them, and use modular furniture that can be reconfigured. The best gaming rooms in five years will have been built with adaptability in mind from day one.
Future Predictions & Innovations
The convergence of AI and smart home technology will transform gaming room automation within the next three years. Imagine a room that detects you sitting down and automatically adjusts monitor brightness to match ambient light, sets your preferred audio profile, switches your lighting to ‘game mode,’ and starts your session timer all without a single button press. This capability is already partially possible with Home Assistant + smart device ecosystems, and will be plug-and-play by 2028.
Generative AI will also impact the physical design space. Within 24 months, we’ll likely see AI-powered tools that can analyze a photo of your room and generate a complete upgrade plan with specific product recommendations, budget breakdowns, and before/after visualizations dramatically lowering the barrier for gamers who don’t know where to start.
Haptic furniture is an emerging category worth watching. Brands like D-BOX already make motion-actuated gaming chairs used in commercial simulators. Consumer-grade haptic desk pads and chair inserts that sync with in-game audio are already entering the market at sub-$200 price points. In five years, haptic feedback integrated into the gaming room environment not just the controller may be standard.
Common Mistakes & Hidden Gaps
Beginner Mistakes
Mistake 1: Buying a ‘gaming chair’ from an unknown brand instead of an ergonomic chair from a reputable brand. Bright colors and racing stripes don’t equal back support.
Mistake 2: Placing monitors on stock monitor stands that are too low. Almost every default monitor height is wrong for sitting posture. Always adjust immediately.
Mistake 3: Buying all RGB accessories without planning a coherent color scheme. Mismatched RGB looks worse than no RGB at all.
Mistake 4: Forgetting to plan for storage. Open shelving and accessible storage are often afterthoughts that require disassembling the desk to retrofit properly.
Intermediate Mistakes (What Even Experienced Builders Miss)
Mistake 5: Treating acoustic treatment and soundproofing as the same thing. They solve completely different problems and require different materials.
Mistake 6: Buying a 4K monitor before a 144Hz monitor. For most game genres, refresh rate has a larger impact on perceived smoothness and performance than resolution.
Mistake 7: Ignoring the desk’s weight rating. A gorgeous DIY build that sags under three monitors and a PC is a disaster waiting to happen. Always over-engineer your structural support.
Mistake 8: Not planning for visitor seating or secondary use. A gaming room that can’t serve any other purpose becomes a source of household friction. A fold-flat futon or a large floor cushion adds social flexibility for almost no cost.
Hidden Gap Most Gaming Room Guides Miss
Virtually no gaming room guide discusses thermal planning how heat from multiple gaming PCs, consoles, and monitors affects room temperature. A typical high-end gaming PC generates 300–400W of heat. Three displays add another 100–150W. In a sealed room, this becomes noticeable within an hour. Planning airflow (directional fans, door positioning, smart thermostat for your room) is a real performance and comfort factor that deserves more attention than it gets.

Rameen Zara is the founder of Clarity Nooks, bringing over five years of experience in home décor and interior styling. She shares simple yet practical design ideas that suit real homes and everyday living. Her approach focuses on cozy aesthetics, soft color palettes, and natural textures that create warm, inviting spaces.


