
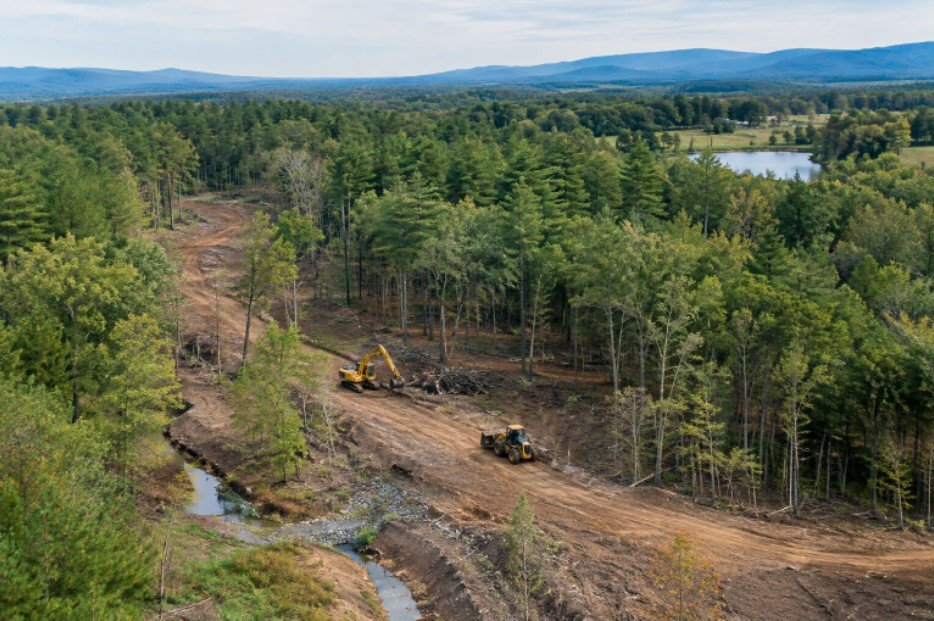
Land Clearing Safety, Permits, and Erosion Control: A Planning Guide

Land clearing is more than removing trees, brush, and stumps. Whether a property is being prepared for a home site, driveway, pasture, pond, or utility route, careful clearing plans help protect people, soil, drainage patterns, and nearby property. A well-planned project begins before equipment reaches the site. By identifying hazards, confirming local requirements, selecting an appropriate method, and preparing for stabilization, property owners can make better decisions about the work and reduce avoidable disruption.
Why Land Clearing Needs a Clear Plan
Removing vegetation changes how a site works. Roots, leaf cover, and existing ground cover help hold soil in place and influence where rainwater travels. Heavy equipment can also compact soil, leave ruts, and create access problems if work begins without a defined plan. For example, a wooded lot may need only a narrow driveway corridor and a carefully located building pad, rather than broad removal across the entire parcel. Matching the work area and method to the property’s slope, soil, access, vegetation, and intended use can preserve useful trees and leave less exposed ground to manage afterward.
Step 1: Assess the Property Before Work Begins
Walk the property and identify the exact limits of disturbance before scheduling equipment. Flag or mark boundaries, retained trees, utility corridors, drainage features, structures, fences, and other items that must remain protected.
- Note steep slopes, soft ground, ditches, ponds, streams, wetlands, and low areas.
- Look for dead trees, hanging limbs, concealed debris, old wire, large rocks, and unstable stumps.
- Locate overhead lines and contact the appropriate utility notification service before digging near possible buried utilities.
- Observe where water enters, crosses, and leaves the property during normal rainfall.
- Choose equipment routes that minimize unnecessary travel over sensitive or saturated ground.
Step 2: Check Permits and Local Rules
Permit requirements vary by location and scope. A project may involve separate reviews for tree removal, grading, driveway access, floodplain work, wetlands, stormwater, burning, or debris disposal. Check with the local planning, building, environmental, and stormwater offices well before the intended start date. Local rules can connect clearing and grading with broader site requirements. For example, Portland’s building regulations for land clearing and grading show how municipal codes may require permits and review for work that disturbs land. Keep approved plans and permit documents on site, and follow any applicable inspection or stabilization conditions.
Step 3: Build a Job-Site Safety Plan
Land clearing can involve felling trees, using chainsaws, excavators, loaders, and dozers, working in uneven terrain, moving debris, and limited visibility. Establish a work zone before the first tree is cut or a machine is started. Bystanders, pets, and unauthorized visitors should remain outside that zone.
- Use trained, qualified operators for the equipment being used.
- Inspect machines, attachments, guards, fluids, and communication devices before each shift.
- Keep workers out of machine blind spots, swing areas, and paths of travel.
- Use suitable protective equipment for the work, including eye, hearing, head, foot, and leg protection where appropriate.
- Plan tree-felling directions and escape paths before making a cut.
- Keep first-aid supplies, emergency contacts, and a reliable way to call for help nearby.
Tree removal hazards deserve particular attention because they can change quickly as trees, limbs, and equipment move. OSHA identifies tree care as work with recognized hazards and provides hazard and safety program resources for tree care operations to help employers and crews organize safer work practices.
Step 4: Choose the Right Clearing Method
No single approach fits every property. The best method depends on the project goal, vegetation size, ground conditions, access, disposal plan, and areas that need to remain undisturbed.
- Manual clearing can suit small areas, tight spaces, and selective removal around retained trees or structures.
- Forestry mulching can process brush and smaller vegetation on site when leaving mulch is appropriate for the plan.
- Mechanical clearing may be needed for dense growth, larger trees, rough terrain, or substantial debris.
- Selective clearing retains chosen trees for shade, screening, habitat, or visual character.
- Grubbing removes roots and stumps where future construction, grading, or pavement requires a cleaner subgrade.
Step 5: Protect Soil and Nearby Water
Vegetation removal exposes soil to rainfall, runoff, and wind. Erosion control works best when installed before major disturbance and maintained while the site remains unfinished. Waiting until sediment has already left the property is rarely an effective strategy.
- Preserve natural buffers around streams, ponds, wetlands, and drainage channels when required or practical.
- Limit the amount of bare soil exposed at one time.
- Place soil stockpiles away from drainage paths and protect them from runoff.
- Use approved perimeter controls, mulch, seed, straw, erosion blankets, or other suitable stabilization measures.
- Inspect controls after significant rain and repair damaged sections promptly.
- Use temporary access routes to reduce rutting and compaction across the site.
Step 6: Handle Trees, Brush, and Stumps Responsibly
Decide how debris will be handled before clearing starts. Sound logs may be useful for lumber, firewood, or approved habitat features. Smaller brush can sometimes be chipped or mulched, while other material may need to be hauled to an approved facility. Burning, burial, and hauling rules differ by jurisdiction, so confirm the local requirements first. Stumps also require a plan. Grinding may be suitable for some landscape areas, while complete removal can be more appropriate where foundations, driveways, drainage structures, or finish grading are planned. Any remaining holes should be addressed so they do not become trip hazards or collect water.
Step 7: Plan Around Weather and Ground Conditions
Weather affects safety and site damage. Wet ground can rut under equipment and become unstable. Heavy rain can move loose soil into ditches and waterways. Dry, windy conditions can increase dust and, where applicable, fire concerns. High winds can make tree work unsafe, especially around dead or leaning trees. Build weather delays into the schedule. Pausing work during poor conditions may protect the site and avoid repairs that cost more than a short delay.
Step 8: Inspect and Stabilize the Site
Before closing out the project, walk the site again. Confirm that clearing stayed within the planned limits, retained areas were protected, debris has been handled, and no unstable trees or hazardous holes remain.
- Check drainage paths and repair ruts or low spots that may hold water.
- Inspect erosion controls and replace damaged materials.
- Stabilize exposed soil with vegetation, mulch, seed, or another appropriate approved method.
- Take photos and retain records for future maintenance, permitting, or construction planning.
Common Questions About Land Clearing
How early should permits be checked?
Start before scheduling the work. Some projects require time for site plans, surveys, tree review, drainage information, or agency approval.
Can every tree on a property be removed?
Not necessarily. Protected trees, stream buffers, wetlands, floodplains, easements, and local ordinances can limit removal even on private land.
What is the best way to prevent erosion?
Limit disturbance, preserve drainage patterns, install controls before major clearing, and stabilize bare soil as soon as practical.
How should clearing estimates be compared?
Ask what area will be cleared, whether stumps and debris are included, how disposal will be handled, whether grading and erosion controls are separate, and what insurance and operator experience the contractor carries.
Final Thoughts
Safe land clearing starts with planning, not machinery. Before work begins, property owners should assess the terrain, identify trees and vegetation to remove, locate existing utilities, and determine how the cleared area will be used. A careful review of local permit requirements, site conditions, access routes, and potential environmental concerns can help establish a realistic scope of work. A detailed safety plan should also address equipment movement, restricted work areas, and potential hazards for workers and nearby properties. Erosion controls and proper drainage measures are important for limiting soil loss and preventing runoff problems, particularly on sloped or exposed ground. Planning how to handle trees, stumps, rocks, and other debris can also keep the worksite organized and reduce unnecessary delays. Once clearing is complete, a final inspection can identify any remaining obstructions, uneven surfaces, drainage issues, or areas needing additional grading. These steps can help leave the property stable, usable, and ready for its next purpose, whether that involves construction, agricultural activities, access improvements, or landscaping.
Rameen Zara is the founder of Clarity Nooks, bringing over five years of experience in home décor and interior styling. She shares simple yet practical design ideas that suit real homes and everyday living. Her approach focuses on cozy aesthetics, soft color palettes, and natural textures that create warm, inviting spaces.