

Modern DIY Backyard Bar Ideas to Transform Your Outdoor Living Space
Imagine stepping outside on a warm Friday evening to a perfectly lit bar area, cold drinks within arm’s reach, and your favorite playlist drifting through the backyard. No crowded venues, no Uber rides, no overpriced cocktails. Just your space, your rules.
Most homeowners assume building a backyard bar means hiring a contractor, spending thousands of dollars, or having serious woodworking skills. None of that is true. With the right plan and a weekend or two, you can create a stunning outdoor entertaining space that looks professional and feels completely personal.
In this guide, you will find 10 detailed DIY backyard bar ideas, from simple pallet builds to fully weatherproofed outdoor kitchen bars. Each idea includes real-world tips, material suggestions, and honest insight into what works, what does not, and how to make your outdoor bar last for years.
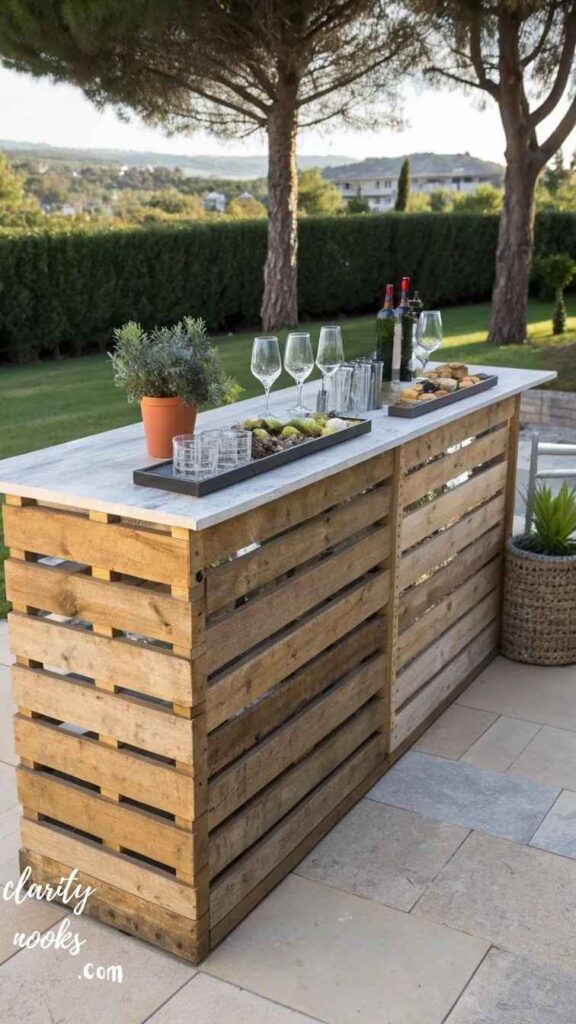
Classic Pallet Bar
Budget-Friendly and Surprisingly Sturdy
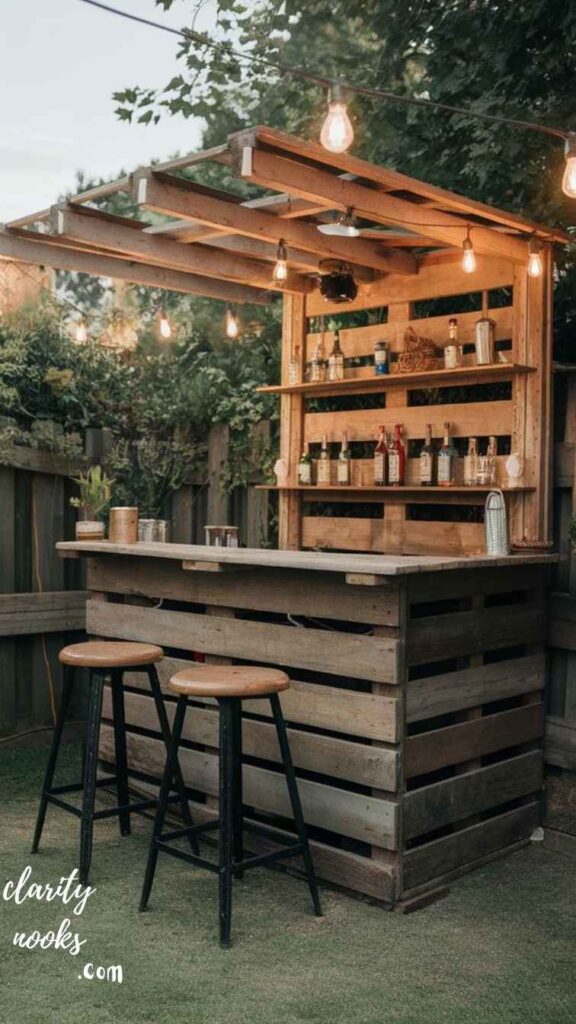
Wooden pallets are arguably the most popular starting point for a DIY backyard bar, and for good reason. They are free or nearly free, structurally sound when stacked correctly, and incredibly versatile. A double-stacked pallet unit with a simple plywood top can function as a full-service bar counter in an afternoon.
The key is selecting heat-treated (HT) pallets, not methyl bromide-treated ones. Look for the IPPC stamp on the pallet, which indicates it is safe for home use. Sand all surfaces thoroughly, apply an outdoor wood stain or sealant, and add a weather-resistant countertop like cedar planks or a poured concrete slab for a polished finish.
Real-life example: A homeowner in Austin, Texas built a U-shaped pallet bar for under $120 using six reclaimed pallets, exterior paint, and a butcher-block countertop offcut from a kitchen renovation. Total build time: one weekend. It has hosted three summers of backyard parties and still looks great.
Pro Tip
Always seal the bottom of your pallet bar with a waterproofing spray or rubber feet to prevent ground moisture from rotting the wood from below.
Must Read: DIY Baby Nursery Ideas for Boys: Budget Decor That Looks Expensive
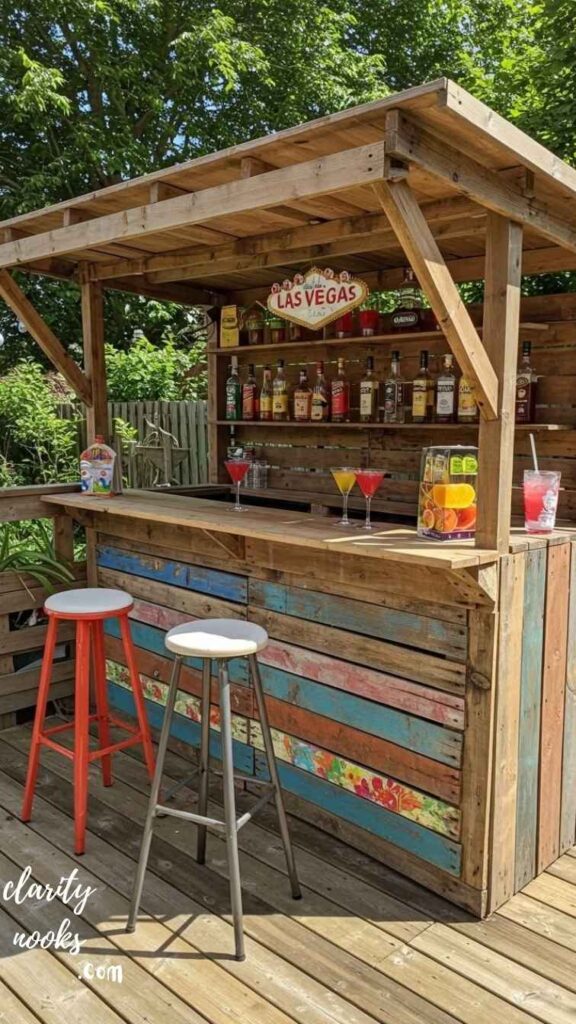
Tiki Bar
Transform Your Yard Into a Tropical Escape
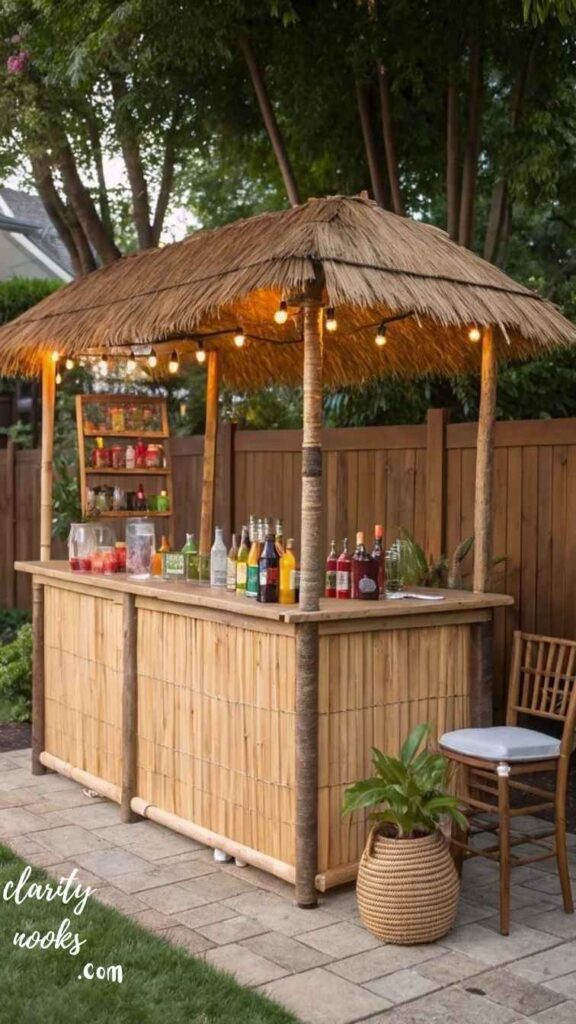
If you love a themed outdoor experience, a tiki bar is one of the most rewarding DIY backyard bar projects you can take on. The aesthetic is forgiving, meaning imperfect craftsmanship actually adds charm. Bamboo poles, thatch roofing panels, and tiki torches do most of the heavy visual lifting.
Start with a simple wooden frame using 4×4 pressure-treated posts. Cover the frame with bamboo rolls or reed fencing (widely available at home improvement stores for $15 to $30 per roll). Add a thatch roof panel over a basic A-frame structure, and hang string lights underneath for that warm, golden glow.
The tiki bar is especially popular in Florida and coastal states, but it works equally well in landlocked backyards. One Reddit user documented building a 10-foot tiki bar for $280 total, including LED flame torches, bamboo cladding, and a laminated countertop with a surfboard design. The full build attracted over 50,000 views and inspired hundreds of copycat builds.
Read More: Easy DIY Dining Table Decor Ideas for Everyday Elegance at Home
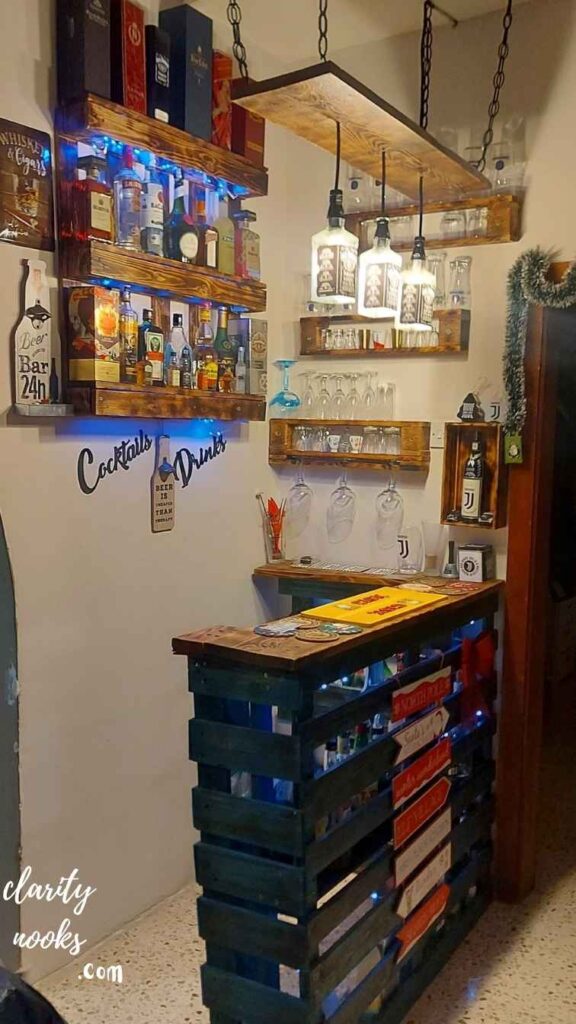
Repurposed Cabinet Bar
Upcycling at Its Best
One of the most underrated DIY backyard bar ideas is repurposing an old kitchen cabinet unit or dresser into an outdoor serving station. This approach gives you built-in storage, a finished look, and a lower cost than building from scratch, especially if you already have the cabinet or can find one cheaply at a thrift store or online marketplace.
The critical step is weatherproofing. Strip the old finish, apply a wood hardener if needed, then coat everything in exterior-grade primer and paint. Replace any hollow-core doors with solid ones. Add outdoor-rated hardware and install a waterproof liner inside any cabinet sections that will hold bottles or bar tools.
This approach works particularly well under a covered patio or pergola where the bar is sheltered from direct rain. A couple in Portland, Oregon transformed a $40 Craigslist kitchen cabinet into a bar station with open shelving on top, wine glass hooks underneath the counter, and a marble-contact-paper countertop. Total cost: under $80. Total time: one Saturday.
Don’t Miss: Trendy DIY Mini Bar Ideas for a Beautiful Home Upgrade
L-Shaped Corner Bar
Maximizing Space and Flow
For larger gatherings, an L-shaped bar configuration transforms a corner of your patio or deck into a proper entertainment hub. The design creates natural flow, separates the bartender space from the guest area, and allows seating on two sides, all without requiring a massive footprint.
Build the frame using standard 2×4 and 2×6 lumber. An L-shaped bar is essentially two straight bar sections joined at a 90-degree angle. Frame each section separately, then join them using corner bracing and pocket screws. Top with a poured concrete countertop, tile mosaic, or even outdoor-grade porcelain slab for a high-end finish that costs a fraction of a custom build.
The L-shaped layout also allows for practical additions like a built-in cooler well (a recessed ice chest framed directly into the bar counter), a lower prep ledge, and under-counter storage for mixers and tools. This is the design to choose if you entertain regularly and want the bar to do real work, not just look good.
Featured Snippet Answer
What is the best shape for a DIY backyard bar?
An L-shaped bar is ideal for most backyards because it maximizes seating, creates natural serving flow, and fits neatly into any corner without dominating the outdoor space.
Also Read: DIY Outdoor Kitchen Ideas for a Perfect Backyard Cooking Space
Pergola Bar
Shade, Structure, and Style Combined
A pergola bar is the most architectural of all the DIY backyard bar ideas on this list. It combines the vertical structure of a pergola with the functionality of a full bar counter, creating a defined outdoor room that feels intentional and designed. If you want a backyard bar that genuinely adds resale value to your home, this is the one.
The pergola frame is typically built from 6×6 posts and 2×8 rafters using notched lap joints or post brackets. Once the structure is up, you can add shade sails, climbing plants, or a polycarbonate roof panel for rain protection. The bar counter wraps around the base of the pergola on one or two sides.
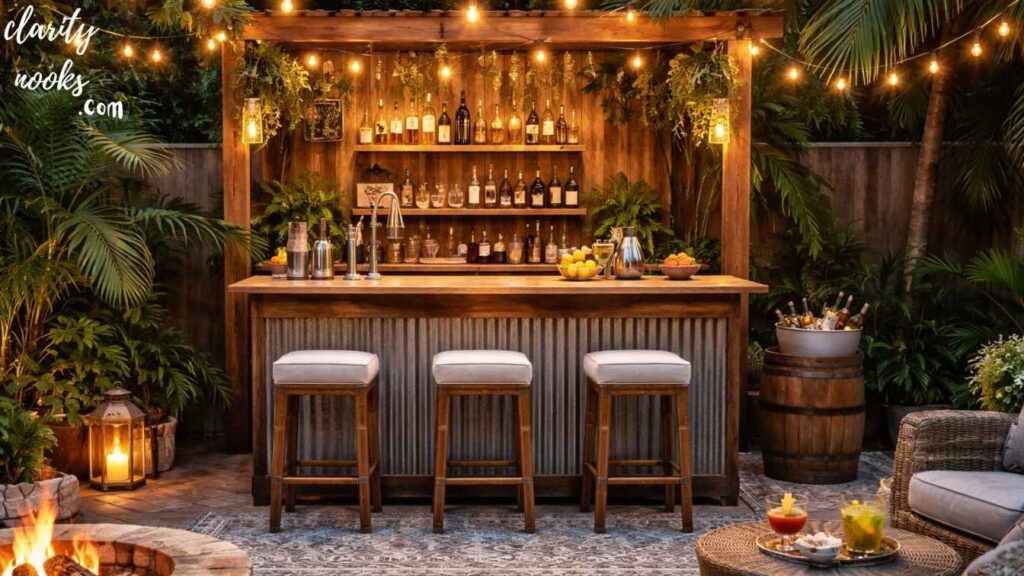
A family in Charlotte, North Carolina built a 12×14-foot pergola bar using a $350 lumber package from Home Depot and $200 in hardware and decor. They added a small outdoor sink connected to the garden hose, Edison bulb string lights, and a corrugated metal back bar wall for hanging glasses and bottles. The entire project took three weekends and transformed their previously unused side yard into their favorite spot in the home.
Porch Rail Bar
The 48-Hour Weekend Project
If you want results fast, a folding or hinged porch rail bar is the quickest DIY backyard bar you can build. This design attaches a hinged plank or folding shelf directly to your deck railing, creating an instant bar top that can be raised for parties and lowered flat when not in use.
All you need is a 1×10 or 1×12 board, two heavy-duty piano hinges, a support chain or folding leg bracket, and a few hours. Finish the board with outdoor stain or epoxy, and you have a fully functional bar surface that costs less than $30 to build.
This is a favorite approach for apartment dwellers with small balconies or homeowners who want a bar option without a permanent structure. It is also a great starter project before committing to a larger build. You can always expand later by adding a shelving unit below the railing for bottle storage and glassware.
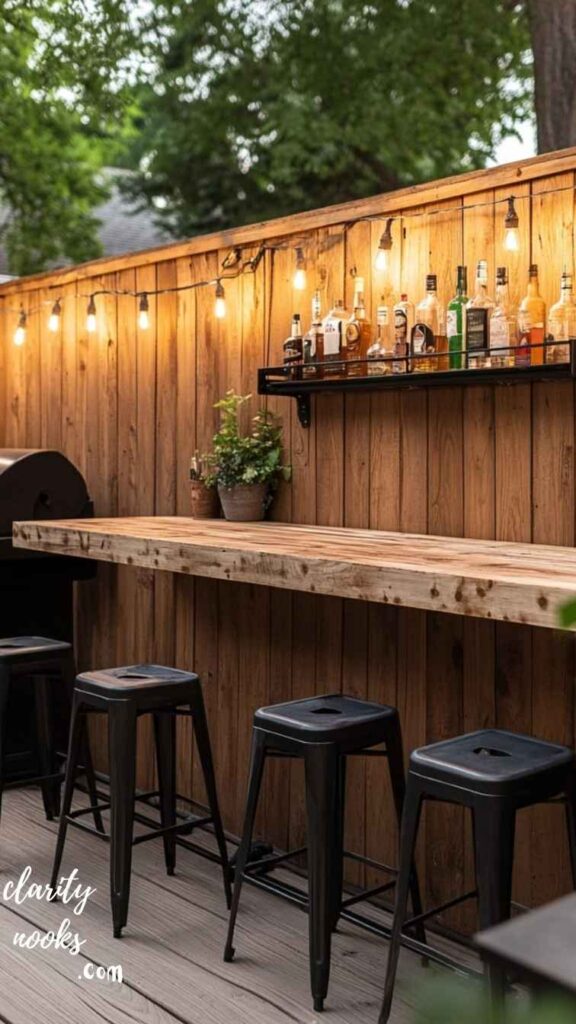
Concrete Block Bar
Industrial Modern With Zero Woodworking

Not everyone is comfortable with power tools and lumber, and that is perfectly fine. A concrete block bar is an excellent no-woodworking alternative that looks sleek, lasts decades, and costs very little to build. Cinder blocks or retaining wall blocks stacked in a U or straight configuration create the bar body, which is then topped with any countertop material of your choice.
No mortar is required for a basic free-standing bar. Simply stack standard cinder blocks in your desired layout, checking for level at each row. Fill hollow cavities with gravel for stability. Top with a pre-cut granite slab, butcher block panel, or poured concrete countertop. For a finished look, paint or stucco the cinder block surface using masonry paint.
The industrial look of a concrete block bar pairs beautifully with modern outdoor furniture, Edison bulbs, and dark metal accents. It is particularly popular among homeowners renovating mid-century modern or contemporary homes. Because there is no wood, there is also no rot, warping, or pest issues, making it one of the most low-maintenance DIY bar options available.
Garden Bar
Integrating Nature Into Your Entertainment Space
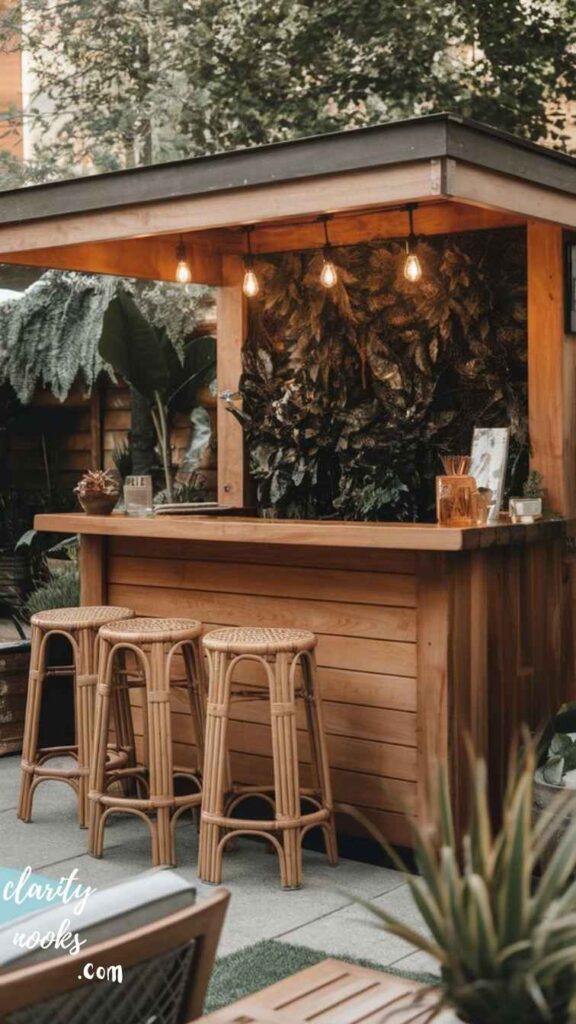
A garden bar blends your outdoor entertaining area with your landscaping rather than treating them as separate zones. Think bar counters built into raised garden bed structures, vertical herb walls as the bar backdrops, or a bar station surrounded by potted tropical plants and ambient garden lighting.
The most practical version uses a raised bed structure made from cedar 2×6 boards as the bar base. One side of the raised bed faces inward for planting, the other faces outward as a serving counter for guests. This dual-purpose design gives you herbs for garnishing cocktails (mint, rosemary, basil) while also solving the problem of what to do with the space behind the bar.
Garden bars tend to attract the most compliments because they feel curated and personal rather than assembled. Adding solar-powered path lights, trailing plants like pothos or sweet potato vine, and a chalkboard menu sign completes the look without any additional construction.
Outdoor Kitchen Bar
Full Functionality in Your Backyard
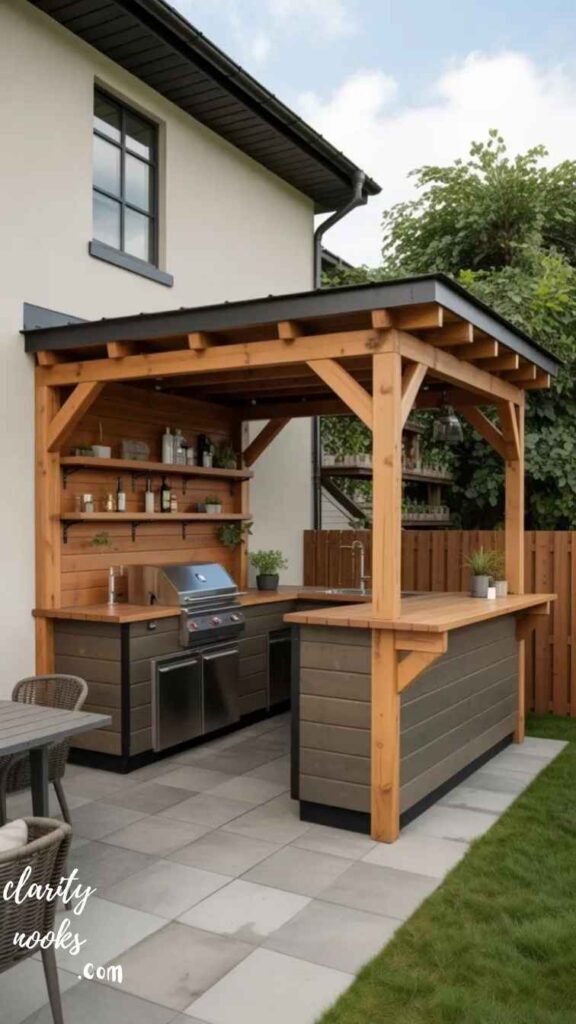
For homeowners who want the ultimate outdoor entertainment setup, combining a full outdoor kitchen with a bar section is the gold standard of DIY backyard bar ideas. This goes beyond cocktails, it incorporates a grill station, outdoor refrigerator, sink, prep counter, and bar seating all in one continuous structure.
The most popular DIY approach for an outdoor kitchen bar uses a concrete board and steel stud frame (the same method used for indoor kitchen islands) finished with stucco, stone veneer, or tile. This method is fully weather-resistant, can support heavy appliances, and is achievable by intermediate DIYers over two to three weekends.
Cost for a mid-range outdoor kitchen bar typically runs between $1,200 and $3,500 depending on appliances and countertop material, which is 60 to 80 percent less than professional installation. A Phoenix-based homeowner documented her full outdoor kitchen bar build on YouTube, detailing every step from framing to final tile grout. Her video has been viewed over 2 million times, proving the appetite for this type of ambitious project.
Shipping Container Mini Bar
Unique, Durable, and Surprisingly Affordable
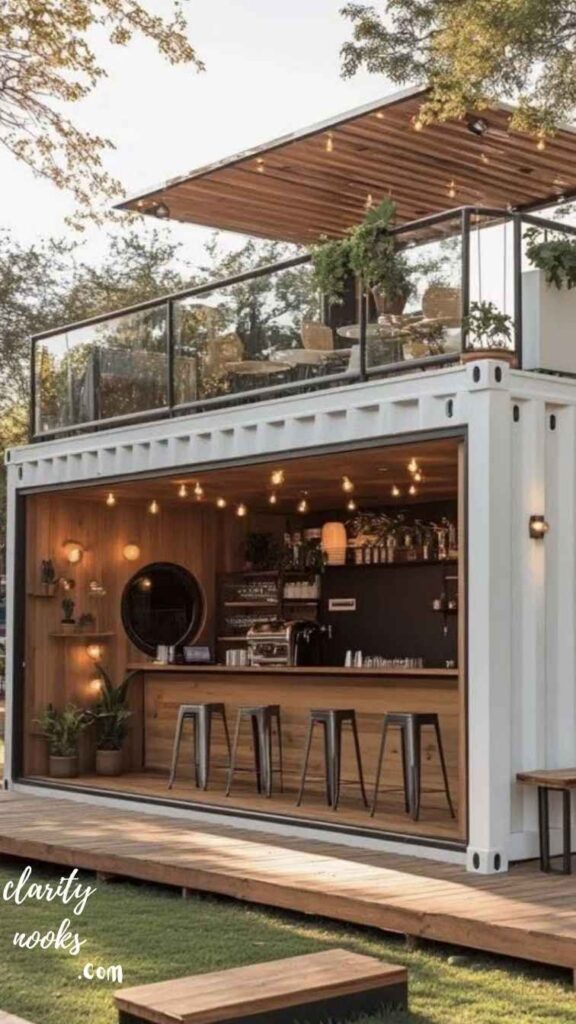
For the adventurous DIYer who wants something truly distinctive, a repurposed mini shipping container or industrial storage unit makes an extraordinary outdoor bar structure. Half-height containers (known as pony containers) or standard 20-foot units can be retrofitted with a fold-down bar counter on one side, creating a self-contained bar booth.
Basic modifications include cutting a window opening in the wall, installing a fold-down steel or wood counter on heavy-duty hinges, adding interior shelving, running a 20-amp outdoor electrical circuit for lighting and a mini fridge, and finishing the exterior with paint, wood cladding, or corrugated steel panels.
This is the highest-effort project on the list, but the result is unmatched in durability, uniqueness, and wow factor. Shipping container bars have become a popular fixture at festivals and events, but several homeowners in the Pacific Northwest and Southwest have built permanent versions in their backyards. When closed up, the container protects all your bar equipment through any weather, a major practical advantage over open-air builds.
Conclusion
Building a DIY backyard bar does not require a big budget, professional skills, or months of planning. Whether you start with a simple pallet build or go all-in on an outdoor kitchen bar, the right idea matched to your space and skill level will deliver a backyard transformation that genuinely improves how you use your outdoor space. The ten DIY backyard bar ideas in this guide cover every budget, aesthetic, and experience level.
Pick the one that excites you most, gather your materials, and dedicate a weekend to making it happen. Your future self, and your guests, will be glad you did.
Trend Analysis: 2026 and Beyond
What Is Trending Right Now in Outdoor Bar Builds
In 2025, the dominant trend in DIY backyard bars is the shift toward permanent, weatherproofed structures rather than seasonal setups. Homeowners are investing in outdoor spaces as true living extensions of the home, driven by remote work culture, rising entertainment costs, and a sustained post-pandemic preference for home-based socializing.
Smart outdoor integration is accelerating rapidly. Bluetooth speakers built into bar structures, outdoor TV mounts above the bar, and app-controlled LED lighting systems are now standard features in higher-end DIY builds. Waterproof outlets and USB charging ports embedded into bar countertops are increasingly expected rather than considered extras.
Predicted Trends for 2026 to 2028
Over the next two to three years, expect modular outdoor bar kits to become widely available at major home improvement retailers. These prefabricated frame systems, similar to what IKEA did for kitchen cabinets, will make it possible to assemble a professional-looking outdoor bar in a day without any custom cutting or framing.
Sustainability will also drive design choices. Reclaimed wood, recycled concrete countertops, and rainwater collection systems integrated into outdoor bar designs are already appearing on architecture and design blogs. By 2027, eco-friendly outdoor entertainment builds are expected to represent one of the fastest-growing home improvement subcategories.
Practical Tips and Expert Insights
Waterproofing Is Non-Negotiable
The single most common reason DIY outdoor bars fail prematurely is inadequate waterproofing. Every wood surface, even pressure-treated lumber, needs a penetrating sealant applied annually. Use an oil-based deck sealer on horizontal surfaces (countertops and shelving) and an exterior primer plus paint on vertical surfaces. Do not skip the undersides, that is where moisture enters first.
Plan Your Electrical Before You Build
If you want any powered elements (lights, refrigerator, blender, TV), plan the electrical circuit before pouring concrete or assembling frames. Running conduit through an already-finished structure is frustrating and expensive. A single 20-amp outdoor GFCI circuit, installed before construction begins, will power almost everything you need.
Bar Height Is Critical for Comfort
The standard bar counter height is 42 to 43 inches, which pairs with 28 to 30-inch bar stools. Most beginner DIYers build bars at kitchen counter height (36 inches), which feels awkward with standard bar seating. Measure and verify height before cutting any frame lumber.
- Use cedar or teak for any exposed wood in wet climates
- Add a toe kick space (3 inches high, 3 inches deep) at the base of the bar for comfortable standing
- Install a rail on the guest side of the bar counter at 12 to 15 inches below the countertop for glass resting
- Use outdoor-rated extension cords rated for at least 15 amps for any temporary electrical needs
- Apply food-safe finish to any wood surface that will contact beverages or food
Long-Term Strategy and Sustainability
A well-built DIY backyard bar is not just a weekend project. It is a long-term investment in your property and quality of life. Research consistently shows that high-quality outdoor living spaces return 60 to 80 percent of their cost in home value, with outdoor kitchens and entertainment areas ranking among the top ROI improvements in the real estate market.
For long-term sustainability, design your bar to be upgradable. Use modular components where possible. Leave space for a future refrigerator or sink even if you do not install one on day one. Run conduit for electrical even before you are ready to wire it. These small decisions during construction eliminate the need for costly rework later.
Choose materials that age gracefully. Teak, cedar, concrete, and natural stone all develop character over time rather than simply degrading. Avoid cheap composite materials that fade, warp, or crack within two to three seasons. Spending 20 to 30 percent more on materials upfront often extends the bar’s usable life by a decade or more.
Future Predictions and Innovations in Outdoor Bar Design
AI-powered design tools are already beginning to transform how homeowners plan outdoor bars. Apps like Planner 5D and RoomSketcher now offer outdoor modeling with realistic material rendering, enabling homeowners to visualize their bar in context before buying a single board. By 2026, expect AI tools to generate full material lists, cut lists, and step-by-step assembly instructions from a simple sketch or natural language description.
Smart cooling technology is another innovation to watch. Compact thermoelectric coolers that embed directly into bar countertops, controlled via smartphone app, are already available from several manufacturers. Within two to three years, expect to see purpose-built smart bar modules that include temperature zones, LED accent lighting, and wireless charging pads all integrated into a single countertop unit.
Vertical gardening integration will likely become a mainstream feature in premium DIY outdoor bars. Living walls with automated irrigation, combined with bar structures, create a sensory experience that no purely architectural design can match. Early adopters in California and the Pacific Northwest are already blending this biophilic design approach with functional outdoor bars.
Common Mistakes and Hidden Gaps
Mistakes Beginners Make
The most frequent beginner error is building without a permit when one is required. In many jurisdictions, permanent outdoor structures over a certain square footage, or those with electrical connections, require a building permit. Skipping this step can result in fines or mandatory removal when selling the home. Always check local ordinances before breaking ground.
Underestimating material quantities is another classic beginner mistake. Always add 10 to 15 percent to your lumber and material estimates to account for waste, cuts, and mistakes. Running short mid-project and facing a discontinued material or color match is a costly and demoralizing setback.
Mistakes Intermediate Builders Make
Intermediate DIYers often over-engineer the frame while under-specifying the countertop. A beautifully built frame with a thin plywood countertop will disappoint. The countertop is the most-touched, most-seen surface in the entire bar. Invest in concrete, tile, natural stone, or quality hardwood for this component above all others.
Another gap that even experienced builders miss is drainage. Any bar surface that will hold ice, wet glasses, or outdoor moisture needs a slight pitch (1/8 inch per foot minimum) toward a drain gap or drip edge. A flat bar top in a rainy climate becomes a standing water problem within one season.
Hidden Content Gaps Competitors Miss
Most articles about DIY backyard bar ideas skip the maintenance calendar entirely. Here is what yours should include: re-seal wood surfaces every spring, inspect all fasteners and hardware for rust every fall, check and re-caulk any gaps around countertop edges annually, and cover or store any cushioned seating before the first frost.
Very few sources also discuss insurance and liability considerations for backyard bars. If you serve alcohol to guests and someone is injured, your homeowner’s insurance policy may be relevant. Review your policy coverage, and consider umbrella liability insurance if you entertain frequently. This is the kind of practical, real-world insight that separates genuinely helpful content from surface-level listicles.

Rameen Zara is the founder of Clarity Nooks, bringing over five years of experience in home décor and interior styling. She shares simple yet practical design ideas that suit real homes and everyday living. Her approach focuses on cozy aesthetics, soft color palettes, and natural textures that create warm, inviting spaces.


