
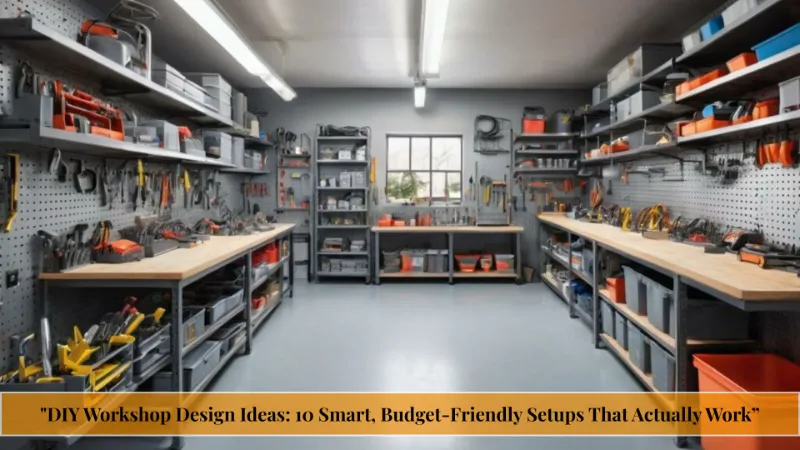
DIY Workshop Design Ideas: Smart, Budget-Friendly Setups That Actually Work

You have the tools. You have the skills. But every time you walk into your garage or basement, you waste 20 minutes just trying to find your drill bits. Sound familiar? A poorly organized, poorly lit, and poorly planned workshop space doesn’t just slow you down it kills your momentum. The good news? You don’t need a custom renovation budget to fix it.
The best DIY workshop design ideas aren’t about buying expensive shelving systems or installing custom cabinetry. They’re about working smarter with your existing space, applying proven workshop layout principles, and choosing storage, lighting, and workbench solutions that fit your actual workflow. Whether you’re building furniture, repairing appliances, or crafting, the right setup makes every session more productive and enjoyable.
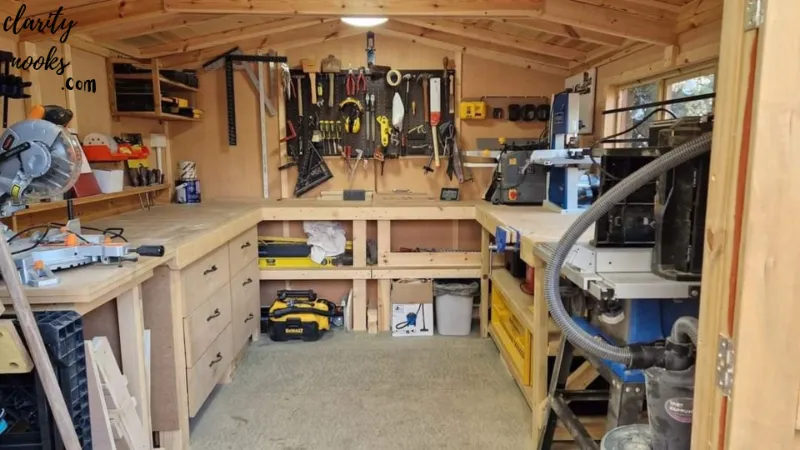
This guide covers practical, real-world workshop design ideas each with step-by-step setup tips, estimated costs, and specific benefits. These aren’t theoretical. These are ideas tested in real garages, basements, and backyard sheds, refined by makers who know what actually works. Let’s design a space that works as hard as you do.
⚡ Featured Snippet:
What Makes a Good DIY Workshop Design?
A good DIY workshop design maximizes usable floor space, provides adequate task lighting, organizes tools within arm’s reach, and creates a safe, efficient workflow. The best setups combine a solid workbench, modular wall storage, proper electrical access, and dedicated zones for different tasks all within a budget that fits your project level.
The French Cleat Wall System Flexible Tool Storage That Grows With You
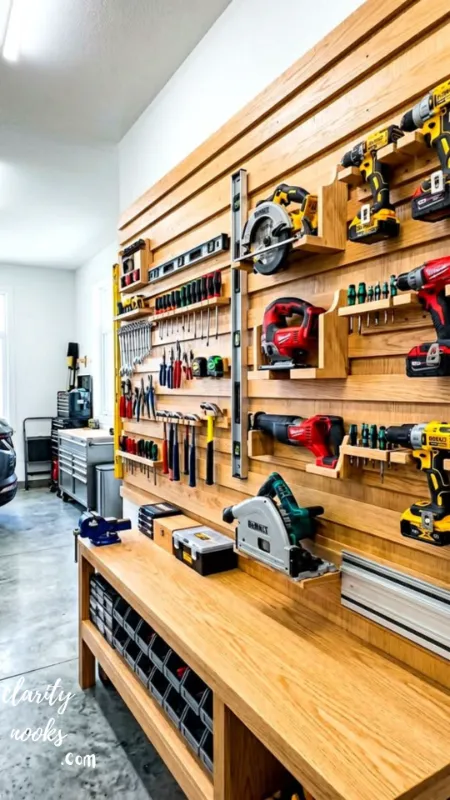
If there’s one upgrade that transforms a home workshop faster than anything else, it’s a French cleat wall storage system. This interlocking wall-mounted panel system uses angled wooden strips to hold custom tool holders, shelves, and jig boards and it’s infinitely rearrangeable. You can move your chisels, hand planes, and measuring tools to wherever makes sense for your current project.
Unlike fixed pegboard or closed cabinets, a French cleat system adapts as your tool collection grows. You add a new router? Hang a custom bracket. Need a dedicated area for finishing tools? Swap panels in minutes. It’s the most scalable tool wall organization idea available to a DIYer, and it costs a fraction of commercial solutions.
| Detail | Specification |
| Materials Needed | 3/4″ plywood (1–2 sheets), table saw or circular saw, screws, wall anchors, paint/stain (optional) |
| Estimated Cost | $40–$120 depending on wall size |
| Time to Build | 4–6 hours for a full wall |
| Key Benefit | Fully modular; zero wasted space; scales as your tools grow |
| Best For | Woodworking, general DIY, craft workshops |
Step-by-Step Setup
- Cut 3/4″ plywood into 3/4″ strips at a 45-degree bevel on one edge.
- Mount horizontal strips to your wall studs 1.5″ apart, beveled edge facing outward and upward.
- Build custom tool holders from scrap plywood with a matching 45-degree bevel cut on the back.
- Hook your tool holders anywhere on the wall no holes, no screws, no permanent mounting.
- Rearrange freely as your workflow changes.
💡 Pro Tip:
Paint alternating cleats in two different colors (like black and gray) to make it easier to hook and adjust holders especially helpful in low-light corners of your workshop.
Learn more here: DIY Home Decor Ideas That Actually Transform Your Space
The Mobile Workbench A Rolling Workshop Hub You Can Take Anywhere
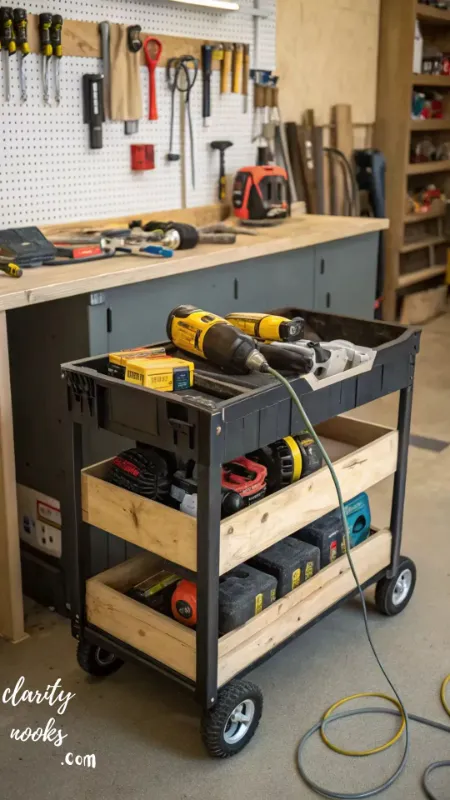
One of the most underrated small workshop design ideas is building a mobile workbench on locking casters. Instead of committing to one fixed location, your primary work surface rolls to wherever you need it next to the garage door for natural light, against the wall for storage mode, or into the center of the room for big assembly projects.
A mobile workbench also doubles as a tool storage unit. Add a lower shelf for power tools, a drawer bank on one side for hardware and hand tools, and a top surface of butcher block or MDF. Many garage workshop layouts benefit enormously from this flexible approach, especially when the same space is used for parking, laundry, or storage.
| Detail | Specification |
| Materials Needed | 2×4 lumber, 3/4″ plywood or butcher block, 4 locking swivel casters (350lb+ rated), screws, wood glue |
| Estimated Cost | $80–$200 (varies by size and top material) |
| Time to Build | 6–10 hours |
| Key Benefit | Maximum flexibility; doubles as storage; adapts to multi-use spaces |
| Best For | Garage workshops, basement workshops, shared-use spaces |
Real-World Scenario
Mark, a weekend woodworker in a 2-car garage, built a 4’x2′ rolling workbench with a drawer unit and lower shelf. On weeknights, it rolls against the wall so his wife can park. On weekends, he rolls it to the center for full project access. The mobile workshop bench saved him from choosing between his hobby and his wife’s car a compromise that’s become his most-recommended tip in his local maker group.
See the full breakdown: DIY Home Office Ideas That Actually Work Smart Setups for Every Space and Budget
Overhead Lumber and Material Storage Reclaim Floor Space Instantly
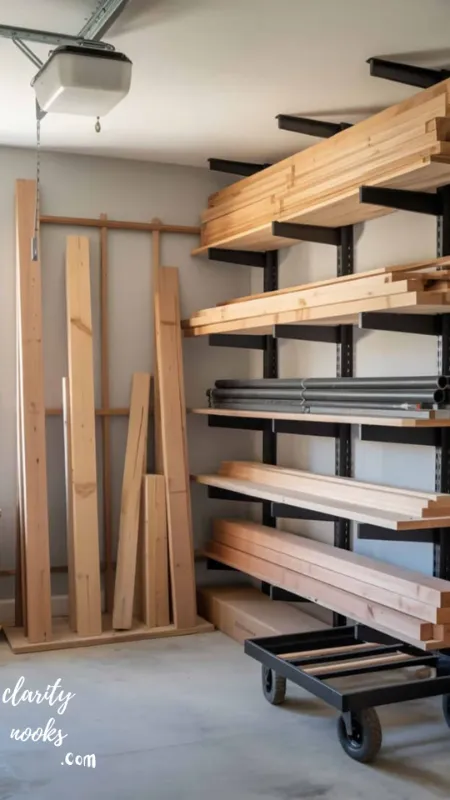
Long boards, sheet goods, and pipe stock are among the biggest clutter culprits in a home workshop. Overhead ceiling storage racks solve this problem by utilizing the dead space above your head. Suspended lumber racks made from 2x4s and threaded rod or metal pipe can safely hold hundreds of pounds of material while freeing up your entire floor.
For garage ceiling workshop storage, simple cantilever arms bolted to ceiling joists work beautifully for lumber. For flat sheet goods like plywood, build a vertical slot-style rack that leans against the wall. Either system dramatically improves workshop organization without requiring a single dollar of commercial shelving.
| Detail | Specification |
| Materials Needed | 2×4 lumber or 1″ metal pipe, threaded rod, eye bolts, lag screws, joist hangers |
| Estimated Cost | $30–$90 |
| Time to Install | 2–4 hours |
| Key Benefit | Frees floor space; keeps materials organized by type; no purchasing racks |
| Best For | Woodworking shops, metalworking setups, craftrooms with sheet goods |
⚡ Voice Search Optimization People Also Ask
How do I store lumber in a small garage workshop?
Mount 2×4 cantilever arms to ceiling joists spaced 16″ apart and rated for your load. Install a vertical slot rack for sheet goods. Both systems keep materials organized, accessible, and completely off the floor.
Read our expert tips: DIY Home Decoration Ideas to Add a Personal Touch to Your Space
Zone-Based Workshop Layout The Most Productive Way to Organize Your Space
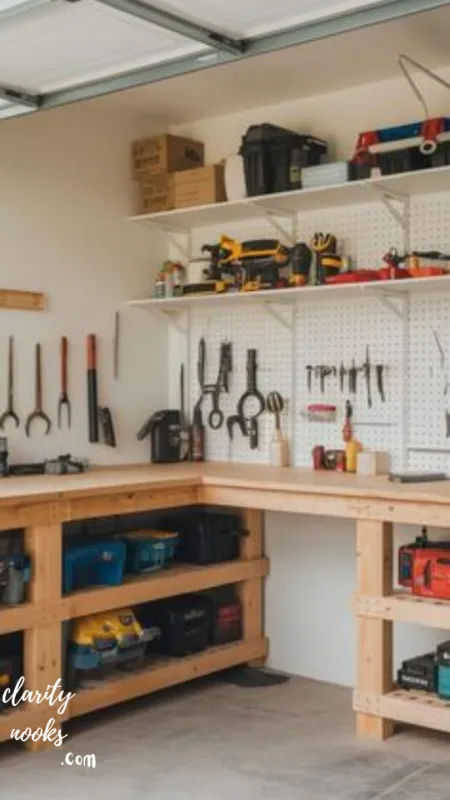
The most effective workshop floor plan ideas aren’t about fitting in the most tools they’re about creating clear activity zones. A zone-based workshop layout separates your workspace into dedicated areas: a cutting zone near the table saw, an assembly zone at the workbench, a finishing zone with good ventilation, and a cleanup zone near the sink or door.
Each zone has its own tool set, lighting, and power access. This reduces the constant cross-room movement that wastes time and causes accidents. Efficient garage workshop design relies heavily on this principle. Even in a 10’x12′ space, clearly defined zones improve safety, speed, and workflow dramatically.
| Zone | Purpose & Key Tools |
| Cutting Zone | Table saw, miter saw, bandsaw; needs clear infeed/outfeed space |
| Assembly Zone | Main workbench, clamps, fasteners, layout tools |
| Finishing Zone | Near ventilation; paint, stain, spray equipment |
| Storage Zone | Wall-mounted tool storage, bins, drawer units |
| Cleanup Zone | Trash, air compressor, shop vac, cleaning supplies |
Mini Case Study:
Sarah redesigned her 400 sq ft basement workshop using zones. Previously, she’d walk across the shop 30+ times per project. After zoning, her average project time dropped by 25%. Her #1 change? Moving her miter saw station adjacent to her lumber rack so material moved in a straight line from storage to cut to assembly never backwards.
See our latest insights: DIY Entryway Decor Ideas That Make a Stunning First Impression
Wall-Mounted Folding Workbench The Space-Saving Game Changer
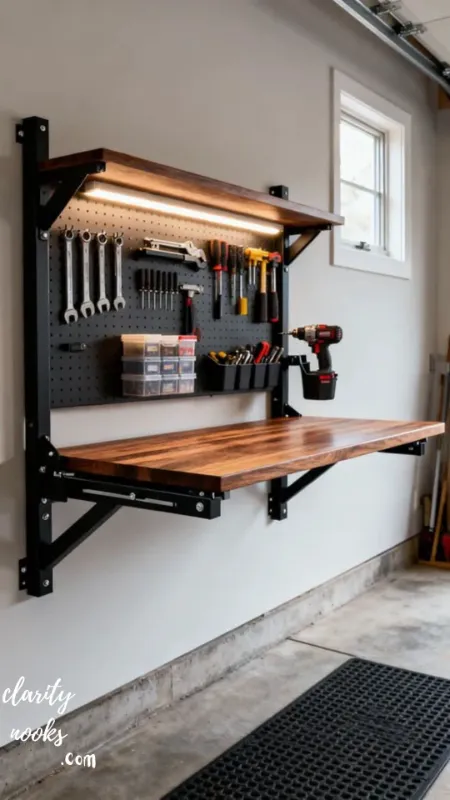
If floor space is your enemy, a wall-mounted folding workbench is your best friend. These fold-down bench designs mount flush to the wall when not in use and fold out to provide a full work surface when needed. They’re ideal for small garage workshop ideas where a fixed bench would eat up half the usable space.
A well-designed fold-down bench includes a locking support leg, storage for small tools in the rear panel, and a work surface made from 3/4″ MDF or plywood. Some makers add a pegboard backsplash to the mounting panel so tools hang behind the bench when it’s folded up making it a true wall-mounted workshop solution that takes zero floor space when closed.
| Detail | Specification |
| Materials Needed | 3/4″ plywood, piano hinge, folding leg bracket or custom support, wall studs, screws |
| Estimated Cost | $50–$130 |
| Time to Build | 3–5 hours |
| Key Benefit | Reclaims floor space when not in use; ideal for multi-purpose garages |
| Best For | Small garages, apartments with utility rooms, craft spaces |
Reader Favorites: DIY Kitchen Rugs Ideas Budget-Friendly, Creative & Stylish Handmade Rug Projects for Every Kitchen
Proper Workshop Lighting Setup Eliminate Shadows, Eliminate Mistakes
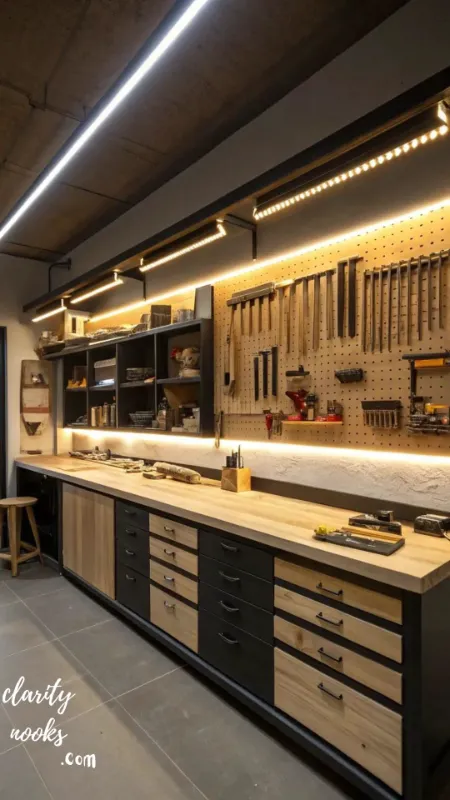
Poor lighting is the single most overlooked issue in home workshop design. Working under a single overhead bulb causes deep shadows, eye strain, and measurement errors. The best workshop lighting ideas use a layered approach: bright ambient LED shop lights for overall coverage, and directed task lighting at specific stations like the workbench and tool area.
For ambient lighting, LED shop light fixtures with 5000K color temperature (daylight) are the gold standard. A 20’x20′ garage typically needs 4–6 four-foot LED shop lights to reach the recommended 50 foot-candles of workshop illumination. Add a clamp-on or magnifying task light at your bench for close detail work like measuring, marking, and fine assembly.
| Detail | Specification |
| Products Needed | LED shop lights (4000–5000K), task lamp, under-cabinet LED strips |
| Estimated Cost | $60–$200 depending on shop size |
| Time to Install | 2–4 hours |
| Key Benefit | Improves accuracy; reduces eye strain; improves safety significantly |
| Best For | All workshop types, especially detail-oriented crafts and woodworking |
⚡ Featured Snippet Opportunity Workshop Lighting
How many lumens do I need in a workshop?
For a typical home workshop, aim for 50 foot-candles of illumination at bench height. A 200 sq ft shop needs approximately 30,000–40,000 lumens total from ceiling-mounted 5000K LED shop lights, supplemented by 1,000–2,000 lumens of task lighting at your primary workstation.
You May Also Like: DIY Front Door Entryway Ideas That Instantly Boost Curb Appeal and Welcome Guests
Pegboard + Cabinet Combo Wall Best of Both Storage Worlds
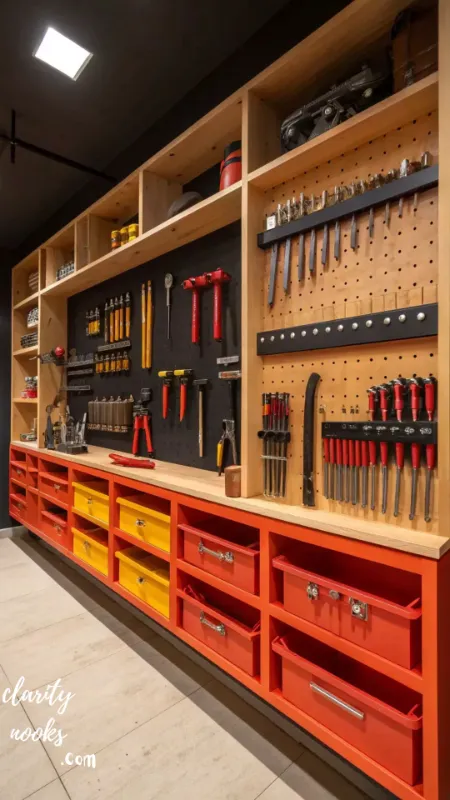
Choosing between open pegboard tool storage and closed cabinet storage is a false dilemma. The smartest workshop wall storage ideas combine both. Use pegboard for frequently accessed hand tools, measuring instruments, and everyday items. Use closed cabinets above or beside for power tool accessories, consumables, finishes, and items that shouldn’t collect sawdust.
This hybrid approach keeps your most-used tools visible and reachable while protecting sensitive items. It also creates a cleaner, more professional look which matters if you’re building a dream garage workshop you’re genuinely proud to work in. Use a consistent color scheme (like all-black hooks on white pegboard) for a polished finish.
| Detail | Specification |
| Materials Needed | Hardboard pegboard, pegboard hooks, 3/4″ plywood for cabinet boxes, hinges, handles |
| Estimated Cost | $80–$250 for a combined 8’x4′ wall section |
| Time to Build | 6–12 hours for full cabinet build |
| Key Benefit | Balances visibility and protection; reduces dust on sensitive items |
| Best For | All-purpose workshops, woodworking, electronics, automotive |
Recommended for You: DIY Backyard Design Ideas: Budget-Friendly Upgrades That Look Professionally Designed
Dedicated Miter Saw Station With Integrated Outfeed Wings
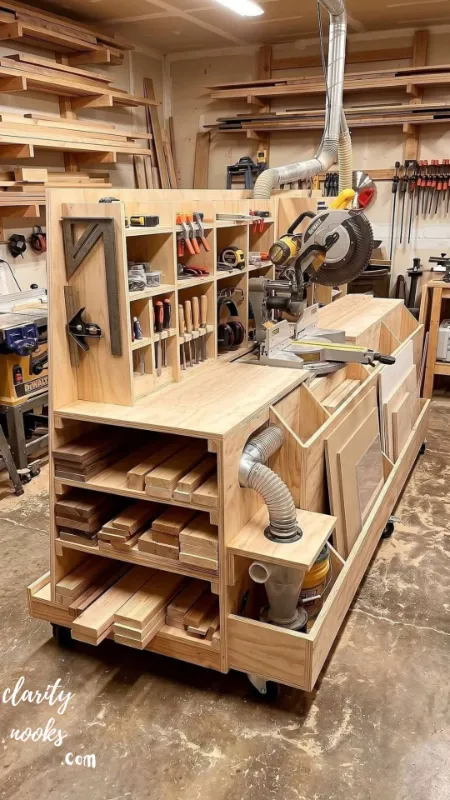
A standalone miter saw sitting on a table is a recipe for frustration. Long boards tip, measurements drift, and every cut is slightly dangerous. A dedicated miter saw station with built-in outfeed wings flat support surfaces that extend to each side of the saw transforms your cut quality and your safety. This is one of the most impactful woodworking workshop ideas for anyone who works with lumber regularly.
Build the station from 3/4″ plywood and 2×4 framing. Set the outfeed surfaces flush to your saw table height. Add a built-in measuring tape on each wing and a stop block system for repetitive cuts. Include a dust collection port at the back to connect your workshop dust management system keeping your space safe and clean.
| Detail | Specification |
| Materials Needed | 3/4″ plywood, 2×4 framing, measuring tape (flush mount), stop block, dust port |
| Estimated Cost | $100–$250 |
| Time to Build | 8–12 hours |
| Key Benefit | Improves cut accuracy; increases safety; enables long-board support |
| Best For | Woodworking shops, trim carpentry setups, any shop with a miter saw |
Spray Painting Booth on a Budget A Safe, Professional Finish Space
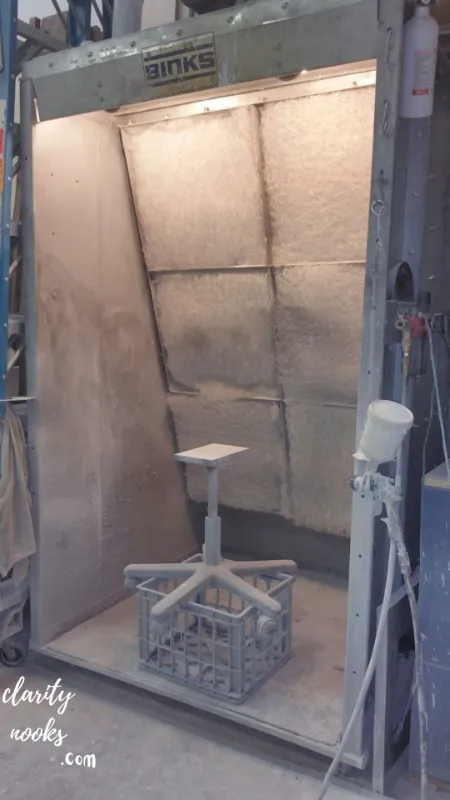
Finishing work spray painting, staining, and lacquering creates fumes and overspray that can damage your tools, irritate your lungs, and create fire hazards. A dedicated DIY spray booth doesn’t have to be permanent or expensive. A simple plastic sheeting enclosure with an inline fan and furnace filter can create a safe workshop finishing area in any garage or shed corner.
For a more permanent setup, frame a small room or alcove with 2x4s, hang visqueen plastic walls, and install a variable-speed inline fan pulling air through a filter toward an exterior vent. This keeps fumes out of your main workspace, protects your tools from overspray, and produces dramatically cleaner finishes. It’s one of the advanced DIY workshop design features that separates a hobbyist setup from a professional one.
| Detail | Specification |
| Materials Needed | 2×4 framing (optional), plastic sheeting, inline fan (400–600 CFM), furnace filter, LED waterproof light |
| Estimated Cost | $75–$300 (basic to permanent) |
| Time to Build | 2–8 hours depending on version |
| Key Benefit | Improves finish quality; protects lungs and tools; isolates fumes |
| Best For | Woodworking, automotive finishing, model building, furniture makers |
Hardware Organizer Station Find Any Screw, Bolt, or Fastener in Seconds
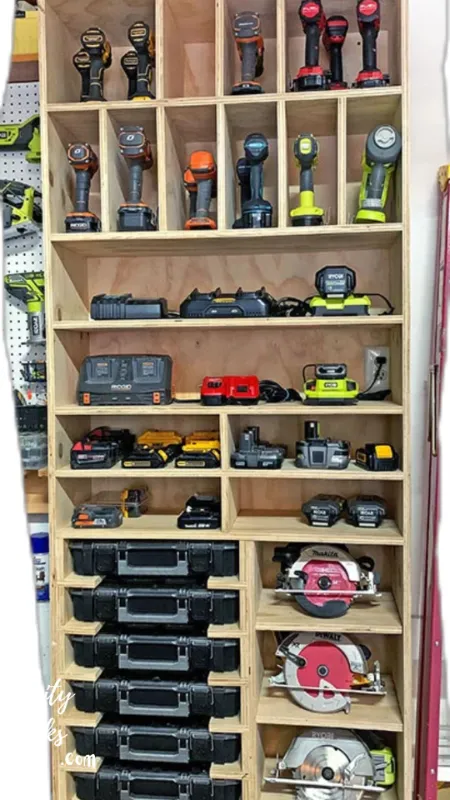
Every maker knows the frustration: you need a #8 x 1.5″ screw and you spend 10 minutes digging through a coffee can of mixed hardware. A dedicated hardware organizer station solves this permanently. Wall-mounted small parts organizers with labeled clear-lidded drawers sorted by type, size, and material save hours over the lifetime of your workshop.
Use a combination of commercially available small parts storage bins (like AkroBins) mounted on a wall panel, or build a custom drawer unit from plywood with a dozen small drawers. Label everything clearly using a label maker. Group by category: wood screws, machine screws, bolts, anchors, nails, staples. This small investment is one of the highest-ROI workshop organization ideas you can make.
| Detail | Specification |
| Materials Needed | Small parts bins (AkroBins or similar), wall-mount panel, label maker, sorting time |
| Estimated Cost | $30–$120 for bins and mounting |
| Time to Organize | 2–4 hours initial sort; ongoing maintenance |
| Key Benefit | Eliminates hardware hunting time; reduces duplicate purchasing; improves workflow |
| Best For | All workshop types; especially valuable for woodworking and metalworking |
Conclusion
A well-designed DIY workshop doesn’t happen by accident it’s built deliberately, one upgrade at a time. Whether you start with a French cleat wall, a zone-based layout, or simply better lighting, each improvement compounds into a space that fuels your creativity rather than fighting it. The best DIY workshop design ideas are the ones you actually implement.
Start with the problem that frustrates you most today. Can’t find your tools? Build a French cleat wall. Short on floor space? Install a folding workbench. Poor visibility? Upgrade your lighting. Each step forward makes the next project faster, safer, and more enjoyable. Your dream workshop is closer than you think start building it this weekend.
📈 Trend Analysis: DIY Workshop Design in 2026 and Beyond
The DIY workshop space is experiencing a genuine renaissance. Google Trends data from 2023–2026 shows sustained growth in searches for “garage workshop ideas,” “small workshop setup,” and “home woodworking shop design” driven by remote work, rising housing costs, and a cultural shift toward hands-on skills and maker culture. This isn’t a trend that will fade.
The most significant current trend is the rise of the hybrid multi-use workshop. With homes becoming workplaces, gyms, and schools, garage and basement spaces serve multiple functions simultaneously. This is pushing DIYers toward modular, mobile, and space-efficient workshop designs that can be configured and reconfigured quickly. Fixed, single-purpose layouts are declining in favor of flexible systems.
Over the next 2–3 years, expect three major trends to accelerate: (1) Smart workshop integration tool tracking apps, smart power strips, and IoT dust collection systems becoming accessible to hobbyists; (2) Vertical space maximization as floor space becomes scarcer, ceiling and wall solutions will dominate; and (3) Sustainability-focused builds makers choosing reclaimed lumber, LED energy systems, and low-VOC finishes as environmental awareness grows within the maker community.
🛠️ Practical Tips & Expert Insights
Expert Insight #1: Start With Workflow, Not Aesthetics
Before buying any storage system or building any bench, map your most common project workflow on paper. Sketch where materials enter, how they move through your process, and where they exit. Then design your layout around that path not around where your tools happen to be right now. This single exercise prevents 90% of inefficient workshop layouts.
Electrical planning is another area where beginners consistently underinvest. Most home workshops run on a single 15-amp circuit enough for one power tool. Serious woodworking or metalworking requires dedicated 20-amp circuits for major equipment like table saws, planers, and dust collectors. Planning this early (and getting it permitted properly) prevents dangerous overloads and future rewiring headaches.
One often-missed expert strategy: design for dust collection from day one. Workshop dust management isn’t just about cleanliness it’s a health issue. Fine wood dust is a known carcinogen. Build your shop with dedicated 4″ ports near each major tool and route them to a central dust collector system. Retrofitting dust collection to an existing shop is three times harder and more expensive than building it in from the start.
Quick-Reference Expert Tip List
- Mount your workbench at the right height: elbow height minus 2″–4″ for heavy work; higher for fine detail
- Install outlets every 6–8 feet along your wall to avoid extension cord tangles and trip hazards
- Use anti-fatigue mats at your primary workstation they reduce back pain significantly during long sessions
- Paint your shop walls white or light gray to maximize light reflection and reduce eye strain
- Add a first aid kit, fire extinguisher, and eye wash station before any other upgrade
🏗️ Long-Term Strategy & Sustainability
The smartest workshop design strategies are built to evolve. Rather than designing for your current tool collection, design for the shop you’ll have in 5 years. Use modular storage systems (like French cleats) that can expand without rebuilding. Run more electrical circuits than you currently need. Leave open wall and ceiling space for future equipment.
From a sustainability perspective, the most eco-conscious workshop choices in 2026 include: switching entirely to LED lighting (cutting energy use by 60–75% vs fluorescent), using reclaimed or secondhand lumber for shop builds (not project pieces), choosing water-based finishes over solvent-based, and installing a HEPA filtration dust collector rather than venting particulates outdoors.
Think about your workshop’s scalability in terms of value, too. A well-built, organized workshop adds genuine resale value to your home if it’s in a garage especially as remote work and maker culture grow. Document your build with photos and a materials list. If you ever sell, a finished, functional workshop with wired-in circuits, good lighting, and organized storage is a meaningful differentiator.
🔮 Future Predictions & Innovations
Within the next 3–5 years, expect AI-assisted workshop design tools to become mainstream. Software that takes your room dimensions and tool list and generates optimized floor plans, lighting schemes, and electrical layouts will move from professional CAD to consumer apps. Early versions already exist in platforms like RoomSketcher and SketchUp, but AI will make them dramatically faster and smarter.
Battery technology advances will transform power tool strategies. As 60V and 80V cordless systems match corded tool performance, shops will increasingly move toward battery-first layouts reducing the need for central air compressors and extensive electrical planning. Dust collection is also going battery-cordless, opening up portable setups that were impractical before.
Expect voice-controlled workshop environments to emerge where integrated smart speakers can trigger dust collection, adjust lighting zones, or activate exhaust fans by voice command. For professional makers and advanced hobbyists, this represents the beginning of the smart home workshop era. Early adopters who wire their shops for smart integration now will have a significant advantage in adaptability.
⚠️ Common Mistakes & Hidden Content Gaps
Beginner Mistakes
- Designing for aesthetics first: A beautiful pegboard wall you can’t actually reach is useless. Always prioritize ergonomics and workflow over appearance.
- Underestimating electrical needs: Running a single 15-amp circuit for a full workshop is the #1 cause of overloaded breakers and dangerous workarounds.
- Skipping the planning phase: Jumping straight to buying shelving and organizing tools before mapping your workflow leads to moving everything twice.
- Ignoring ventilation: A sealed garage with no fresh air makes painting, staining, and even dust collection uncomfortable and unhealthy.
Intermediate Mistakes
- Building storage before finalizing tool placement: Your storage should be designed around where your tools naturally work, not the other way around.
- Using the wrong workbench height: Intermediate builders often default to standard kitchen counter height (36″) but the optimal bench height depends on your task and body height.
- Over-investing in fixed storage early: Permanent cabinets are great eventually, but building them before you’ve worked in the space for a few months locks you into a layout you’ll regret.
Hidden Content Gaps (Topics Competitors Miss)
- Workshop heating and cooling for year-round use a critical but rarely covered topic
- Soundproofing strategies for workshop spaces in shared buildings or close-neighbor suburbs
- ADA-accessible workshop design for makers with mobility considerations
- Multi-person workshop layouts for couples or maker groups sharing a space
- Workshop insurance, liability, and home coverage considerations for serious hobbyists
Frequently Asked Questions
What is the best layout for a home workshop?
The best home workshop layout uses a zone-based approach separating cutting, assembly, finishing, and storage areas to minimize cross-room movement. Even small shops benefit from clear zones, which improve safety, speed, and workflow significantly.
How do I design a workshop in a small garage?
Focus on vertical storage (French cleats, pegboard, ceiling racks), mobile furniture (rolling workbenches, carts), and fold-down workbenches. Use every inch of wall and ceiling space, and keep the floor as clear as possible for movement.
How much does it cost to set up a DIY workshop?
A functional starter DIY workshop can be set up for $300–$800 using budget-friendly storage solutions, a basic workbench build, and proper lighting. A more complete intermediate setup with dedicated circuits and comprehensive storage runs $1,500–$4,000.
What type of workbench is best for a DIY workshop?
For most DIYers, a mobile workbench on locking casters with a 3/4″ MDF or butcher block top offers the best combination of durability, flexibility, and value. Fixed benches built from 2×4 construction lumber are excellent for woodworking-focused shops.
How do I organize tools in a small workshop?
French cleat walls offer the most flexible tool organization for small workshops. Pegboard is an excellent second option. The key is to keep frequently used tools at eye level within arm’s reach, and to store rarely used items in closed storage.
Rameen Zara is the founder of Clarity Nooks, bringing over five years of experience in home décor and interior styling. She shares simple yet practical design ideas that suit real homes and everyday living. Her approach focuses on cozy aesthetics, soft color palettes, and natural textures that create warm, inviting spaces.