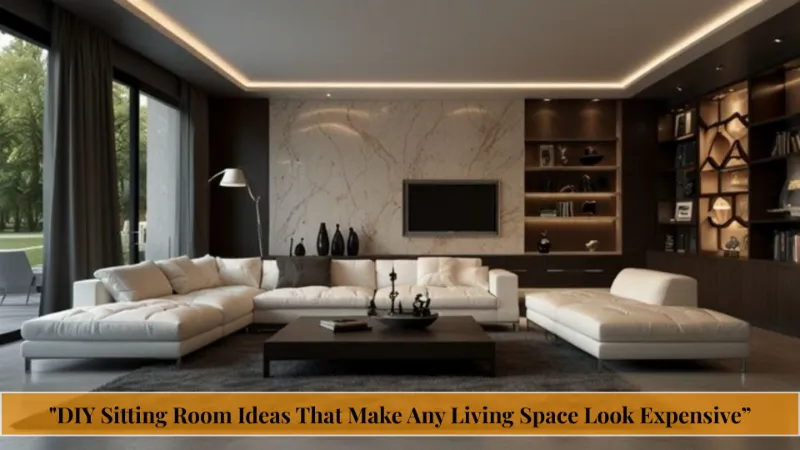
DIY Sitting Room Ideas That Make Any Living Space Look Expensive

Staring at a sitting room that feels flat, outdated, or oddly unfinished is one of the most common home frustrations. You don’t need a renovation budget or a design degree to fix it, and you don’t have to live with mismatched furniture and bare walls another season.
This guide walks through practical DIY sitting room ideas, each with real materials lists, honest cost estimates, and step-by-step instructions you can follow this weekend. Every project has been tested for feasibility, not just pulled from a mood board.

Whether you’re furnishing a first apartment or refreshing a family home, these budget-friendly sitting room ideas balance style with function, so the results actually hold up to daily life.
What Makes a Sitting Room Feel Complete?
A complete sitting room balances four elements: comfortable seating, layered lighting, textural variety (rugs, fabric, wood), and at least one clear focal point, such as an accent wall or statement light fixture. Missing any one of these usually makes a room feel unfinished, even with nice furniture.
Most DIY sitting room ideas fail not from lack of effort but from tackling everything at once. Start with one focal point, then build outward with lighting, texture, and smaller accents, which is exactly how the ideas below are ordered.
Build a Reclaimed Wood Accent Wall
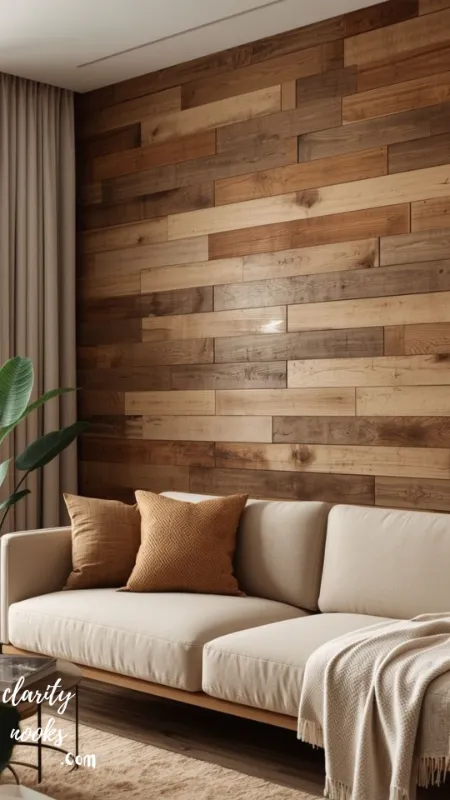
A reclaimed wood accent wall instantly adds warmth and texture to any sitting room without a full renovation budget. This is one of the most requested DIY sitting room ideas because it delivers a designer look using salvaged materials, pallet boards, or inexpensive shiplap strips from a hardware store.
| Quick Facts | |
| Materials | Reclaimed wood boards or pallet planks, wood glue, finishing nails, sandpaper, wood stain or clear sealant, level, measuring tape |
| Estimated Cost | $80–$180 for a standard 8×10 ft wall (free if using salvaged pallets) |
| Time Required | One full weekend (6–8 hours) |
| Skill Level | Beginner to intermediate |
Step-by-Step:
- Measure the wall and calculate the number of boards needed, adding 10% extra for cuts and mistakes
- Sand each plank to remove splinters and rough edges
- Arrange boards in a horizontal, vertical, or herringbone pattern before attaching
- Glue and nail boards to the wall starting from the bottom corner, using a level after every row
- Seal with a matte or satin finish to protect against dust and fading
Benefits: This project adds real architectural texture, hides uneven drywall, and creates a natural focal point behind a sofa or media console. It also increases perceived home value far beyond its low material cost.
Decorating Tip: Mix two or three stain tones across the boards for a collected, rustic-industrial look rather than a flat, uniform finish.
Case Study: A homeowner in a rented apartment used lightweight faux-wood peel panels instead of nailing into drywall, achieving the same accent wall effect while staying fully deposit-safe.
Explore this topic: DIY Living Room Carpet Ideas: Transform Your Space Without Breaking the Bank
Create a Thrifted Gallery Wall
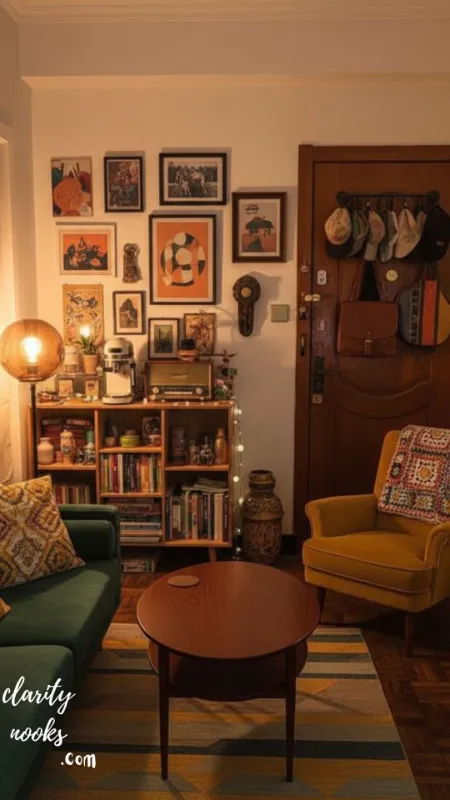
A curated gallery wall is one of the easiest budget-friendly sitting room ideas because it repurposes frames you already own or find secondhand. Mixing sizes, finishes, and artwork styles creates a personal, gallery-quality display without paying for custom framing.
| Quick Facts | |
| Materials | 8–12 secondhand or existing frames, spray paint (optional), printed art or photos, picture hanging strips, a paper template kit |
| Estimated Cost | $25–$60 if thrifting frames; $0 if reusing existing ones |
| Time Required | 3–5 hours |
| Skill Level | Beginner |
Step-by-Step:
- Collect frames in varying sizes but unify them with one or two spray-paint colors
- Lay the frames on the floor in your desired arrangement
- Trace each frame onto paper templates and tape them to the wall to test spacing
- Hammer nails or attach hanging strips at the marked points
- Hang frames and adjust for a consistent 2–3 inch gap between each piece
Benefits: A gallery wall adds personality, storytelling, and color without committing to expensive art. It’s also fully reversible, making it ideal for renters who want a strong visual statement.
Decorating Tip: Anchor the arrangement with one large statement piece and build smaller frames around it rather than spacing everything evenly, which tends to look flat.
Find out more: Trendy DIY Living Room Curtain Ideas for a Fresh and Elegant Look
Make a No-Sew Fabric-Wrapped Ottoman
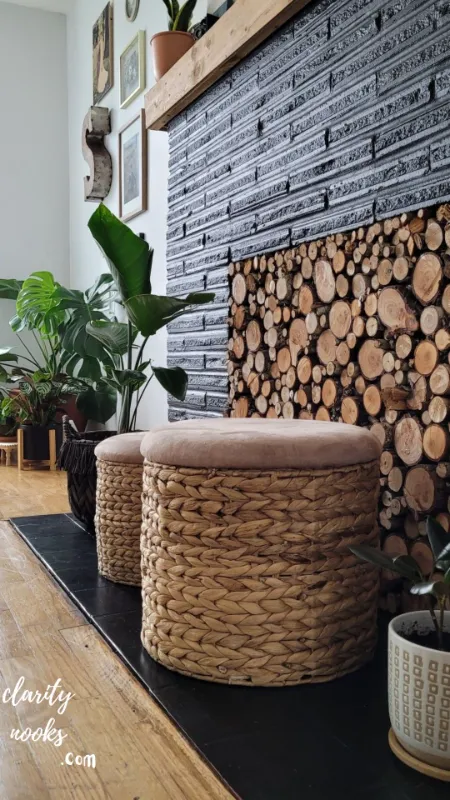
Turning a plain storage cube or old coffee table into a fabric-wrapped ottoman is a favorite among no-sew DIY sitting room ideas. It adds soft texture, doubles as extra seating, and hides mismatched furniture underneath a fresh fabric layer.
| Quick Facts | |
| Materials | Wooden cube or old table, foam padding, upholstery fabric, heavy-duty staple gun, fabric scissors, hot glue gun |
| Estimated Cost | $35–$70 depending on fabric choice |
| Time Required | 3–4 hours |
| Skill Level | Beginner to intermediate |
Step-by-Step:
- Cut foam to match the top surface and glue it in place
- Cut fabric with 4–6 extra inches on each side for wrapping
- Pull fabric taut over the top and staple it to the underside, starting with the center of each edge
- Fold and staple the corners neatly, trimming excess fabric
- Glue decorative trim along the base to hide raw staple lines
Benefits: An upholstered ottoman softens a room full of hard surfaces and provides hidden storage for blankets, remotes, or magazines, keeping the sitting room clutter-free.
Decorating Tip: Choose a performance fabric (stain-resistant, tightly woven) if pets or kids regularly use the sitting room.
See the full breakdown: DIY Living Room Decor Ideas That Actually Transform Your Space
Build a Floating Corner Reading Nook
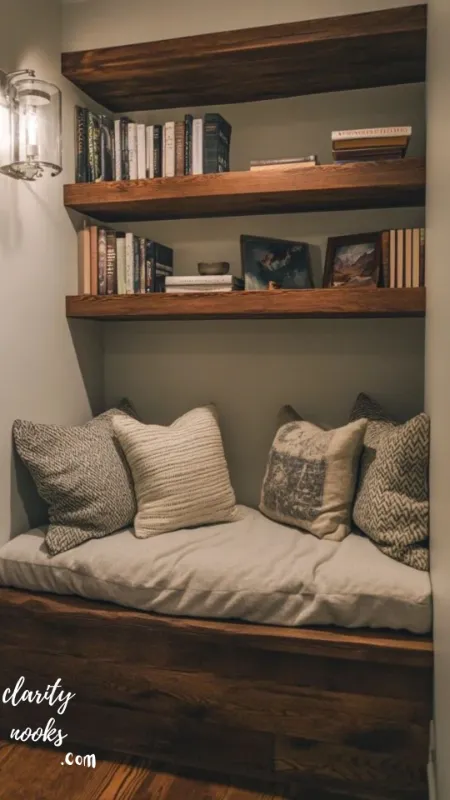
An unused corner is one of the biggest missed opportunities in small sitting rooms. Adding floating shelves, a slim seat, and a reading lamp transforms dead space into a cozy, functional nook without shrinking your floor plan.
| Quick Facts | |
| Materials | 2–3 floating shelf brackets and boards, a slim armless chair or floor cushion, a compact reading lamp, wall anchors |
| Estimated Cost | $60–$150 |
| Time Required | One afternoon (4–5 hours) |
| Skill Level | Beginner |
Step-by-Step:
- Choose a corner near natural light for the nook’s location
- Mark stud locations and install floating shelf brackets securely
- Attach shelf boards and let adhesive or hardware cure fully before loading books
- Place a slim chair or floor cushion beneath the shelving
- Add a plug-in wall sconce or small lamp for task lighting
Benefits: A reading nook adds function to wasted square footage and creates a calming retreat separate from the main seating area, which is especially valuable in open-plan homes.
Decorating Tip: Stagger shelf heights instead of lining them up evenly to create visual rhythm and display books, plants, or framed photos side by side.
Read our expert tips: DIY Family Room Ideas: 10 Budget-Friendly Transformations That Actually Work
Paint and Reupholster an Old Armchair
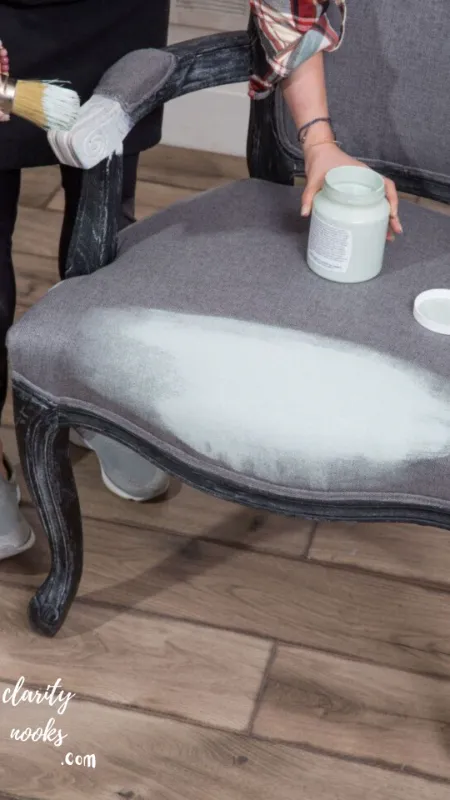
Reviving a tired armchair through paint and reupholstery is one of the most cost-effective DIY sitting room ideas for anyone with a solid wood frame but worn fabric. A fresh finish can make a decades-old piece look brand new.
| Quick Facts | |
| Materials | Chalk paint or wood stain, fine-grit sandpaper, upholstery fabric, foam (if needed), staple gun, flathead screwdriver for removing old fabric |
| Estimated Cost | $50–$120 |
| Time Required | One full weekend |
| Skill Level | Intermediate |
Step-by-Step:
- Remove old fabric panel by panel, keeping pieces as fabric-cutting templates
- Sand and paint or stain the exposed wood frame
- Replace worn or flattened foam padding
- Cut new fabric using the old panels as a guide, adding 2 inches of overlap
- Staple new fabric into place, working opposite sides first to keep tension even
Benefits: Reupholstering preserves quality vintage frames that are often sturdier than modern furniture, while giving you full control over color and pattern to match your sitting room’s palette.
Decorating Tip: Test paint and fabric swatches together under your room’s actual lighting before committing, since undertones shift dramatically between daylight and lamp light.
Real-Life Scenario: A family inherited a solid oak wingback chair with torn upholstery. Instead of replacing it, they spent under $90 on paint and remnant fabric, keeping a sentimental piece as the sitting room’s centerpiece.
Don’t miss this guide: DIY Basement Family Room Ideas: 9 Budget-Friendly Transformations Home Improvement (Guide 2026)
Add a DIY Macrame Wall Hanging

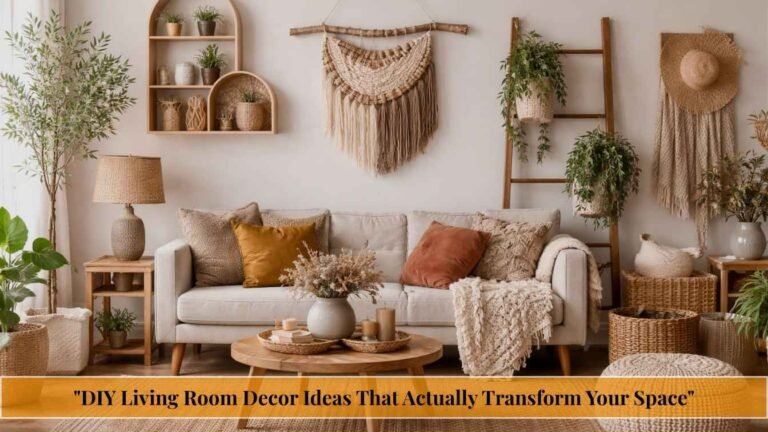
A handmade macrame wall hanging brings soft, tactile texture to a sitting room and works especially well above a sofa or beside a window. It’s an inexpensive way to fill a bare wall with handmade, boho-inspired detail.
| Quick Facts | |
| Materials | Cotton macrame cord, a wooden dowel or driftwood branch, scissors, a comb for fringing |
| Estimated Cost | $15–$35 |
| Time Required | 2–3 hours |
| Skill Level | Beginner |
Step-by-Step:
- Cut cord into equal lengths, roughly three times your desired finished length
- Fold and attach each cord to the dowel using a simple lark’s head knot
- Work basic square knots in rows to build your pattern
- Trim the bottom edge into a straight or arched shape
- Comb out the fringe for a soft, textured finish
Benefits: Madds warmth and dimension without color commitment, making it easy to update the rest of the room’s palette later without needing to redo the wall art.
Decorating Tip: Hang the piece slightly higher than eye level and let the fringe extend toward furniture below to visually connect the wall to the seating area.
Read the next article: Cozy DIY Balcony Privacy Ideas for Peaceful Apartment Living
Build a Pallet Wood Coffee Table
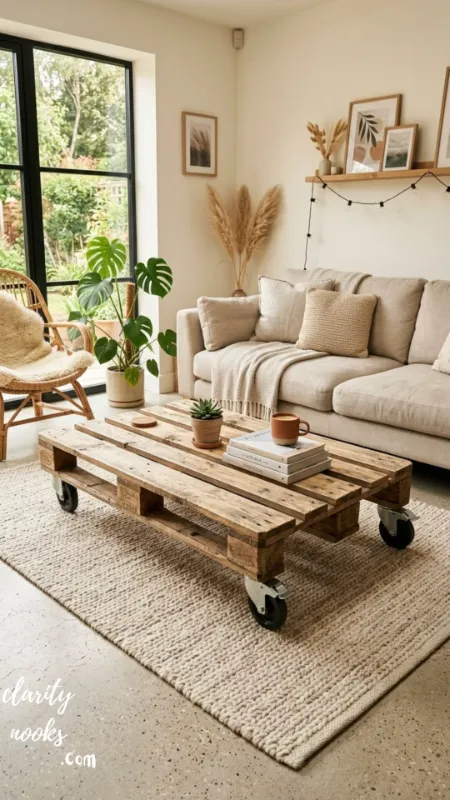
A pallet wood coffee table remains one of the most popular budget builds because it combines rustic charm with real functionality. It’s sturdy, customizable, and can be finished to match nearly any sitting room style, from farmhouse to modern industrial.
| Quick Facts | |
| Materials | 2–3 wooden pallets, sandpaper, wood screws, caster wheels or wooden legs, wood stain or paint, sealant |
| Estimated Cost | $40–$100 |
| Time Required | One weekend |
| Skill Level | Intermediate |
Step-by-Step:
- Disassemble pallets carefully or keep one intact as the tabletop base
- Sand all surfaces thoroughly to remove splinters
- Attach legs or caster wheels to the underside using a level for balance
- Stack a second layer of boards for added height and a layered look if desired
- Stain or paint, then seal with polyurethane for durability
Benefits: Pallet furniture is inexpensive, sturdy when built correctly, and gives your sitting room an authentic handmade centerpiece that store-bought tables rarely match in character.
Decorating Tip: Add caster wheels instead of fixed legs so the table can be easily repositioned for cleaning or rearranging furniture.
You May Also Like: DIY Canopy Bed Ideas: Budget-Friendly Ways to Build a Dreamy Bedroom Retreat
Create a Layered Rug Look
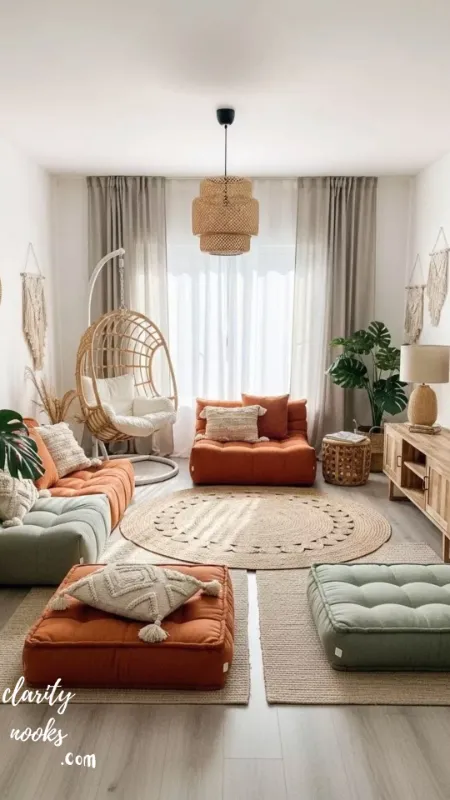
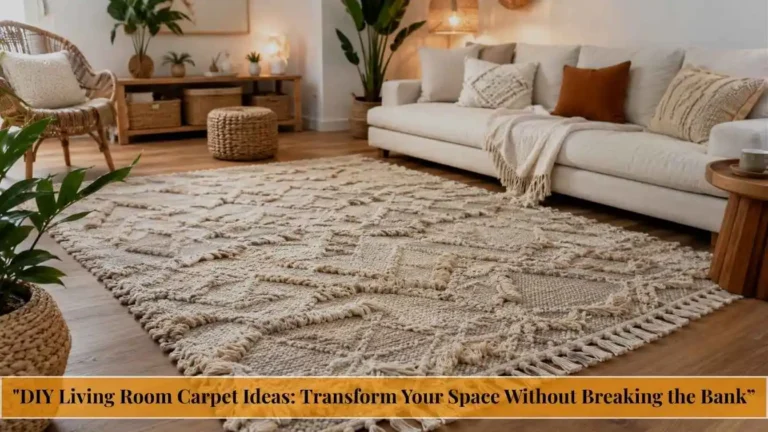
Layering rugs is a simple styling trick that instantly makes a sitting room feel more intentional and expensive. Placing a smaller patterned or textured rug over a larger neutral one adds depth without buying one large, costly statement rug.
| Quick Facts | |
| Materials | One large neutral base rug (jute or flatweave), one smaller accent rug, non-slip rug pad |
| Estimated Cost | $40–$150 depending on size and material |
| Time Required | 30–60 minutes |
| Skill Level | Beginner |
Step-by-Step:
- Lay the larger neutral rug first, centered under the main seating group
- Place the smaller accent rug at a slight offset, usually near the front of the sofa
- Secure both layers with a non-slip pad to prevent shifting
- Tuck rug edges under furniture legs to anchor the layered look
Benefits: Layering hides worn or stained base rugs, adds texture underfoot, and lets you introduce color or pattern in a low-commitment, affordable way.
Decorating Tip: Keep the base rug neutral and let the top rug carry pattern or color so the layered look doesn’t compete with other sitting room decor.
Recommended for You: DIY Under Stairs Storage Ideas: Smart Ways to Reclaim Hidden Space
Install a Peel-and-Stick Wallpaper Accent Panel
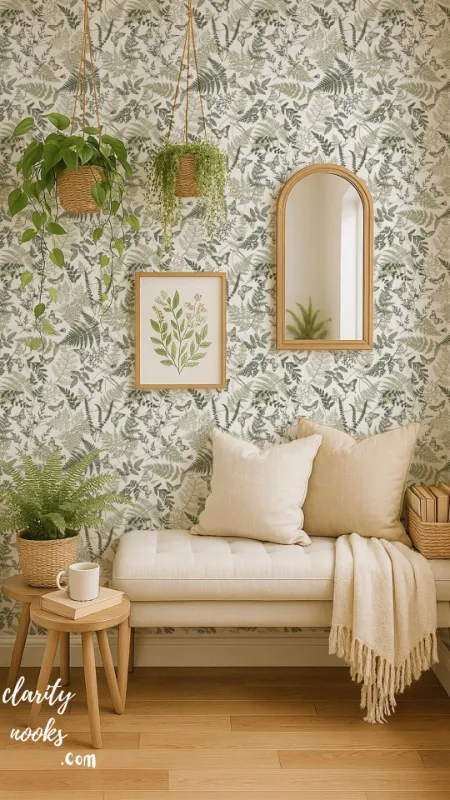
Peel-and-stick wallpaper has become a go-to solution for renters and homeowners who want bold pattern without a permanent commitment. Applied to a single wall or even just a panel behind a shelf, it delivers major visual impact for very little effort.
| Quick Facts | |
| Materials | Peel-and-stick wallpaper roll, smoothing tool, utility knife, tape measure, level |
| Estimated Cost | $30–$90 for one accent wall |
| Time Required | 2–4 hours |
| Skill Level | Beginner |
Step-by-Step:
- Clean and dry the wall surface completely before application
- Measure and cut the first strip, adding 2 inches extra top and bottom
- Align the strip using a level, then peel and press from top to bottom
- Smooth out air bubbles with a smoothing tool as you go
- Trim excess with a sharp utility knife along the ceiling and baseboard
Benefits: This is a fully removable upgrade, meaning renters can add personality without violating lease terms, while homeowners get a fast alternative to a full repaint.
Decorating Tip: Choose a large-scale pattern for small sitting rooms since oversized prints tend to read as more sophisticated than tiny, busy motifs.
Make DIY Rope or Concrete Pendant Lighting
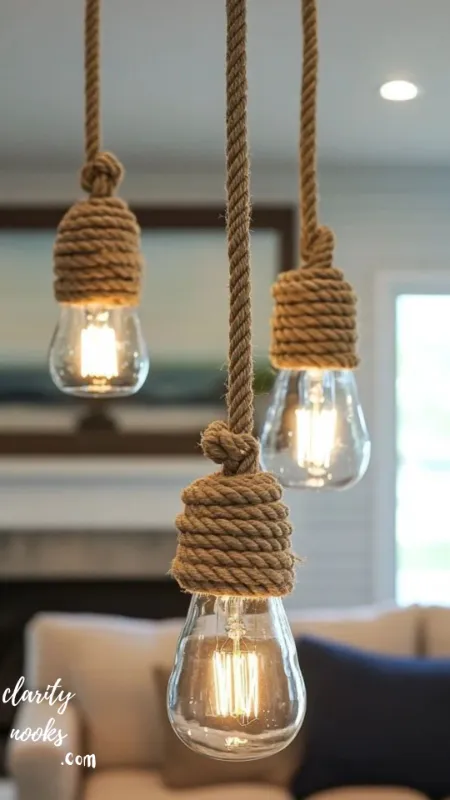
Swapping a builder-grade light fixture for a DIY pendant light is a high-impact, low-cost upgrade. Rope-wrapped or lightweight concrete pendant shades add a handmade, boutique feel that instantly elevates the whole sitting room.
| Quick Facts | |
| Materials | Pendant light cord kit, wire basket or paper mache form, natural rope or quick-set concrete mix, hot glue |
| Estimated Cost | $25–$60 per fixture |
| Time Required | 3–5 hours plus drying time |
| Skill Level | Intermediate |
Step-by-Step:
- Choose a base shape: a wire basket for rope-wrapping or a balloon mold for concrete
- Wrap rope tightly around the frame, securing with hot glue every few rows, or pour a thin concrete shell over the mold
- Let concrete cure fully for 24–48 hours before demolding
- Install the pendant light cord kit following the manufacturer’s wiring instructions
- Hang at a height that clears eye level, typically 28–34 inches above a coffee table
Benefits: Custom lighting is one of the fastest ways to change a room’s mood, and a handmade pendant becomes a genuine conversation piece rather than a generic fixture.
Decorating Tip: Always turn off power at the breaker before touching any wiring, and if you’re unsure about electrical work, hire a licensed electrician for the wiring step only.
Build a Media Console from Stock Cabinets
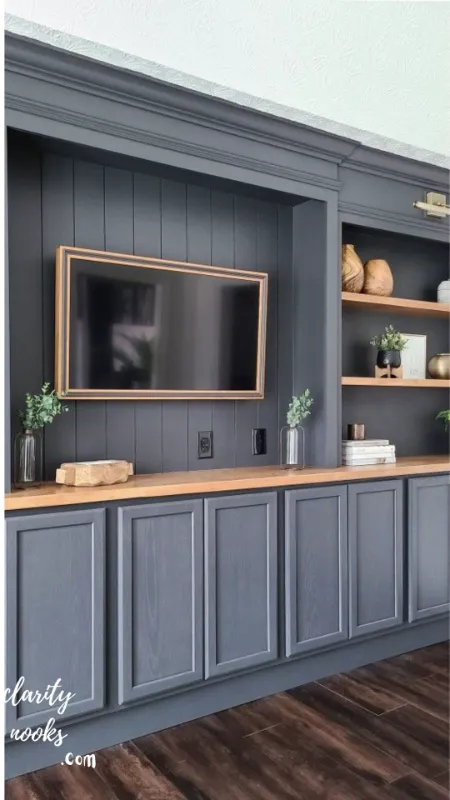
Instead of buying an expensive built-in media wall, you can build a custom media console using unfinished stock cabinets from a home improvement store. This is one of the most practical DIY sitting room ideas for hiding cords and clutter.
| Quick Facts | |
| Materials | 2–3 unfinished stock base cabinets, a plywood top, cabinet hardware, wood filler, paint or stain, cable management clips |
| Estimated Cost | $150–$350 |
| Time Required | One weekend |
| Skill Level | Intermediate |
Step-by-Step:
- Arrange cabinets side by side and screw them together at the sides for stability
- Cut and attach a plywood top slightly larger than the cabinet footprint
- Fill seams and screw holes, then sand smooth
- Paint or stain the entire piece for a unified, built-in look
- Drill a rear cord-management hole and route cables through it before mounting a TV above
Benefits: This method costs a fraction of a custom-built cabinet while offering real storage for electronics, games, and blankets, keeping the sitting room visually calm.
Decorating Tip: Leave a half-inch gap behind the console against the wall for ventilation if it will house a cable box or gaming console.
Create a Cozy Window Seat with Storage
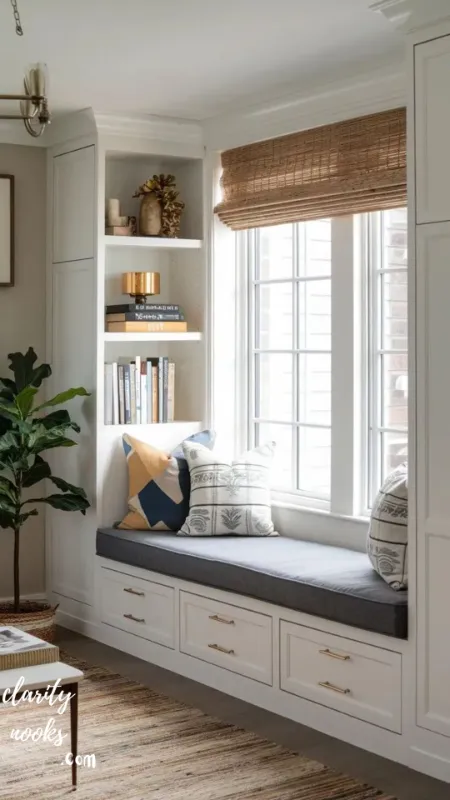
A DIY window seat turns an underused window ledge into both a charming seating spot and hidden storage. It’s a favorite among sitting room ideas for homes that need more function packed into a small footprint.
| Quick Facts | |
| Materials | Plywood, 2×4 lumber for the frame, hinges, foam cushion, fabric, piano hinge for a lift-top lid |
| Estimated Cost | $90–$220 |
| Time Required | One weekend |
| Skill Level | Intermediate to advanced |
Step-by-Step:
- Build a simple box frame from 2x4s sized to fit the window recess
- Attach a plywood top and bottom to enclose the storage cavity
- Install a piano hinge along the back edge so the seat lifts for access
- Cut foam and fabric to size, then staple to a separate lid insert
- Sand, paint, and set the cushioned lid onto the hinged base
Benefits: A window seat maximizes natural light for reading, adds hidden storage for seasonal items, and often becomes the most photographed corner of the sitting room.
Decorating Tip: Add a hidden lip or magnetic catch to the lid so it stays flush and doesn’t shift when used as everyday seating.
Final Thoughts
These DIY sitting room ideas prove that a warm, well-designed space doesn’t require a big budget or professional help. From a reclaimed wood accent wall to a hand-built window seat, each project adds real character and function to your home.
Pick one idea that solves your biggest frustration first, whether that’s bare walls, cramped storage, or dated furniture, and build outward from there. Your sitting room is one weekend project away from finally feeling finished.
Trend Analysis: Sitting Room Design Trends (2026–2029)
Sitting room trends are shifting toward tactile, handmade details over mass-produced decor. Homeowners increasingly favor reclaimed wood, natural fiber rugs, and reupholstered vintage furniture instead of fast-furniture replacements, driven partly by rising furniture costs and partly by sustainability awareness.
Multi-functional layouts are also accelerating. As more people work from home part-time, sitting rooms are being designed with hidden storage, foldaway desks, and window seats that convert casual lounging space into quiet work corners without a dedicated office.
Over the next two to three years, expect AI-assisted room planning apps to become standard for DIY decorators, letting homeowners preview accent walls, furniture layouts, and paint colors before spending a dollar on materials, reducing costly trial-and-error purchases.
Practical Tips and Expert Insights for DIY Success
Professional stagers consistently apply the 60-30-10 color rule: 60% dominant neutral, 30% secondary color, and 10% accent color. Applying this ratio to a sitting room’s walls, furniture, and accessories prevents the mismatched, cluttered look that plagues many first-time DIY projects.
Buy tools once, not per project. A quality staple gun, level, and stud finder pay for themselves across multiple projects in this guide and prevent the frustration of a project failing halfway through due to underpowered equipment.
Always test paint, stain, and fabric swatches in the room itself, under both daytime and evening lighting, before committing. Colors that look perfect on a store swatch frequently shift tone dramatically once installed.
Long-Term Strategy: Building a Sitting Room That Lasts
Treat your sitting room as a layered system rather than a single project. Start with durable, neutral big-ticket pieces (sofa, rug, media console), then rotate smaller, cheaper accents like pillows, art, and lighting every season for variety without replacing core furniture.
Choosing quality frames and solid wood bases for reupholstery projects means the piece can be re-covered again in five or ten years, rather than discarded. This approach reduces long-term spending far more than buying new furniture every few years.
Document your projects with photos and material sources. If a paint color or fabric works perfectly, having the exact product name saved makes future touch-ups or matching pieces dramatically easier and cheaper.
Future Predictions: AI, Smart Homes, and Sitting Room Innovation
Smart lighting integration is moving from novelty to default. Expect more DIY pendant and sconce projects built around smart bulb bases, letting homeowners control warmth and brightness by voice or app without rewiring switches.
AI-generated room visualization tools are already reducing decorating mistakes, and within a few years, most major hardware and paint retailers are expected to offer built-in AR previews, letting you see an accent wall or furniture placement on your actual wall before buying anything.
Modular furniture is also expanding, with more brands offering reconfigurable sofas and shelving units specifically designed for renters and small spaces, aligning closely with the flexible, budget-conscious spirit behind most DIY sitting room projects.
Common Mistakes and Hidden Gaps to Avoid
Beginner mistake: skipping surface prep. Painting or staining over dust, grease, or old finish without sanding causes peeling within months, wasting both time and materials on an otherwise solid project.
Intermediate mistake: ignoring scale. Many DIYers build furniture or hang art sized for a showroom photo rather than their actual room dimensions, resulting in pieces that feel cramped or oddly small once installed.
Hidden gap most guides miss: ventilation and drying time. Rushing concrete pendant lights, stained furniture, or wallpaper application before full curing time causes cracking, bubbling, or lingering odors that surface days after the project looks finished.
Frequently Asked Questions
What is the cheapest way to update a DIY sitting room?
The cheapest update is rearranging existing furniture and adding a layered rug or thrifted gallery wall, both of which typically cost under $60 and require no tools beyond a hammer and measuring tape.
Can I decorate a sitting room without hiring an interior designer?
Most of the ideas in this guide, including accent walls, reupholstery, and pendant lighting, are fully achievable with basic tools, and following a clear materials list removes the guesswork a designer would normally handle.
How much does a full DIY sitting room makeover typically cost?
A complete DIY sitting room makeover using the projects in this guide usually costs between $400 and $900, compared to $3,000 or more for a professionally furnished and styled room.
What colors make a small sitting room feel bigger?
Warm neutrals, soft sage greens, and light terracotta tones reflect natural light well and visually expand a small sitting room, especially when paired with a large-scale peel-and-stick wallpaper panel rather than small, busy patterns.
How long does a DIY sitting room makeover take?
Most single projects take between 2 hours and one full weekend. A complete room refresh combining 4–5 projects from this guide typically spans two to three weekends when done alongside a regular schedule.
Rameen Zara is the founder of Clarity Nooks, bringing over five years of experience in home décor and interior styling. She shares simple yet practical design ideas that suit real homes and everyday living. Her approach focuses on cozy aesthetics, soft color palettes, and natural textures that create warm, inviting spaces.