
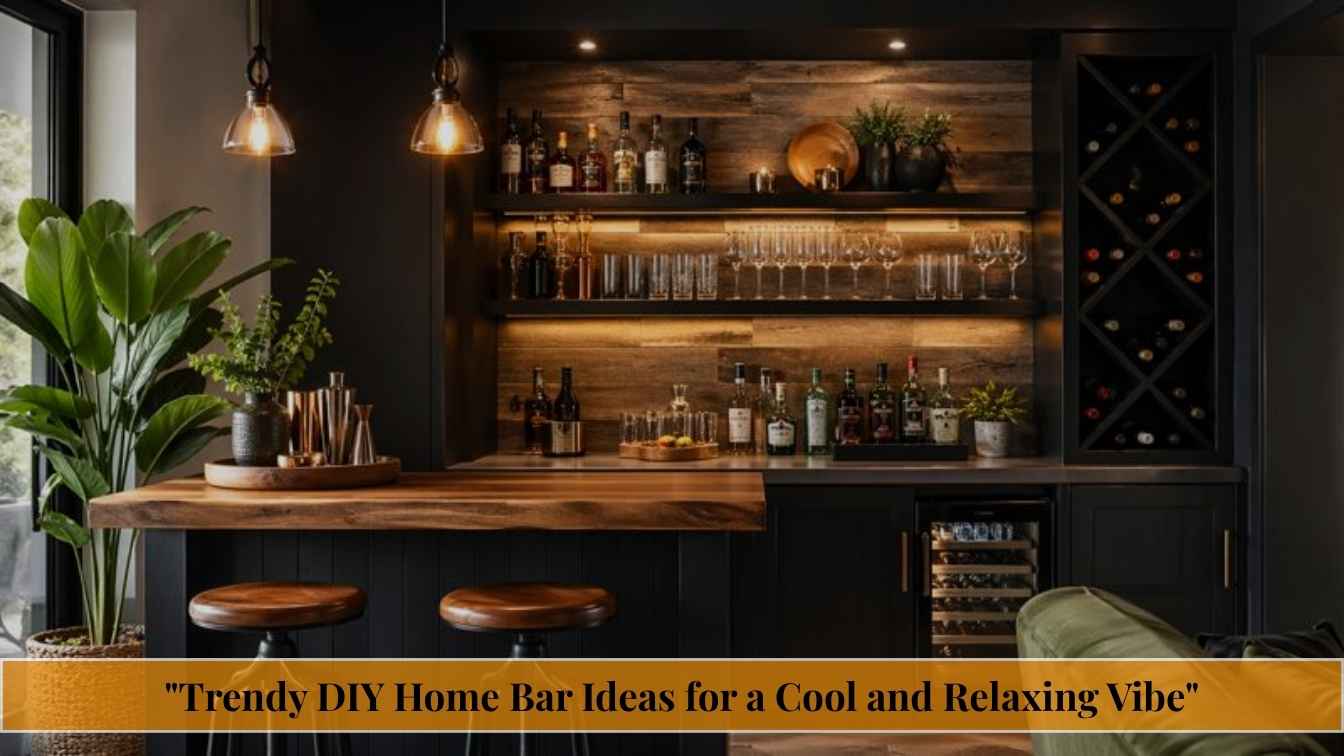
Trendy DIY Home Bar Ideas for a Cool and Relaxing Vibe
You’ve been hosting dinner parties on a folding table with a mismatched wine rack in the corner. You scroll through beautifully curated home bars online gleaming shelves, pendant lighting, custom cabinetry and assume it’s out of reach. It’s not. Most of those stunning setups were built on weekends, with IKEA hacks, reclaimed wood, and a decent drill.
A home bar isn’t just a luxury. It’s the piece of your home that tells guests: we take entertaining seriously here. And the beauty of going DIY is that you get exactly the bar you want the right size, the right style, the right vibe instead of whatever’s in stock at a furniture store.
This guide covers 11 genuinely actionable DIY home bar ideas, from repurposed furniture builds to built-in statement bars, suitable for every budget and space size. Whether you’re working with a dedicated room, an awkward corner, or a rented apartment, there’s a real solution here for you.
What is a DIY home bar?
A DIY home bar is a custom-built or repurposed entertaining station designed for home use typically including storage for bottles, glassware, and bar tools built by the homeowner rather than purchased as a finished unit. Costs typically range from $50 (repurposed furniture) to $2,000+ (custom built-ins).
IKEA Hack Bar Cabinet
The IKEA hack is arguably the most popular entry point into DIY home bars and for good reason. The KALLAX, BESTA, and HEMNES lines offer solid foundations that, with the right modifications, look nothing like their flat-pack origins. The trick is in the finishing: swap hardware, add wood veneer panels to sides, install underlighting, and suddenly a $150 shelving unit becomes something people ask about.
The key modification most guides miss is adding a solid wood top. A butcher block slab from a lumber yard, cut to size and oiled with food-safe mineral oil, gives the whole unit a warmth and weight that elevates it entirely. Pair that with Edison-style bulbs above and matte black cabinet pulls, and you’re done.
Real-World Scenario
James, a renter in Chicago, built his KALLAX bar for $340 total including a live-edge walnut top he found on Facebook Marketplace for $60. His landlord never knew the difference. He took it with him when he moved.
click here👈
Estimated cost: $150–$450 | Skill level: Beginner | Time: 1 weekend
Must Read: DIY Laundry Room Ideas: Easy Makeovers for a Clean, Functional Space
Repurposed Dresser Bar
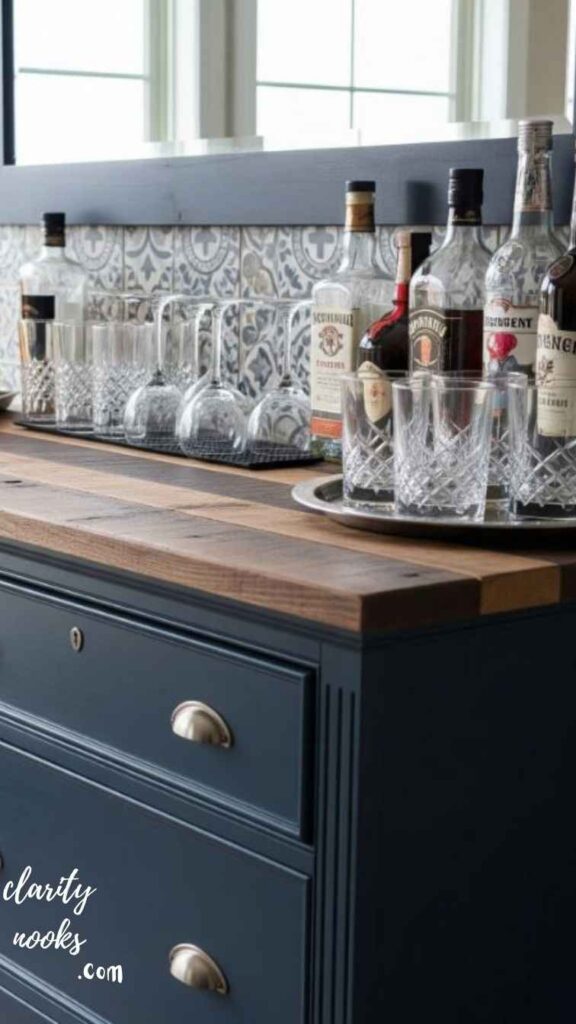
An old dresser is one of the most underrated bar conversions available. The structure is already there deep drawers become ice and tool storage, the top becomes your workspace, and the body provides more bottle storage than most purpose-built bar cabinets. Thrift stores and estate sales routinely yield solid wood dressers for $30–$80, the kind built in the 1970s with actual dovetail joinery.
The transformation process is straightforward: remove a drawer or two to create open bottle cubbies, refinish the exterior in a deep lacquer or chalk paint, line the inside with contact paper, and add a marble or butcher block top. Install a small LED strip along the back interior and your repurposed dresser becomes a serious conversation piece.
Real-World Scenario
A homeowner in Austin converted a $45 Goodwill dresser into a mezcal bar using navy chalk paint and brass pulls. Total investment: $140. A professional bar unit with similar storage capacity would have cost $800+.
click here 👈
Estimated cost: $45–$200 | Skill level: Beginner | Time: 1–2 days
Also Read: DIY Laundry Room Ideas: Easy Makeovers for a Clean, Functional Space
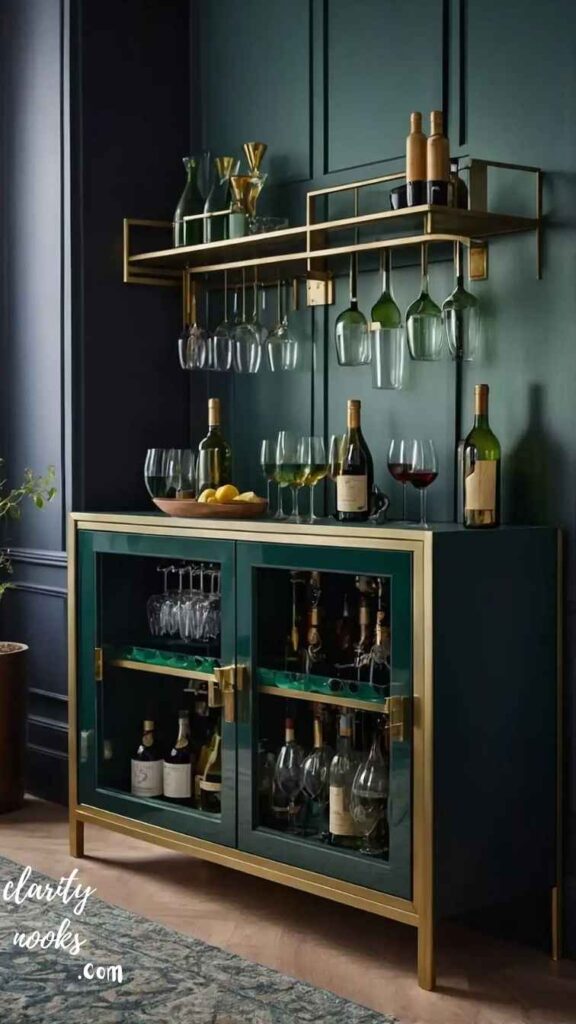
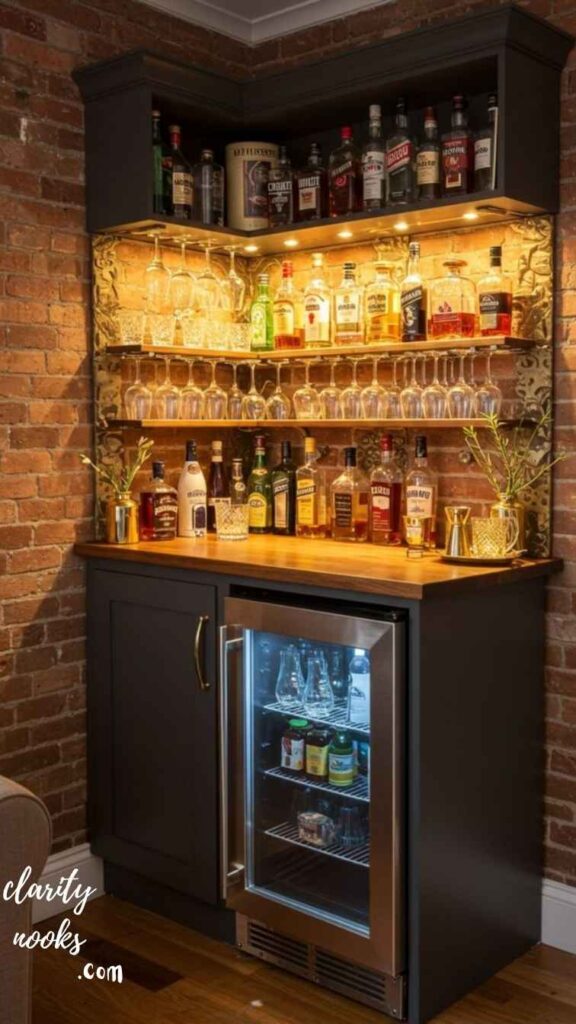
Floating Shelf Bar Wall
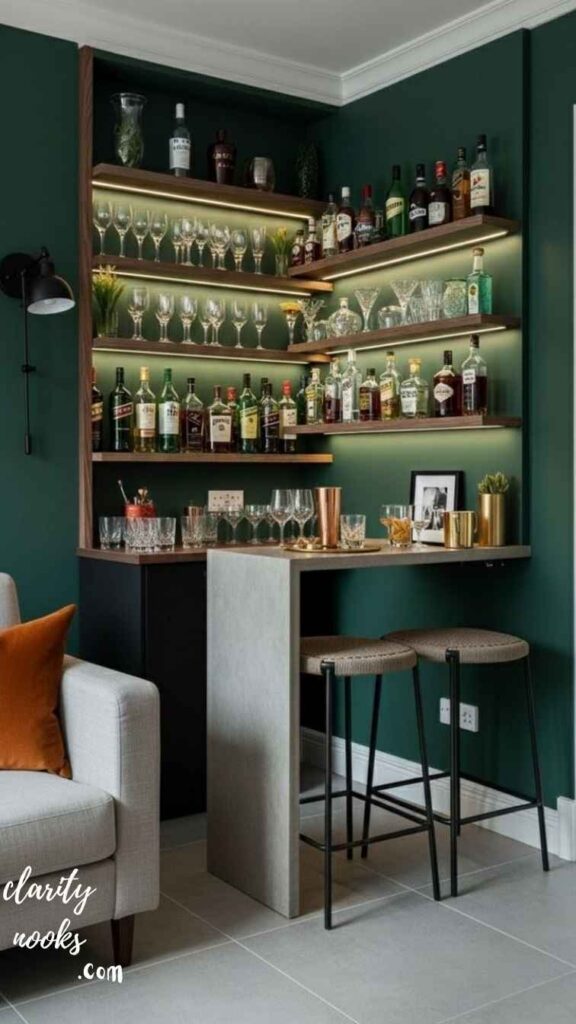
If floor space is tight, look up. A well-designed floating shelf arrangement can hold an entire bar’s worth of bottles, glassware, and accessories without occupying an inch of floor space. The magic is in the composition: stagger shelf heights, mix open display with closed storage below, and use the wall itself as a backdrop whether that’s exposed brick, a dark paint color, or reclaimed wood planking.
Floating shelves work especially well in apartments and small homes because they’re modular and reversible. Use heavy-duty invisible brackets rated for 50+ lbs per shelf don’t cut corners here. A fall-down moment with a shelf full of spirits is both dangerous and expensive. Space your shelves 12–14 inches apart for standard bottles, and place a small countertop or fold-down bracket at working height for mixing.
One detail most guides skip: mount a narrow towel bar or copper rail just below the lowest shelf to hang stemware. It frees up shelf space and adds a professional bar aesthetic at almost zero cost.
click here👈
Estimated cost: $80–$300 | Skill level: Beginner-Intermediate | Time: Half a day
Don’t Skip: DIY Dressing Table Ideas for a Cozy and Functional Bedroom Makeover
Closet Bar Conversion
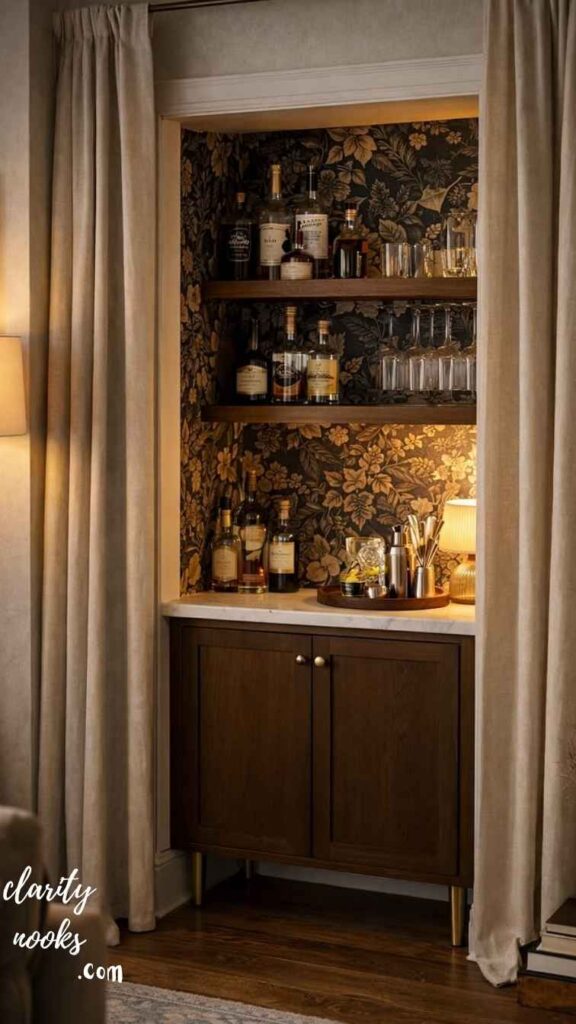
A hallway closet, a reach-in bedroom closet, or even a built-in cabinet niche almost any enclosed vertical space can be converted into a bar that completely closes off when not in use. This is the ideal solution for families with young children, for people who entertain occasionally but don’t want a permanent bar visible in their living room, or for renters who want something discreet.
The conversion process: remove the rod and standard shelving, install adjustable shelf pins or custom-cut shelves at varying heights to accommodate bottle sizes, paint the interior a dark, dramatic color (navy, forest green, or black all work beautifully), install interior lighting, and add a small countertop at the base. When the doors close, it disappears. When they open, it’s a full bar.
Real-World Scenario
A Brooklyn couple converted their unused coat closet into a gin bar with six floating shelves, interior LED strips, and a custom acrylic label system for their tonic collection. Their toddler walks past it every day without knowing what’s inside.
click here👈
Estimated cost: $100–$350 | Skill level: Intermediate | Time: 1–2 weekends
Read More: DIY Library Room Ideas: Modern, Aesthetic & Functional Home Library Designs
Reclaimed Wood Pallet Bar
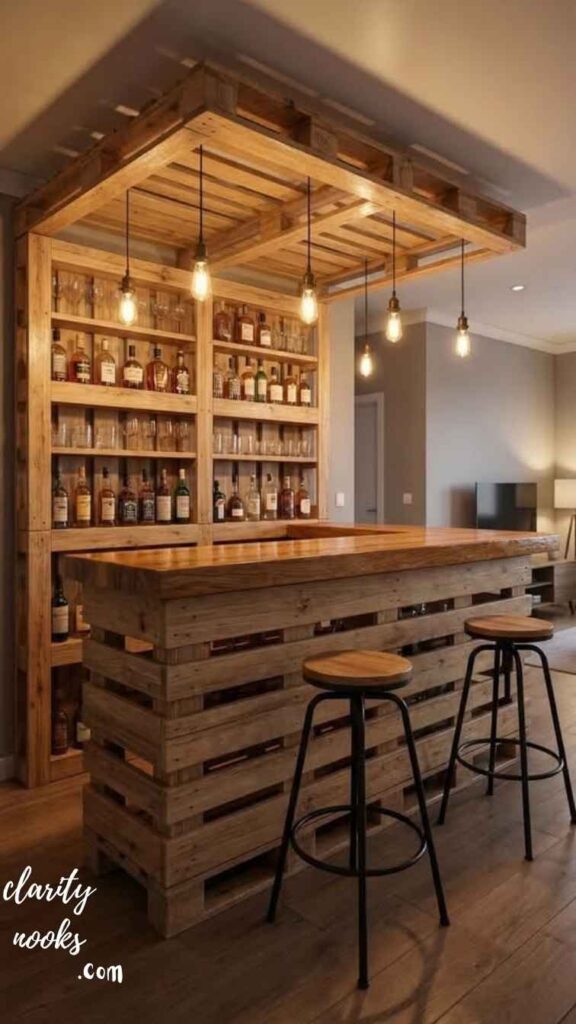
Pallet bars have a reputation for looking rough and if you grab whatever wooden pallets are sitting outside a warehouse and nail them together, they will look rough. The difference between a pallet bar that looks rustic-chic and one that looks like a construction site is preparation. Sand every surface, fill knots with wood filler, apply a conditioner before staining, and finish with a proper polyurethane topcoat for the bar counter.
The structural approach that works: build a frame from standard 2×4 lumber first, then apply pallet wood as the cladding on the outside faces. This gives you a sturdy, level structure that won’t wobble when guests lean against it, while the pallet wood provides all the texture and character you want on the exterior. Add a zinc sheet or rough-sawn hardwood as the top, and you have a backyard or basement bar that looks genuinely bespoke.
Sourcing tip: HEAT-treated pallets (marked HT) are safe for indoor use. MB-marked pallets have been chemically treated and should be avoided entirely.
click here👈
Estimated cost: $60–$250 | Skill level: Intermediate | Time: 2–3 weekends
Rolling Bar Cart Upgrade
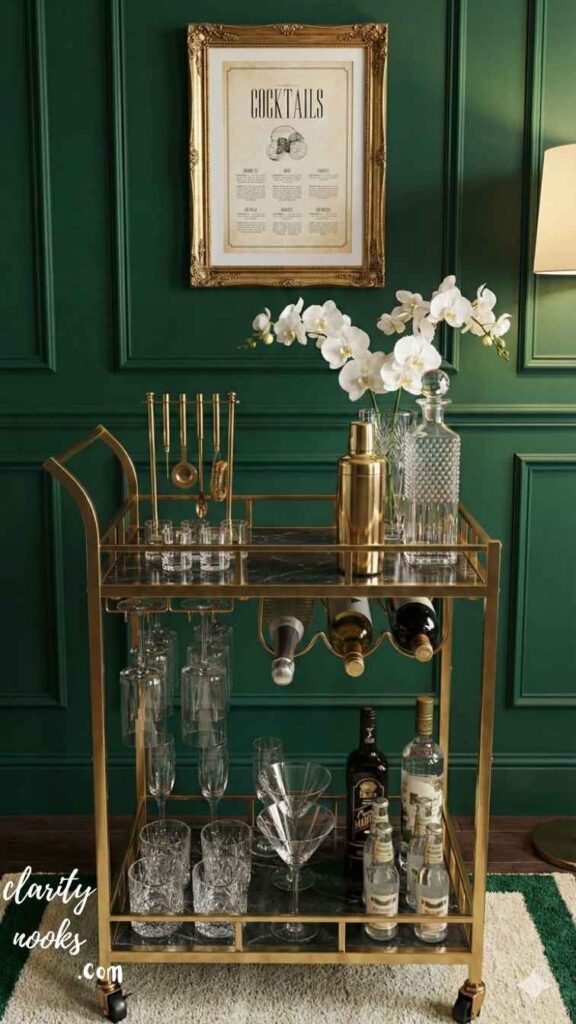
A standard bar cart becomes genuinely impressive when you treat it as a curated display rather than just storage. Most people dump everything onto a cart and call it done. The high-impact version involves intentional arrangement: bottles grouped by spirit type or color, glassware positioned at varying heights using small risers, a small plant or fresh herbs (mint, rosemary) for color, and a linen cocktail napkin draped over the handle.
If you already own a basic cart and want to elevate it without buying a new one, a can of matte black or gold spray paint transforms the frame entirely. Swap out the glass shelves for marble-contact-paper-lined wooden ones. Add a small mirrored tray to anchor the arrangement. For under $30, your existing cart becomes something people actively comment on.
Real-World Scenario
A Los Angeles interior stylist documented the transformation of a $39 IKEA RÅSKOG cart into a luxury-looking cocktail cart using spray paint, a marble tray, and intentional styling. The post was shared 47,000 times on Pinterest.
click here 👈
Estimated cost: $30–$200 | Skill level: Beginner | Time: 2–4 hours
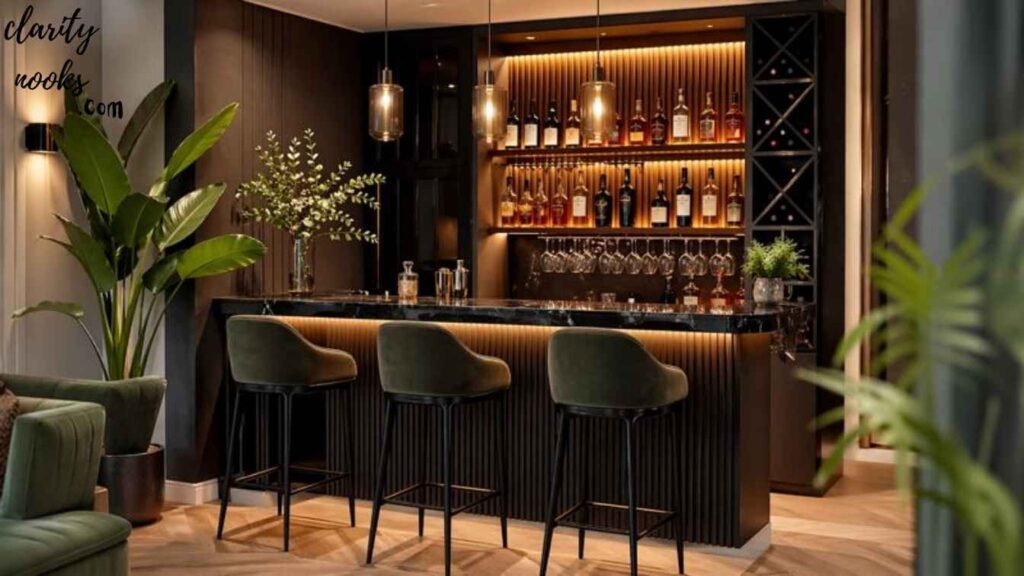
Basement Built-In Bar
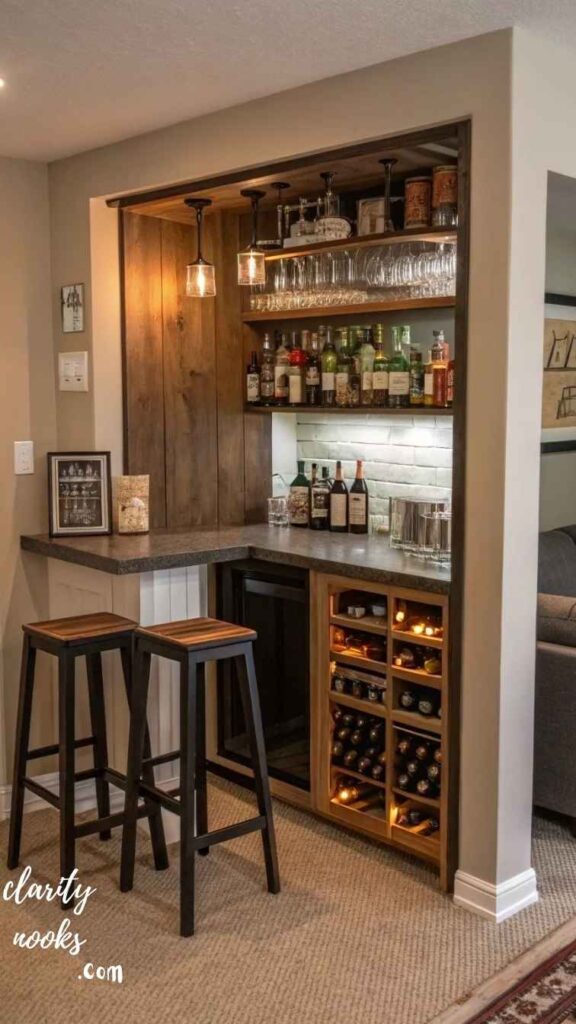
If you have a basement, you have the single best opportunity in your home for a full-scale DIY bar build. Basements offer the structural freedom exposed walls, concrete floors, low ceilings that actually suit a bar aesthetic. The key to a basement bar that doesn’t feel like a frat house is material quality and lighting. Use real wood or stone surfaces, invest in proper bar stools, and install layered lighting (overhead ambient, under-cabinet, and pendant task lighting).
A standard basement bar layout includes a bar counter with knee space, overhead cabinetry for glassware, a back bar display wall, and ideally a small refrigerator or kegerator built into the lower cabinetry. The plumbing addition of a bar sink is a weekend project for anyone comfortable with basic plumbing and it’s the single feature that shifts a basement bar from impressive to genuinely professional.
For a lower-commitment version, use freestanding units a butcher block island on casters as the bar, floating shelves on the wall behind, and a mini-fridge tucked underneath. This approach costs half as much and can be reconfigured later.
click here👈
Estimated cost: $400–$3,000 | Skill level: Intermediate-Advanced | Time: 2–8 weekends
Outdoor Pergola Bar
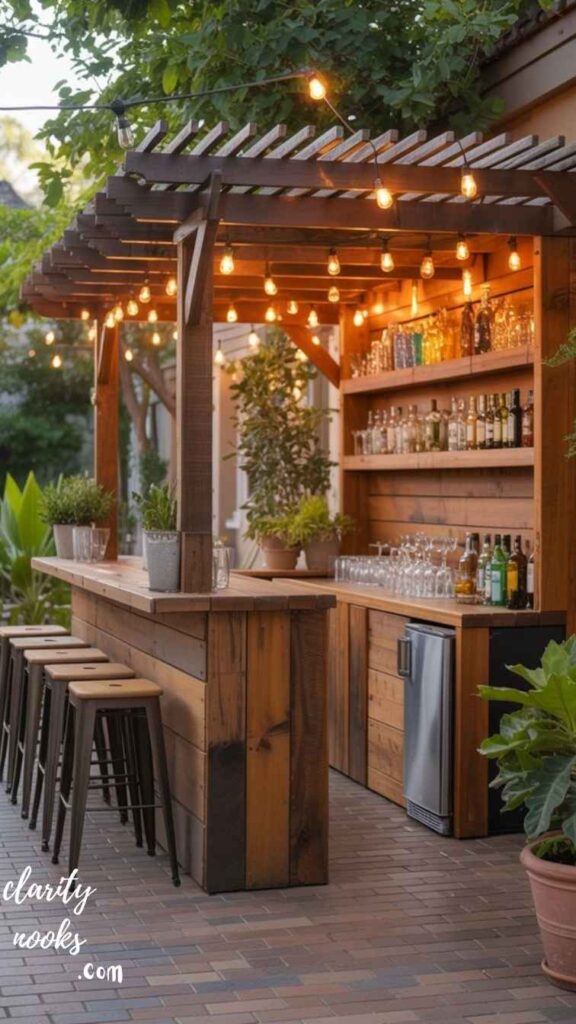
An outdoor bar transforms your backyard from a passive space into an active entertaining destination. The DIY version doesn’t require a full outdoor kitchen a well-built pergola bar with a concrete or tile top, weatherproof cabinetry, and a dedicated outdoor fridge is more than enough. Materials matter enormously here: use cedar, redwood, or pressure-treated lumber, and seal everything properly for your climate.
The layout detail that makes outdoor bars genuinely functional: face the bartender outward so the person making drinks can face their guests. Most DIY outdoor bars are built with the bartender facing the wall, which creates a disconnected, restaurant-kitchen feel. Reverse that, build the back wall at counter height, and put your bottles on display behind the serving counter.
Real-World Scenario
A homeowner in Phoenix built a pergola tiki bar using landscape timber, concrete countertops (poured in molds at home), and thatch roofing panels from a garden center. Total cost was $780. A contractor quoted the same project at $6,400.
click here👈
Estimated cost: $300–$1,500 | Skill level: Intermediate-Advanced | Time: 2–4 weekends
Speakeasy-Style Hidden Bar
A hidden or concealed bar is the ultimate conversation piece in any home. The concept is straightforward: the bar looks like something else a bookcase that swings open, a chalkboard that flips down, a map on hinges until it doesn’t. The execution requires planning, but not expert carpentry. A standard bookcase with a piano hinge and a magnetic latch is well within beginner DIY capability.
The bookcase version is the most popular: mount a standard bookcase on a piano hinge attached to a sturdy wall frame. Leave a few real books on the shelves for authenticity. A magnetic touch latch keeps it closed. Behind it, build a narrow bar alcove with a drop-down counter, back-lit bottle display, and compact storage. The reveal moment for first-time guests is reliably spectacular.
For a simpler version, a framed chalkboard menu mounted on piano hinges over a wall niche works beautifully and can be built in a single afternoon with about $120 in materials.
click here👈
Estimated cost: $200–$800 | Skill level: Intermediate | Time: 1–3 weekends
Kitchen Island Bar Extension
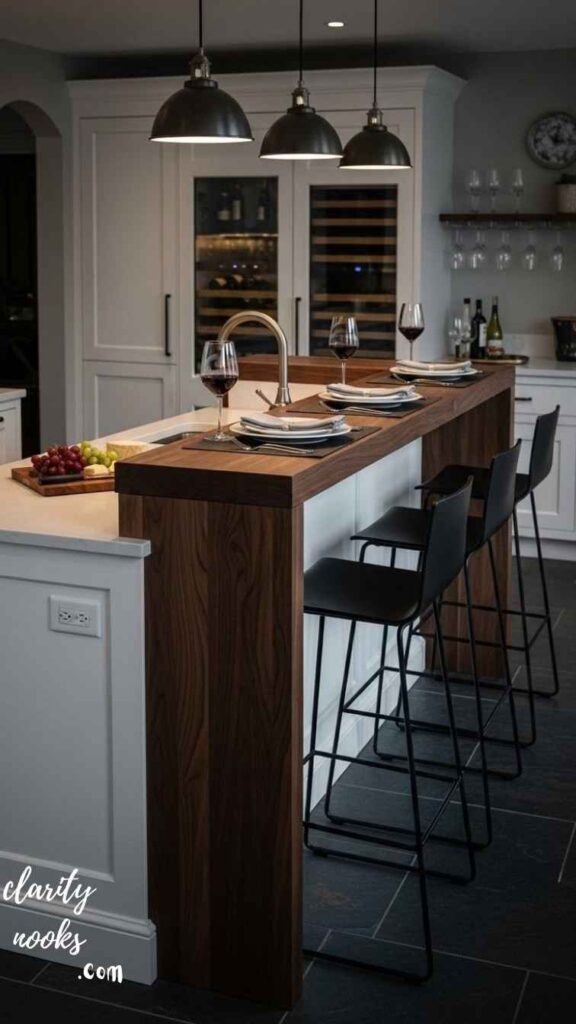
If your kitchen island is underutilized, extending or converting one end of it into a dedicated bar station is one of the highest-value DIY projects you can do. It requires no new footprint, integrates naturally with your existing entertaining flow, and keeps the bar area immediately adjacent to where food prep happens which is exactly how parties actually work.
The conversion typically involves adding a wine rack to one end of the island base, mounting an overhead glass rack or pendant lighting above that end, and designating that corner as the drink-making station with its own cutting board, jigger, and tool drawer. If your island has a seating overhang, that becomes the bar seating area automatically. No construction required just intentional organization and a few targeted accessories.
For homes with kitchen islands that don’t extend to seating height, adding a purpose-built bar-height extension on one end essentially a small wooden box with a butcher block top is a weekend project that completely changes how the kitchen feels.
click here👈
Estimated cost: $50–$600 | Skill level: Beginner-Intermediate | Time: Half a day to 1 weekend
Cocktail Nook
Under-Stair Bar
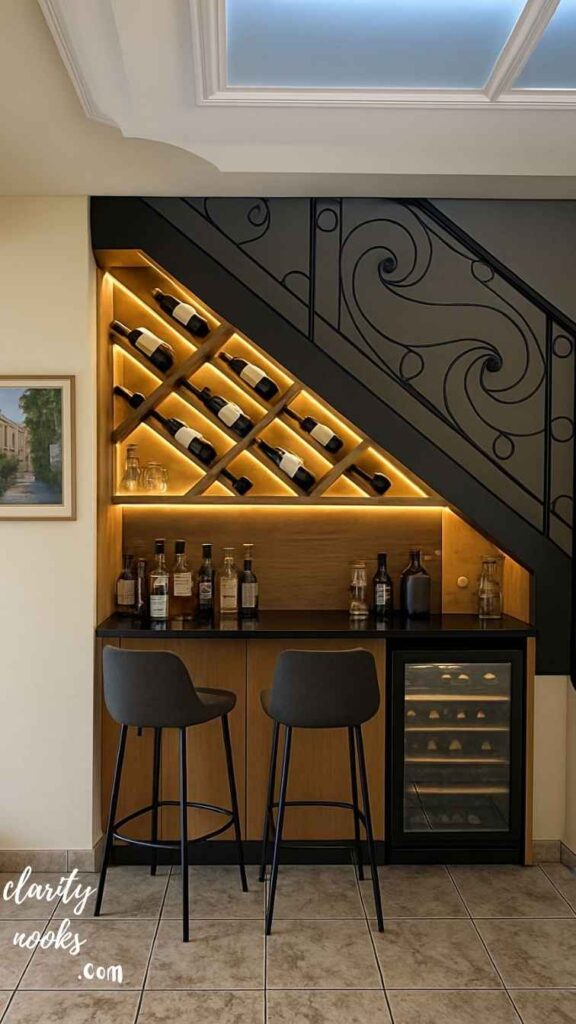
The space under a staircase is one of the most wasted volumes in most homes. It’s typically used for awkward shoe storage or forgotten clutter. But with proper planning, the triangular space beneath a stair run can become a genuinely spectacular bar nook complete with a counter, overhead display, lighting, and seating for two. The irregular geometry makes it look intentional and custom-designed.
The practical approach: install a narrow countertop along the tallest wall of the space, mount shelves that follow the stair angle above, use the lower triangular sections for wine bottle storage or mini-fridge placement, and frame the entrance with trim or an arched opening. String lighting or LED strips under each stair tread (viewed from inside the nook) creates an effect that’s genuinely striking and costs about $40.
Real-World ScenarioA family in Edinburgh converted the under-stair space that previously held broken vacuum cleaners and odd shoes into a gin bar with arched entrance, mirrored back wall, and reclaimed whisky barrel seating. The project was completed over four weekends and cost £380.
click here👈
Estimated cost: $150–$900 | Skill level: Intermediate | Time: 2–4 weekends
Conclusion
DIY Home Bar Ideas can easily turn any corner of your home into a fun and stylish space. You do not need a big budget or fancy tools. Simple materials, smart storage, and creative design choices can make a big difference. These ideas help you build a cozy spot where you can relax or entertain guests with ease. The best part is that you can customize everything based on your taste and space. Small or large, every home can enjoy a personal bar area that feels warm and inviting.
In the end, DIY Home Bar Ideas are all about creativity and comfort. You can reuse old furniture, add lighting, and include shelves for a modern look. Each idea gives you a chance to express your style while saving money. With a little effort, you can create a space that feels like a mini lounge at home. It makes gatherings more enjoyable and adds charm to your living space. Start small, think smart, and enjoy building your perfect home bar.
Trend Analysis
Where DIY Home Bar Design Is Heading
Home bar design has shifted meaningfully in the last two years, and understanding the direction helps you build something that stays relevant rather than dating instantly. The overriding trend is a move away from the “man cave” aesthetic dark wood, sports memorabilia, neon signs toward bars that integrate seamlessly with the rest of the home’s design language.
Consumers increasingly want bars that are part of the living room or kitchen, not exiled to basements. They’re choosing natural materials, curated collections over large quantities, and non-alcoholic or low-ABV options displayed proudly alongside spirits. This changes everything from how bars are styled to how they’re sized.
Sober-Curious Inclusive Bars
Non-alcoholic spirits, functional beverages, and adaptogen elixirs are now displayed prominently alongside traditional spirits requiring new storage and display thinking.
Japandi Bar Aesthetic
The minimalist Japanese-Scandinavian fusion aesthetic is replacing dark-wood maximalism. Clean lines, natural materials, muted colors, intentional negative space.
Built-In Integration
Bars are moving from standalone furniture to fully integrated architectural elements built into walls, under stairs, within cabinetry systems becoming permanent home features.
Smart Bar Technology
Smart LED systems, digital cocktail recipe displays, app-controlled lighting scenes, and even AI-assisted cocktail suggestion tools are entering the home bar space rapidly.
Ritual-Centered Design
Bars designed around specific drink rituals Japanese whisky prep, Italian aperitivo, artisan coffee cocktails with dedicated tools and staging rather than general-purpose setups.
Sustainability in Materials
Reclaimed wood, recycled glass countertops, and repurposed vintage furniture are moving from budget-conscious choices to design-forward ones with intentional provenance stories.
Looking ahead to 2027–2028, expect modular bar systems (plug-and-play components that reconfigure like furniture) to become widely available, and AI-powered home bars that track inventory, suggest recipes based on what you have, and even reorder supplies automatically to become mainstream consumer products rather than novelties.
Expert Insights
Practical Tips Most Guides Don’t Tell You
These aren’t obvious. They come from the difference between a bar that looks right in photos and one that actually works in daily use.
- Counter height is non-negotiable. Standard bar height is 42–43 inches. Kitchen counter height is 36 inches. Get it wrong and every interaction at your bar feels awkward. Measure before you build anything.
- Lighting does more work than materials. A mid-range bar with excellent lighting looks better than a premium bar with overhead fluorescents. Invest in dimmable warm bulbs, under-shelf strips, and at least one pendant. Budget $80–$150 for lighting alone.
- The ice question is always underestimated. Where is your ice coming from? A portable countertop ice maker ($80–$150) is the single highest-impact functional addition to any home bar, and most DIY guides never mention it.
- Design your drainage early. If there’s any chance you’ll add a sink later, rough in the drain now even if you don’t finish the plumbing. Retrofitting drainage through finished cabinetry and flooring is far more expensive and disruptive than planning for it from the start.
- Glassware storage is always underplanned. You need more space than you think. A set of 8 highballs, 8 rocks glasses, 8 wine glasses, 6 coupes, and 6 champagne flutes takes up serious real estate. Map it out before you cut any shelves.
- Ventilation matters for enclosed bars. Spirits evaporate and the vapors accumulate. In a closet or under-stair bar, add a small passive vent or leave intentional gaps in cabinetry. This matters for air quality and prevents a permanent alcohol smell from permeating adjacent rooms.
- Seal your countertop obsessively. Whether it’s wood, concrete, stone, or laminate seal it, let it cure completely, and seal it again. A bar counter takes more abuse than any other horizontal surface in your home.
Long-Term Strategy
Building a Bar That Scales with Your Life
The most common mistake in DIY home bar projects is building something perfectly suited to your life right now without considering where your life is going. A built-in basement bar is fantastic when you’re 34 with no kids. Five years later, that same bar might need to become a homework space or playroom. Conversely, a bar cart you buy at 28 might feel embarrassingly insufficient by 35 when you’re hosting serious dinner parties.
The long-term strategy is to think in phases. Start with the simplest version that serves your current needs a floating shelf wall or repurposed dresser and document exactly what doesn’t work about it. Those pain points tell you exactly what to build or invest in next. Most great permanent home bars were designed by people who’d spent years using imperfect temporary ones.
If you’re a homeowner thinking about resale value: a well-designed, well-built bar space does add appeal, particularly in markets where buyers are in the 30–50 age demographic. However, a bar that’s too themed, too large, or built over existing storage space can actually subtract from perceived value. Modular, reversible builds protect you either way. Built-in bars should be finished to the same quality standard as the rest of your kitchen cabinetry to benefit resale.
Future Predictions & Innovations
What’s Coming to the Home Bar Space
The next wave of home bar innovation is being driven by two forces: smart home integration and the premiumization of at-home cocktail culture. Automated cocktail machines (like the Bartesian or Drinkworks models, but more sophisticated) are improving rapidly and will likely become as common as espresso machines within the next few years. Designing a bar with a power outlet, water line access, and a dedicated display spot for one of these devices is forward-thinking design.
AI is also entering the home bar in practical ways. Apps that photograph your bar shelf, identify every bottle, and suggest cocktail recipes based on what you actually have are already available and improving quickly. The next generation will integrate with grocery delivery services, track consumption patterns, and proactively suggest restocking. Your home bar will effectively have its own AI bar manager.
On the materials side, expect to see more bio-based countertop options (mushroom composites, compressed seagrass panels), ultra-thin porcelain slabs that mimic stone at a fraction of the cost and weight, and self-healing surface coatings that resist the ring stains and scratches that plague bar counters. For DIY builders, these materials will open up options that currently require professional installation.
Common Mistakes & Hidden Gaps
What Goes Wrong Even for Experienced DIYers
These are the mistakes that don’t appear in most guides because they require having actually built and used a home bar to discover them.
❌ Mistake
Building shelves 10–11 inches deep for bottles, then realizing standard 750ml bottles are 11.5–12 inches tall and won’t fit vertically.
✓ The Fix
Build shelves 13 inches deep minimum. Measure your actual bottle collection it varies enormously by spirit type and brand.
❌ Mistake
Installing the bar in a location with no natural traffic flow, so guests never actually use it and the host is constantly shuttling between bar and party.
✓ The Fix
Map your actual party traffic patterns before committing to a location. The bar should be on the path between entry and living area, not hidden in a corner.
❌ Mistake
Using indoor-only materials on an outdoor or semi-outdoor bar (covered patio, screened porch), causing warping, mold, or deterioration within one season.
✓ The Fix
Any bar exposed to humidity or temperature swings needs exterior-rated materials and finishes, even if it’s covered. Always check moisture ratings before buying.
❌ Mistake
Intermediate DIYers who get the structure right but skip proper cabinet alignment and leveling resulting in doors that swing open or won’t close properly.
✓ The Fix
Use a proper spirit level at every stage of installation. Adjustable concealed hinges (blum or similar) allow micro-adjustments after installation without disassembly.
FAQ’s About DIY Home Bar Ideas
How much does it cost to build a DIY home bar?
DIY home bars range from $50 (repurposed furniture with paint and hardware) to $3,000+ (full built-in basement bar with sink and cabinetry). Most functional and attractive builds land in the $150–$700 range, with the biggest variable being whether you’re using new or repurposed materials.
Do I need a permit to build a home bar?
Furniture-based bars (carts, dressers, floating shelves) require no permits. Permanent built-ins typically don’t either, unless they involve plumbing (adding a sink), electrical work (adding circuits), or structural changes. When in doubt, check with your local building department the cost of a quick call is far less than the cost of unpermitted work discovered at resale.
What is the best wood for a DIY bar counter?
Hard maple, white oak, and teak are the top choices for bar counters all are dense, durable, and handle moisture well when properly sealed. Butcher block (end-grain or face-grain) is the most popular DIY option because it’s pre-finished and widely available. Avoid softwoods like pine for bar tops they dent and scratch too easily for daily use.
What is the standard height for a home bar?
The standard home bar counter height is 42–43 inches, which pairs with 28–30 inch bar stools. Kitchen counter height (36 inches) is too low for standing bar service. If you’re building a bar with both standing service and seated guests, a raised counter for service at 42″ with a lower seating ledge at 36″ is the ideal configuration.
Can I build a home bar in a rented apartment?
Yes the best renter-friendly approaches are freestanding units (bar carts, repurposed dressers, IKEA hacks), floating shelves mounted with heavy-duty picture-rail systems that don’t require drilling, and closet conversions that are fully reversible. Avoid permanent countertop cuts, built-in plumbing, or any modifications that leave marks beyond standard wall anchors.

Rameen Zara is the founder of Clarity Nooks, bringing over five years of experience in home décor and interior styling. She shares simple yet practical design ideas that suit real homes and everyday living. Her approach focuses on cozy aesthetics, soft color palettes, and natural textures that create warm, inviting spaces.


